If you have ever wished for a bread that brings the warm, comforting aroma of fresh herbs and garlic right into your kitchen without a ton of effort, then you are going to fall head over heels for this Rustic No Knead Rosemary Garlic Bread Recipe. It perfectly balances simplicity and flavor, allowing you to enjoy a crusty, golden-brown loaf that is infused with fragrant rosemary and garlic, all while requiring minimal hands-on preparation. This bread is the perfect go-to for any time you want to elevate a meal or snack with a little homemade magic.
Ingredients You’ll Need
The charm of this recipe lies in its straightforward, everyday ingredients—no fancy or hard-to-find items here. Each ingredient plays a crucial role in creating the perfect texture, taste, and aroma that make this rustic bread so irresistible.
- 3 cups all-purpose flour: Forms the sturdy yet tender base of the bread, giving it structure and chew.
- 3 cloves garlic, minced: Adds bold, savory punch and depth that infuses every bite.
- 1 tablespoon finely chopped fresh rosemary: Offers a fresh, piney fragrance and a lovely herbal note that makes this bread special.
- 1 ¼ teaspoons kosher salt: Enhances flavor and balances the bread’s natural sweetness.
- ¾ teaspoon freshly ground black pepper: Brings gentle heat and complexity to complement the rosemary and garlic.
- ½ teaspoon instant yeast: The tiny powerhouse that helps the dough rise without any kneading drama.
- 1 ½ cups water, at room temperature: Hydrates the dough, ensuring it becomes soft and beautifully sticky.
- 2 tablespoons cornmeal: Adds a subtle crunch and prevents sticking during baking.
How to Make Rustic No Knead Rosemary Garlic Bread Recipe
Step 1: Mix the Dry Ingredients
Begin by combining all the dry ingredients—flour, minced garlic, rosemary, kosher salt, black pepper, and instant yeast—in a large bowl. This mixture guarantees that the wonderful flavors get evenly distributed throughout the dough.
Step 2: Add Water and Stir
Pour in the room-temperature water and quickly stir with a wooden spoon or your hand until you have a wet, sticky dough. It should come together in about 30 seconds, no kneading required! The wetness is key to achieving the bread’s open crumb and rustic texture.
Step 3: Let the Dough Rest
Cover the bowl tightly with plastic wrap and leave it to rest at room temperature for 18 to 24 hours. You’ll know the dough is ready when bubbles dot the surface, signaling that the yeast has worked its magic and a robust flavor has developed.
Step 4: Prepare the Baking Vessel
Lightly oil a 10-inch cast iron skillet or coat it with nonstick spray, then sprinkle the bottom with cornmeal. This layer prevents the dough from sticking and adds a delightfully crispy bottom crust.
Step 5: Shape the Dough
Turn the dough out onto a lightly floured surface and gently form it into a round. Be careful not to deflate it too much—you want to maintain as many air pockets as possible. Transfer the shaped dough into the prepared skillet.
Step 6: Second Rise
Cover the dough with a clean dishtowel and let it gently rise again at room temperature for about 2 hours. The dough should double in size and feel soft but not spring back immediately when poked, which indicates it’s perfectly proofed.
Step 7: Bake to Golden Perfection
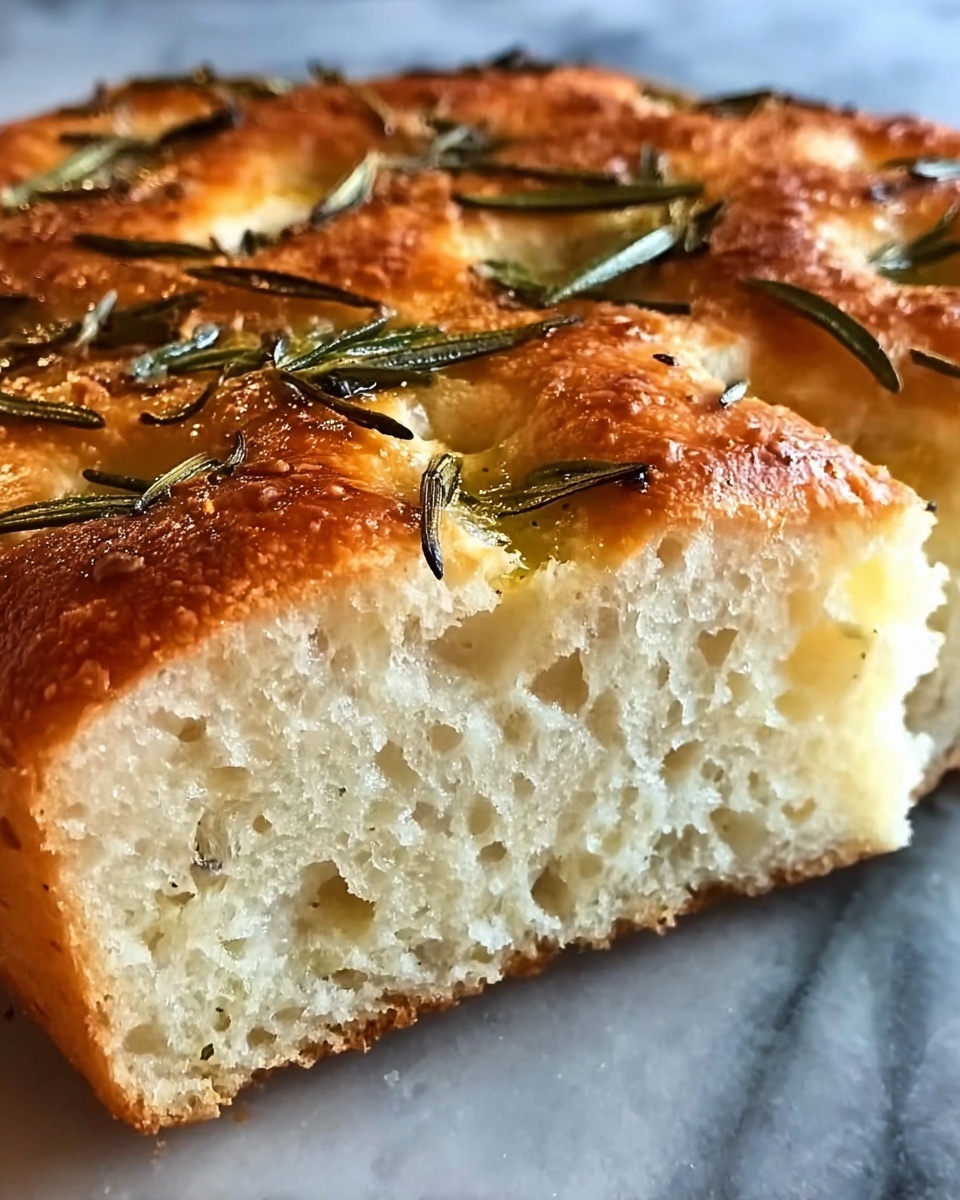
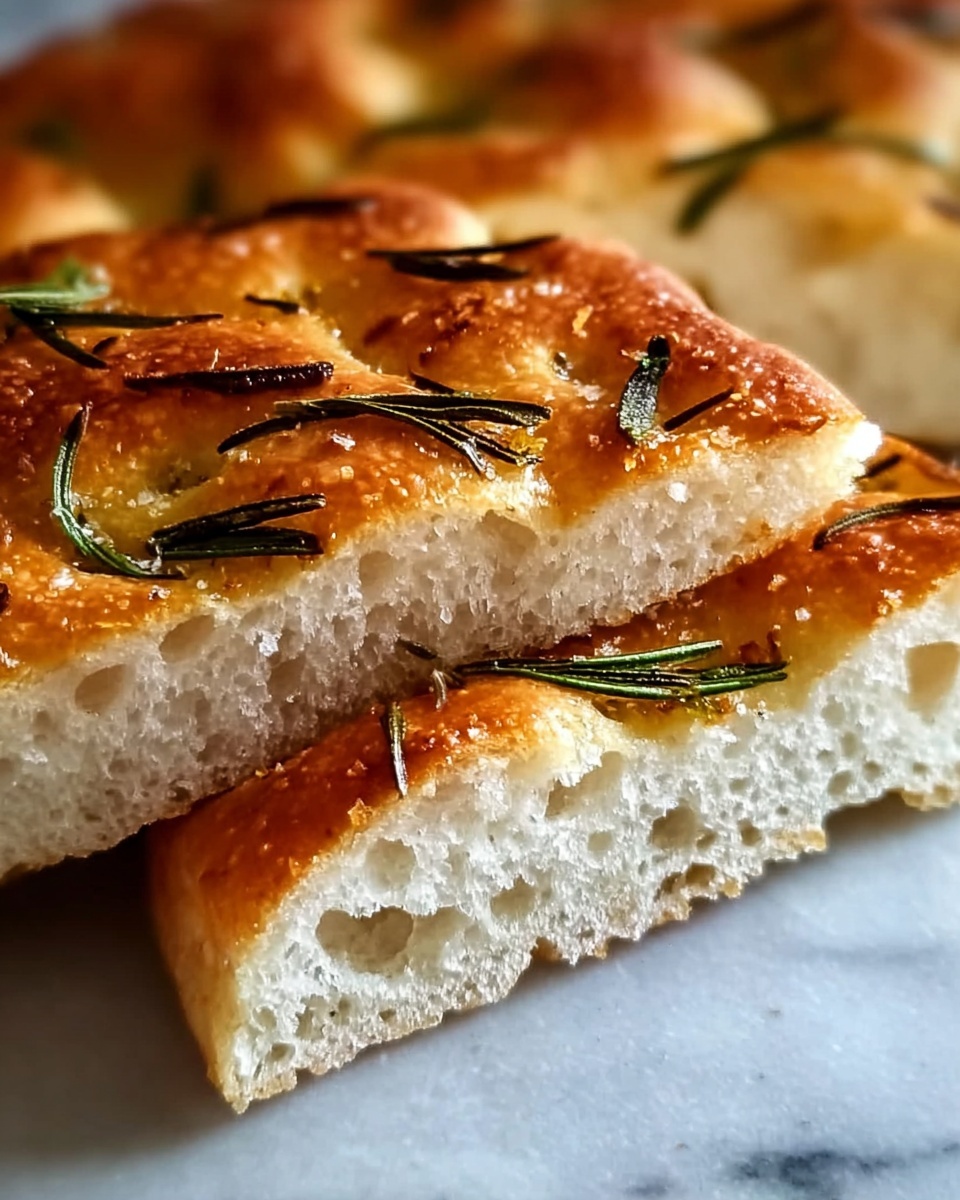
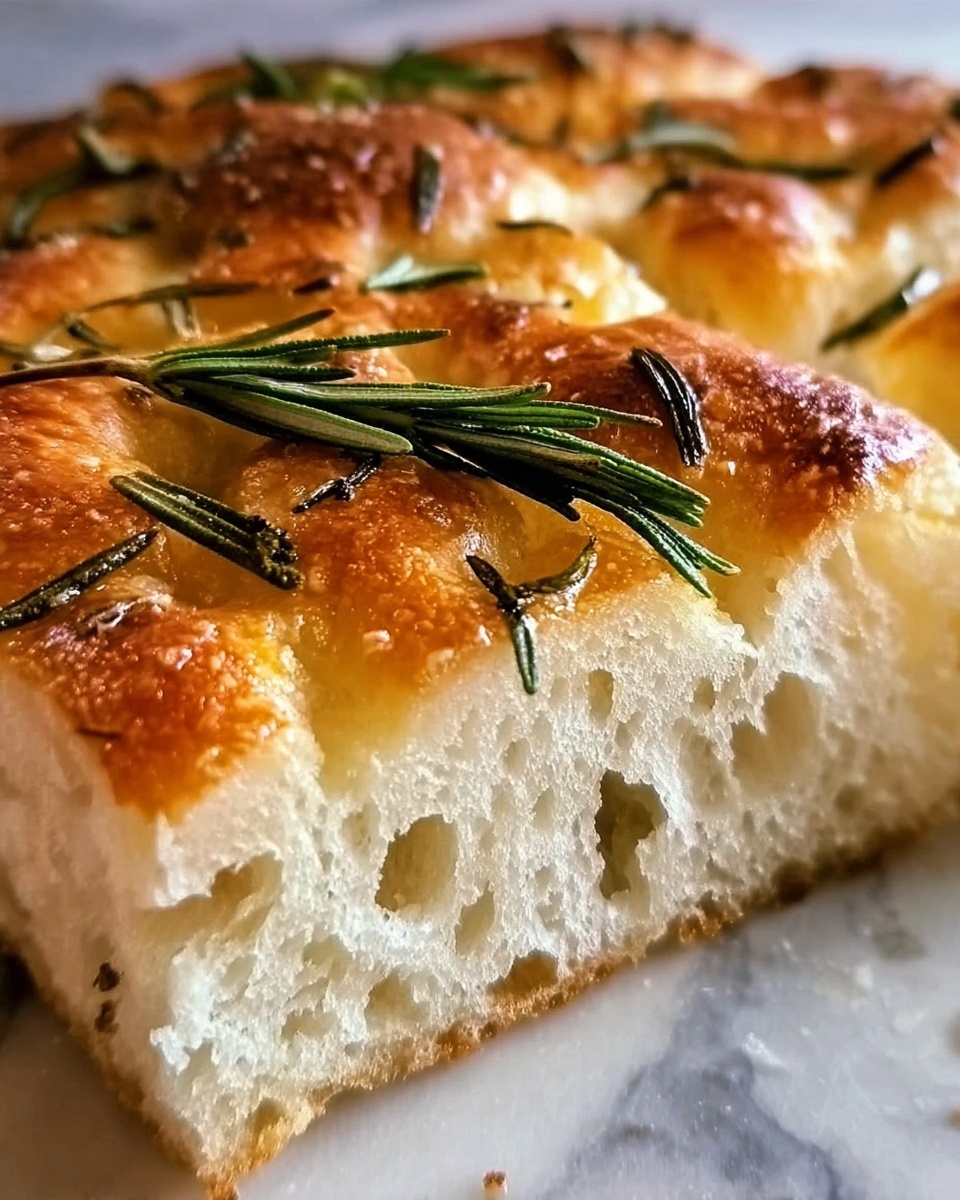
Preheat your oven to 450°F (230°C). Place the skillet right into the oven and bake the bread for 30 to 40 minutes until it’s a deep golden brown with a crisp crust. When it’s done, you’ll have a loaf that is as stunning to look at as it is delicious to eat!
How to Serve Rustic No Knead Rosemary Garlic Bread Recipe
Garnishes
A sprinkle of flaky sea salt or a drizzle of good-quality olive oil right after baking takes the bread to the next level. You might also add a little more fresh rosemary on top for a burst of green and extra aroma that welcomes everyone to the table.
Side Dishes
This bread pairs beautifully with soups, stews, or even a fresh salad. Its hearty texture holds up well when dunked into tomato soup or alongside a bowl of creamy mushroom stew. It’s also fantastic simply smeared with softened butter or creamy whipped ricotta for a quick snack.
Creative Ways to Present
Think outside the loaf by slicing this bread into thick slabs for open-faced sandwiches or bruschetta. You can toast the slices lightly and top with roasted vegetables or a smear of tapenade. Its rustic look and complex flavors make it a stunning addition to any cheese or charcuterie board.
Make Ahead and Storage
Storing Leftovers
Wrap leftover bread tightly in plastic wrap or place in an airtight container to keep it fresh at room temperature for up to two days. The crust might soften slightly, but the flavor will remain vibrant.
Freezing
If you want to enjoy this Rustic No Knead Rosemary Garlic Bread Recipe later, slice it first and then freeze. Wrap slices individually or in small batches in plastic wrap and place in a freezer bag so you can grab just what you need without thawing the whole loaf.
Reheating
To bring back the fresh-from-the-oven texture, warm leftover slices in a toaster or oven set around 350°F until crisp. If you froze the bread, let it thaw at room temperature first for best results before reheating.
FAQs
Can I use dried rosemary instead of fresh?
Absolutely! While fresh rosemary offers a more vibrant flavor, dried rosemary works well too—just use about a third of the amount specified for fresh to avoid overpowering the bread.
Do I really not need to knead the dough?
One of the best things about this recipe is that you don’t! The long fermentation time lets the gluten develop and creates a perfect texture without any kneading effort.
What type of flour works best?
All-purpose flour is ideal here for its balance of protein and versatility. You can also try bread flour for a chewier texture, but stick to all-purpose if you want the recipe to work just as described.
Is a cast iron skillet essential for baking?
While a cast iron skillet gives the best crust due to its heat retention, you can bake this bread on a baking sheet lined with parchment if needed. Just be sure to sprinkle cornmeal or flour to prevent sticking.
Can I add other herbs or ingredients?
Definitely! This recipe is a wonderful base for customization. Consider adding thyme, oregano, or even sun-dried tomatoes for a delicious twist on the Rustic No Knead Rosemary Garlic Bread Recipe.
Final Thoughts
This Rustic No Knead Rosemary Garlic Bread Recipe is a game-changer for anyone who loves homemade bread but wants to keep things simple and stress-free. With just a handful of ingredients and some patience, you’ll be rewarded with an aromatic, crusty loaf that tastes like it took hours of expert baking skill. I wholeheartedly recommend giving this recipe a try—you might just find your new favorite bread to share with family and friends.
Print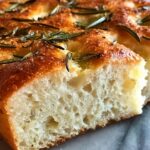
Rustic No Knead Rosemary Garlic Bread Recipe
- Prep Time: 10 minutes
- Cook Time: 35 minutes
- Total Time: 20 hours 45 minutes
- Yield: 8 servings
- Category: Bread
- Method: Baking
- Cuisine: American
- Diet: Vegetarian
Description
This Rustic No Knead Rosemary Garlic Bread is a simple yet flavorful homemade bread featuring fragrant fresh rosemary and garlic. With minimal hands-on time and no kneading required, this recipe allows the dough to slowly develop flavor and texture overnight. The bread is baked directly in a cast iron skillet for a perfectly crusty exterior and soft, airy interior, making it an ideal accompaniment for meals or a delicious snack.
Ingredients
Dry Ingredients
- 3 cups all-purpose flour
- 1 tablespoon finely chopped fresh rosemary (or more, to taste)
- 1 ¼ teaspoons kosher salt
- ¾ teaspoon freshly ground black pepper
- ½ teaspoon instant yeast
Wet Ingredients
- 3 cloves garlic, minced
- 1 ½ cups water, at room temperature
For Baking
- 2 tablespoons cornmeal
- Light oil or nonstick spray for skillet
Instructions
- Mix Dry Ingredients. In a large bowl, combine the all-purpose flour, minced garlic, chopped fresh rosemary, kosher salt, freshly ground black pepper, and instant yeast thoroughly.
- Add Water and Combine. Using a wooden spoon or your hand, pour in the room temperature water and mix until a wet, sticky dough forms, about 30 seconds. The dough should be shaggy and sticky.
- First Rise. Cover the bowl tightly with plastic wrap and leave it at room temperature. Allow the dough to rest and ferment until the surface is dotted with bubbles, about 18 to 24 hours, which develops flavor and texture.
- Prepare Skillet. Lightly oil a 10-inch cast iron skillet or coat it with nonstick spray. Sprinkle the bottom with 2 tablespoons of cornmeal to prevent sticking and add texture to the crust.
- Shape Dough. On a lightly floured surface, gently shape the dough into a round ball without deflating it. Place the shaped dough into the prepared skillet.
- Second Rise. Cover the skillet with a clean dishtowel and let the dough rest at room temperature until it doubles in size and does not spring back when poked, approximately 2 hours.
- Bake the Bread. Preheat the oven to 450°F (230°C). Place the skillet with the dough directly in the preheated oven and bake for 30 to 40 minutes until the bread develops a golden brown crust and sounds hollow when tapped.
Notes
- The long fermentation time enhances the bread’s flavor and texture; do not rush this step.
- Use instant yeast for best results as it does not require proofing.
- A cast iron skillet helps develop a crusty bottom and sides; if unavailable, use an oven-safe heavy baking dish.
- The cornmeal adds texture and prevents sticking, but it is optional.
- Let the bread cool on a rack before slicing to retain crumb structure.


