“`html
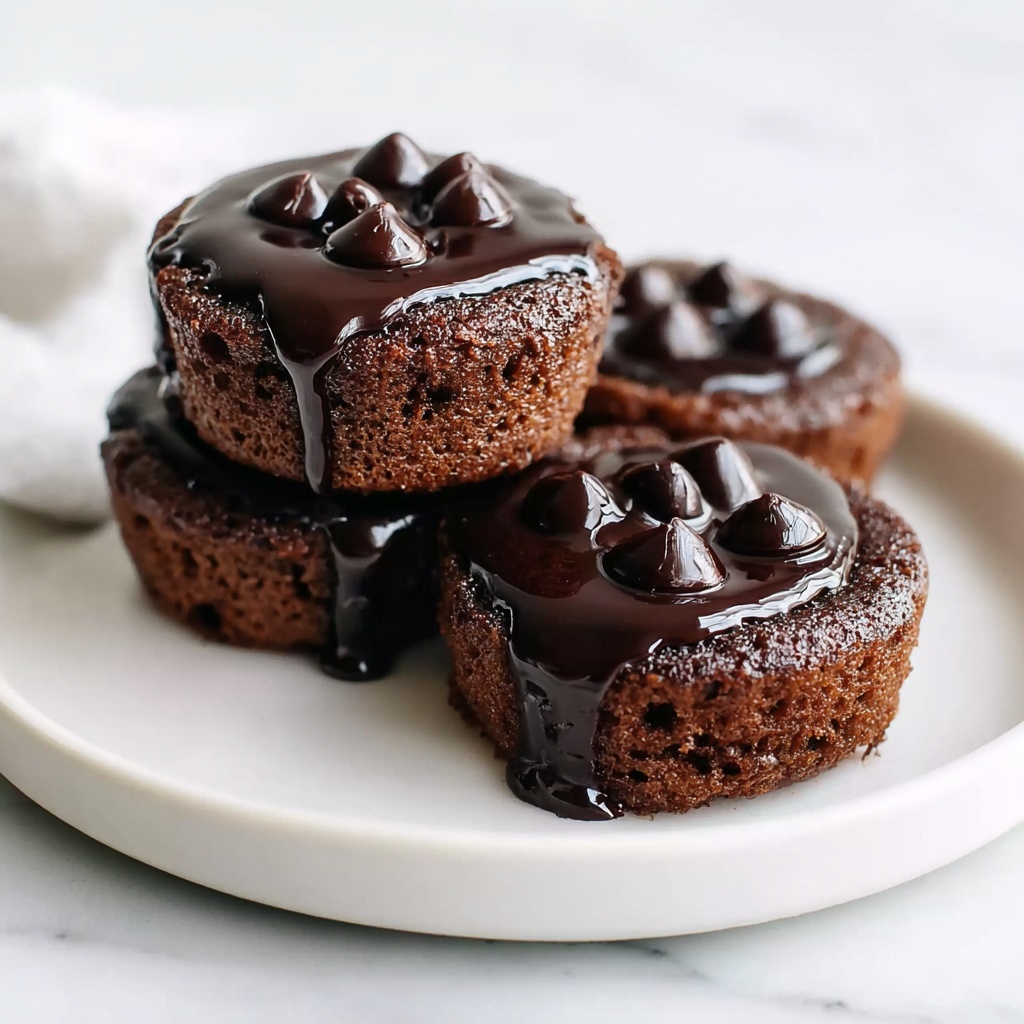
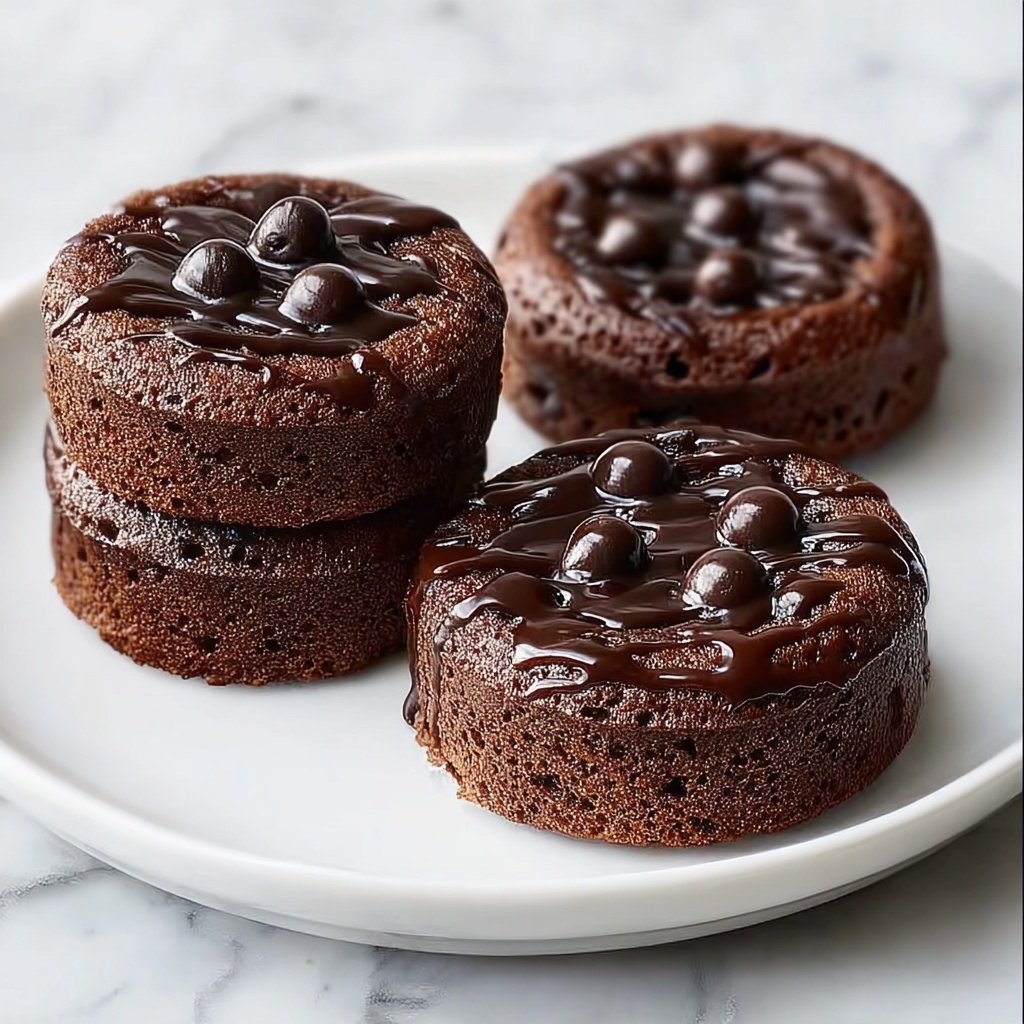
There is something incredibly delightful about these Mini Chocolate Fudge Cakes with Fresh Berries and Whipped Cream Recipe that makes every bite a little moment of joy. Rich, fudgy chocolate centers meet the brightness of fresh berries and the airy softness of whipped cream in a dessert that feels both indulgent and perfectly light. Whether you’re celebrating a special occasion or simply craving a sweet treat, these mini cakes offer the ultimate balance of texture and flavor in a charming, individual-sized portion.
Ingredients You’ll Need
These simple yet essential ingredients come together to create a dessert that is luxuriously chocolatey, tender, and bursting with freshness. Each component plays a vital role—whether it’s the smoothness of melted semi-sweet chocolate, the fluffiness of whipped eggs, or the natural sweetness of fresh berries that adds color and zing.
- Semi-sweet chocolate chips (½ cup / 85g): Provides rich chocolate flavor and smooth fudgy texture.
- Salted butter (4 tablespoons / 56g): Adds creaminess and balances the sweetness with a touch of salt.
- Large eggs (2): Whipped to fluffy perfection for a light, airy crumb that contrasts the fudgy center.
- All-purpose flour (¼ cup / 30g): Just enough to give structure without weighing down the cake.
- Espresso powder (½ teaspoon, optional): Enhances the depth of chocolate flavor for a subtly sophisticated kick.
- Vanilla extract (½ teaspoon): Adds warmth and rounds out the dessert’s flavor profile.
- Powdered sugar: For a delicate dusting that makes each cake look irresistible.
- Fresh berries: Their juicy brightness complements the rich chocolate perfectly.
- Whipped cream: Light and fluffy partner to smooth the richness.
- Ice cream (optional): A cool, creamy addition for an indulgent twist.
How to Make Mini Chocolate Fudge Cakes with Fresh Berries and Whipped Cream Recipe
Step 1: Prepare the Tartlet Pans
First things first—preheat your toaster oven to 400°F (200°C). Getting the oven properly hot ensures that your cakes develop a beautiful crust while keeping the centers delightfully fudgy. Line the bottoms of four tartlet pans with parchment paper for easy removal, and spray the sides lightly with non-stick baking spray so the cakes come out perfectly intact.
Step 2: Melt the Chocolate and Butter
Combine your semi-sweet chocolate chips with the salted butter in a microwave-safe bowl. Using 20-second bursts in the microwave, stir frequently until everything melts smoothly together. This silky chocolate-butter mix is the heart of your mini cakes, promising that luscious fudgy texture everyone loves.
Step 3: Whisk the Eggs
While the chocolate mixture cools slightly, whisk your eggs in a separate bowl. Start beating on medium-low speed just until frothy, then crank it up to high and continue whisking until the eggs are light in color, fluffy, and nearly tripled in volume. This step is key for creating a tender crumb that contrasts the dense fudge inside.
Step 4: Combine Ingredients
Stir the flour and optional espresso powder gently into your cooled chocolate mixture. Then, slowly fold this rich mixture into the fluffy eggs, combining them carefully to keep all that airiness intact. This careful folding will help your cakes rise just enough while remaining soft and fudgy inside.
Step 5: Bake the Cakes
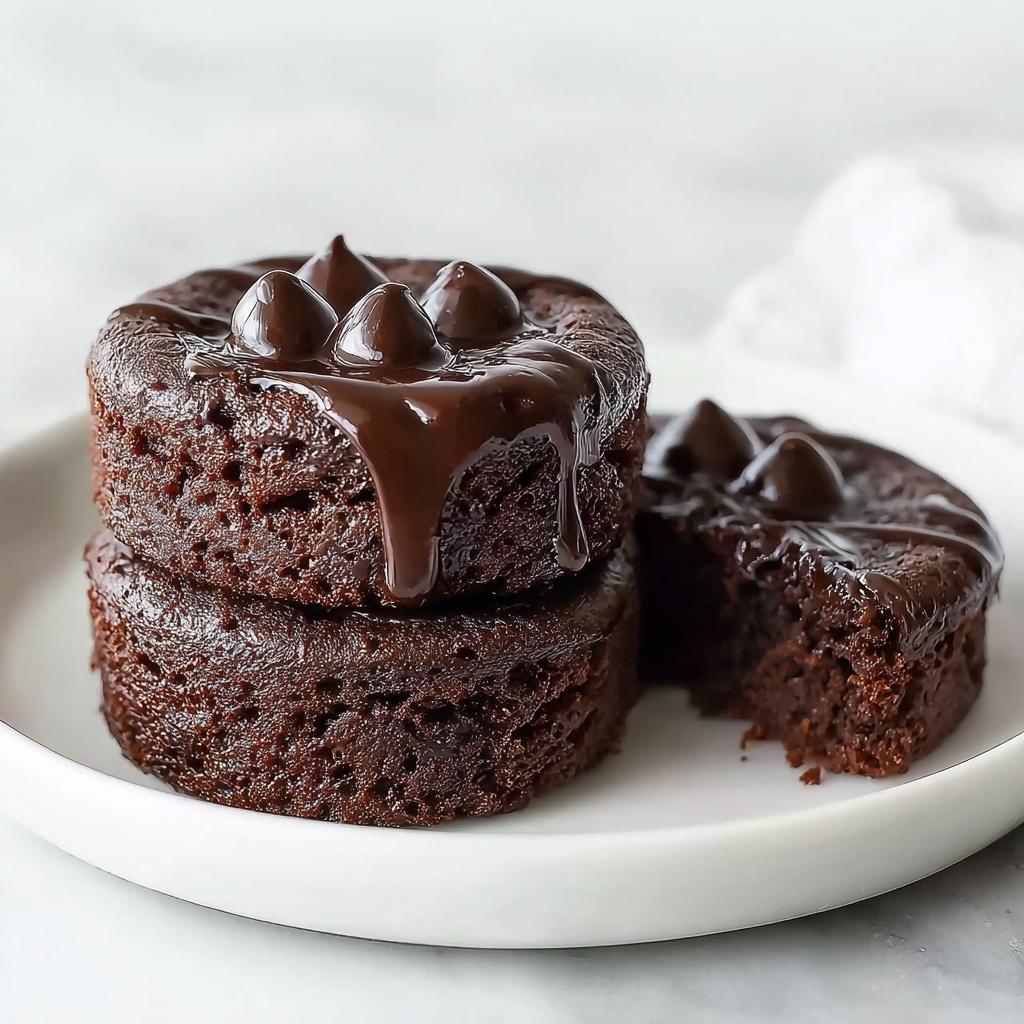
Divide the batter evenly among the prepared tartlet pans, filling each with tender promise. Bake for about 15 minutes until the tops feel set but the centers remain soft when touched. The timing is crucial for that perfect balance of texture—don’t rush!
Step 6: Cool Before Serving
Let your cakes cool in their pans for about 30 minutes. This resting time helps the fudgy centers to set gently without becoming dry. Once cooled, carefully lift the parchment and enjoy the anticipation of that first rich bite.
How to Serve Mini Chocolate Fudge Cakes with Fresh Berries and Whipped Cream Recipe
Garnishes
Nothing elevates these mini chocolate fudge cakes quite like a dusting of powdered sugar, a handful of burstingly fresh berries, and a generous dollop of whipped cream. Together, these garnishes add brightness, texture, and visual appeal that make each serving feel like a celebration on a plate.
Side Dishes
For a truly decadent dessert experience, serve alongside a scoop of vanilla ice cream or a drizzle of caramel sauce. The contrast between warm cake and cool ice cream is a classic pairing that never disappoints. You might even consider a light mint sprig for a fresh aromatic touch.
Creative Ways to Present
Try serving each mini cake in individual glass jars layered with whipped cream and berries in between for a lovely trifle effect. Alternatively, arrange the cakes on a rustic wooden board surrounded by extra fresh berries and edible flowers to create a stunning centerpiece that invites conversation and indulgence.
Make Ahead and Storage
Storing Leftovers
If you have any leftovers (which we hope you do because they’re amazing), store the mini cakes in an airtight container at room temperature for up to two days. This keeps the texture just right without drying them out.
Freezing
To freeze, wrap each cooled mini cake individually in plastic wrap, then place in a freezer-safe container. They can be frozen for up to one month. When ready to enjoy, thaw overnight in the refrigerator for the best texture.
Reheating
Warm up frozen or refrigerated cakes gently in a toaster oven or conventional oven at a low temperature (around 300°F/150°C) for about 5-7 minutes. This helps revive their fudgy centers and soft exterior without overcooking.
FAQs
Can I make these cakes without the espresso powder?
Absolutely! The espresso powder is optional and simply serves to deepen the chocolate flavor. If you don’t have it on hand or prefer a purer chocolate taste, just leave it out—it won’t affect the texture at all.
What kind of berries work best?
Fresh strawberries, raspberries, blueberries, or blackberries all make excellent companions for these mini chocolate fudge cakes. Choose whatever berries are in season and at peak freshness for the best flavor.
Can I substitute the butter for a dairy-free option?
Yes, you can replace the salted butter with a dairy-free margarine or coconut oil. It may slightly change the flavor and texture, but your cakes will still be deliciously fudgy and moist.
How do I know when the cakes are done baking?
The edges should be set and slightly pulling away from the sides of the pan, and the tops firm to the touch—but the centers should still feel soft and slightly wobbly. Overbaking will dry out the luxurious fudgy texture.
Can I double the recipe for a larger batch?
Definitely! Just double all ingredients and bake either in two batches of four pans or find appropriately sized pans for larger cakes. Baking time may vary slightly, so keep an eye on the texture.
Final Thoughts
If you’re looking for a dessert that feels sophisticated but is totally approachable, then this Mini Chocolate Fudge Cakes with Fresh Berries and Whipped Cream Recipe is calling your name. It’s a wonderful way to impress guests or treat yourself to a sweet moment of joy. Trust me, once you try these buttery, fudgy, fresh, and fluffy cakes, they will become a beloved favorite in your kitchen too. Happy baking!
“`
Print
Mini Chocolate Fudge Cakes with Fresh Berries and Whipped Cream Recipe
- Prep Time: 15 minutes
- Cook Time: 15 minutes
- Total Time: 1 hour
- Yield: 4 mini cakes
- Category: Dessert
- Method: Baking
- Cuisine: American
Description
These Mini Chocolate Fudge Cakes are rich, decadent, and perfect for any occasion. With a fudgy center and a slightly firm top, they deliver an intense chocolate flavor enhanced by a hint of espresso powder. Easy to prepare in toaster oven tartlet pans, these individual cakes are ideal for serving with powdered sugar, fresh berries, whipped cream, or ice cream for an indulgent dessert experience.
Ingredients
Chocolate Mixture
- ½ cup (85g) semi-sweet chocolate chips
- 4 tablespoons (56g) salted butter
- ½ teaspoon espresso powder (optional, enhances chocolate flavor)
Batter
- 2 large eggs
- ¼ cup (30g) all-purpose flour
- ½ teaspoon vanilla extract
Toppings (Optional)
- Powdered sugar
- Fresh berries
- Whipped cream
- Ice cream
Instructions
- Prepare the Tartlet Pans: Preheat your toaster oven to 400°F (200°C). Line the bottoms of four individual tartlet pans with parchment paper and lightly spray the sides with non-stick baking spray. Arrange the pans on a quarter sheet pan or another tray that fits inside your toaster oven.
- Melt the Chocolate & Butter: In a microwave-safe bowl, combine the semi-sweet chocolate chips and salted butter. Microwave in 20-second increments, stirring well after each interval until the mixture is fully melted and smooth, taking about 2 minutes total. Allow to cool slightly so it won’t cook the eggs later.
- Whisk the Eggs: In a separate large bowl, beat the eggs first on medium-low speed until frothy, then increase to high speed to whip the eggs until they become light, fluffy, and have tripled in volume. This aeration is key to the cake’s texture.
- Combine Ingredients: Stir the all-purpose flour and optional espresso powder into the chocolate mixture until evenly combined. Gently fold this chocolate mixture into the beaten eggs using a spatula, mixing carefully to retain the airiness and achieve a smooth batter.
- Bake the Cakes: Divide the batter evenly among the prepared tartlet pans. Bake in the preheated toaster oven for approximately 15 minutes, until the tops are set and firm but the centers remain soft and fudgy.
- Cool & Serve: Remove the cakes from the oven and let them cool completely in the pans, about 30 minutes, before carefully removing. Dust with powdered sugar or serve topped with fresh berries, whipped cream, or a scoop of ice cream to elevate the dessert.
Notes
- Using espresso powder is optional but it enhances the chocolate flavor significantly.
- Be sure not to overbake; the centers should remain fudgy for the best texture.
- If you don’t have tartlet pans, small ramekins or muffin tins can be substituted.
- Whipping the eggs well is crucial to achieving a light texture in these dense cakes.
- Let the cakes cool in the pans completely before removing to prevent them from breaking apart.


