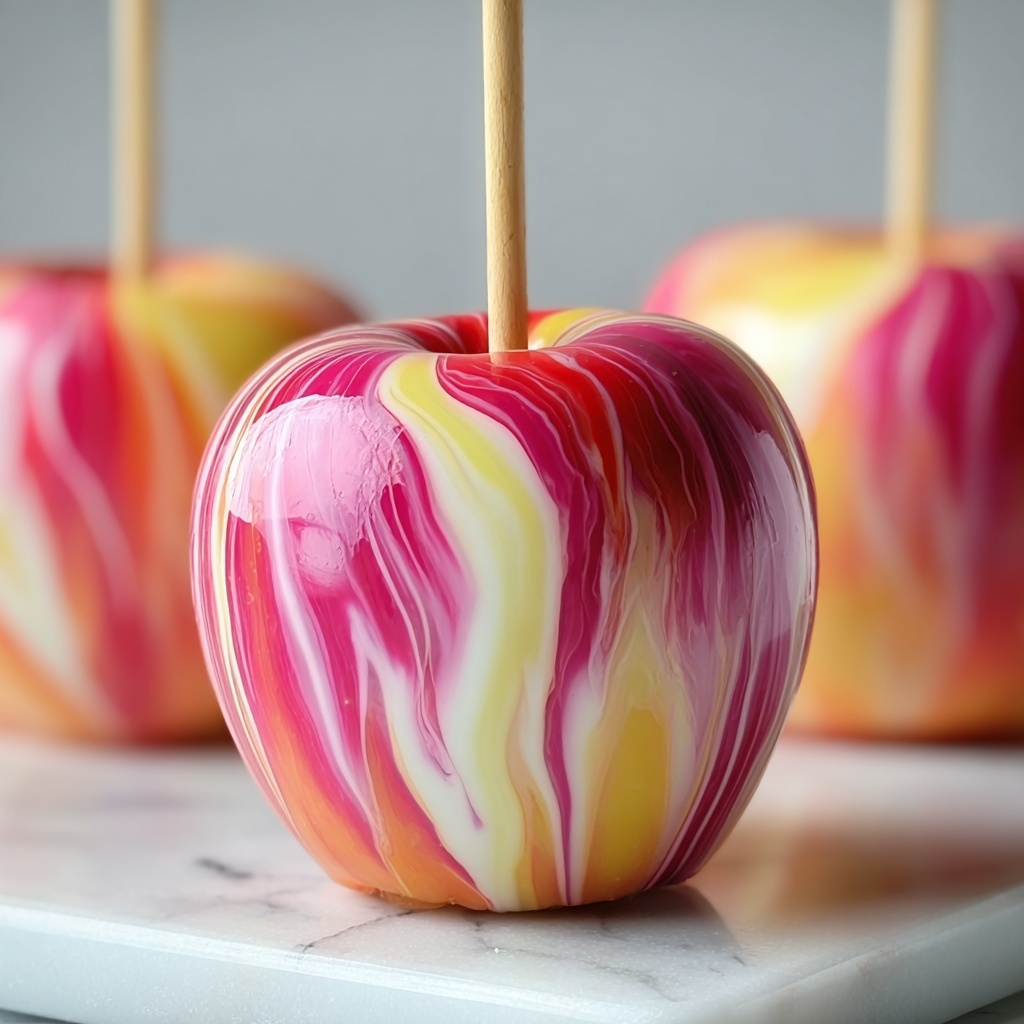
If you have a sweet tooth and love a bit of fun in the kitchen, this Marbled Effect Candy Apples Recipe is going to be your new best friend. Imagine crisp, juicy apples perfectly coated in a glossy, hard candy shell that swirls with mesmerizing red and black marbled colors. This recipe transforms ordinary candy apples into a stunning treat that catches eyes and wins hearts. The balance of tart fruit and sweet, crunchy coating makes these perfect for festive parties, autumn gatherings, or just a delightful homemade snack that tastes as amazing as it looks.
Ingredients You’ll Need
Sometimes, the simplest ingredients create the most magical results, and that’s exactly what happens here. Each component plays a key role in making your marbled candy apples come to life — from the crispness of the apples to the shiny, crackling sugar coating bursting with color.
- Apples (8 medium, firm): Choose firm varieties like Granny Smith or Fuji for the best crunch and flavor contrast.
- Granulated sugar (2 cups): The foundation of a perfect candy shell, creating that beautiful hard crack texture.
- Light corn syrup (1 cup): This prevents crystallization and keeps the candy glossy and smooth.
- Water (1 cup): Helps dissolve the sugar evenly for a consistent syrup.
- Red food coloring (a few drops): Adds vibrancy and that striking swirl effect in the marbling.
- Black food coloring (a few drops): A bold contrast color that makes your marbled candy apples truly pop.
- Parchment paper: To catch any drips and make cleanup a breeze.
- Lollipop sticks (8-10): Essential for handling and displaying your candy apples in style.
How to Make Marbled Effect Candy Apples Recipe
Step 1: Prepare Apples
Start with washing your apples really well and drying them completely — any moisture can cause the candy coating to slip right off. Then carefully insert lollipop sticks halfway into the stems. Placing them on a baking sheet lined with parchment paper helps contain any sticky drips later on.
Step 2: Make Candy Mixture
In a medium saucepan, stir together sugar, corn syrup, and water over medium heat until the sugar fully dissolves. It’s important to cook this mixture until it hits the hard crack stage (300°F). This ensures your candy shell sets up perfectly crisp and beautiful. Patience here will pay off with that perfect crunch!
Step 3: Cool and Color
Once the syrup reaches the right temperature, remove it from heat and let it cool for a couple of minutes so it thickens slightly but remains pourable. Divide the syrup evenly into two bowls — this is where the magic begins. Add red food coloring to one bowl and black to the other, mixing them until the colors are vibrant and uniform.
Step 4: Marble Apples
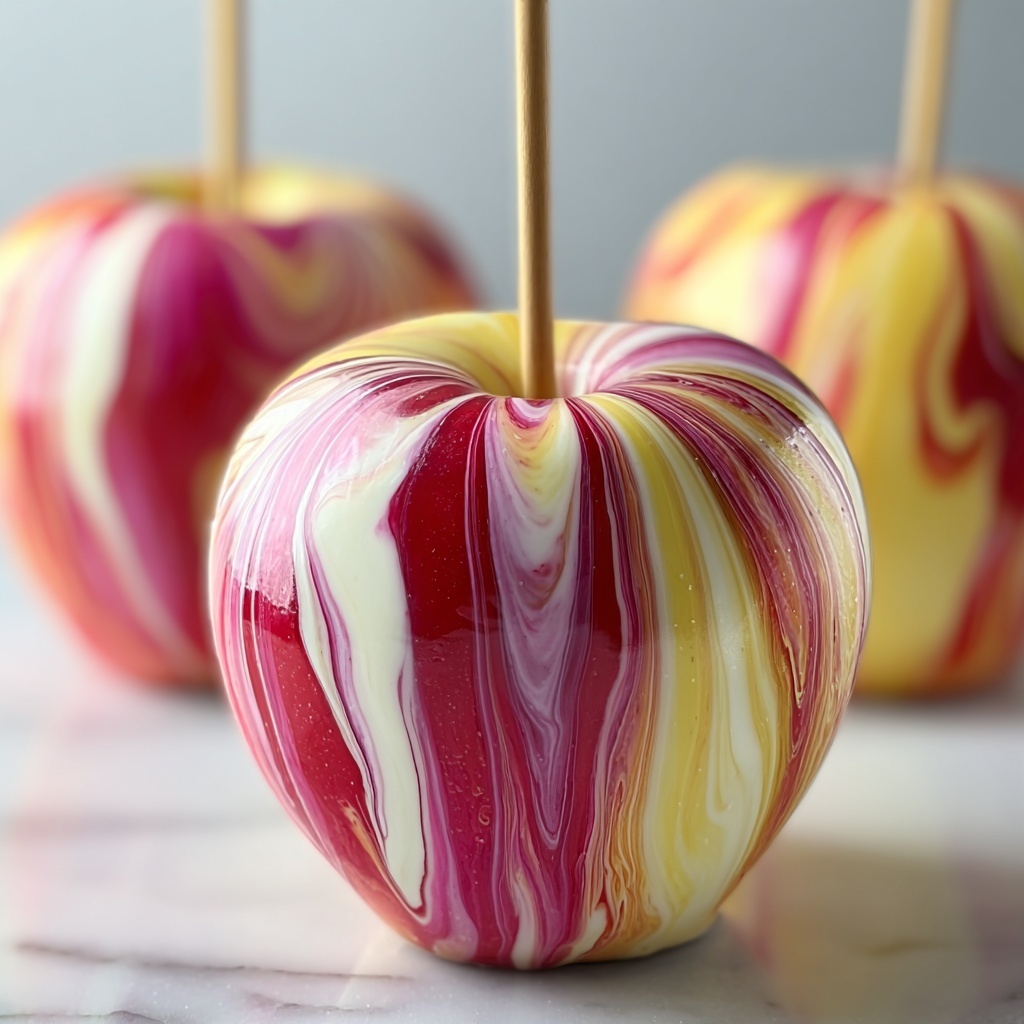
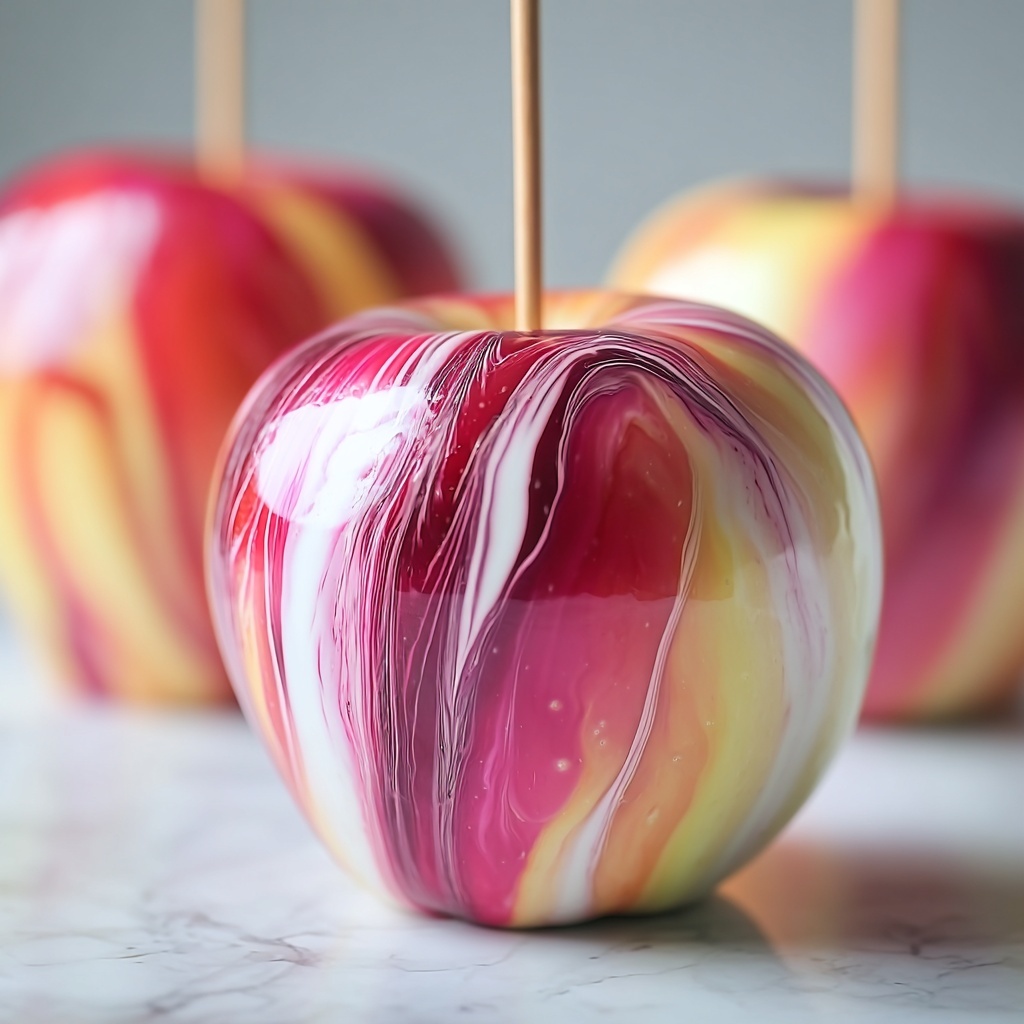
Drizzle the colored candy syrups over the apples in a kind of freestyle performance. Alternate red and black drizzles to create a swirling marbled effect. The randomness is key — don’t worry about perfection; that unpredictability is what gives each apple its unique charm. Allow any excess candy to drip off naturally for that elegant glossy finish.
Step 5: Let Harden
Finally, give the apples 30 to 45 minutes at room temperature to set completely. The candy shells will become gorgeously hard and shiny, making these apples just as sturdy as they are stunning. Resist the urge to touch them until they’re fully cooled to avoid fingerprints or smudges.
How to Serve Marbled Effect Candy Apples Recipe
Garnishes
While the marbled candy shell is the star, adding a sprinkle of edible glitter or a light dusting of crushed nuts before candy hardens can take these apples to a whole new level. A little extra flair never hurts, especially if you’re serving them at a party or as festive gifts.
Side Dishes
Pair your marbled candy apples with simple sides like roasted nuts, a cheese board, or even a creamy caramel dip. The contrasting textures and flavors add depth and play nicely with the sweet and tart notes of these apples.
Creative Ways to Present
For an eye-catching presentation, stick the candy apples upright in a decorative foam block or place them standing on a platter accented with autumn leaves or colorful napkins. Wrapping each apple individually in cellophane tied with a ribbon makes for charming party favors or thoughtful homemade gifts.
Make Ahead and Storage
Storing Leftovers
If you have any leftovers, keep your marbled candy apples in a cool, dry place. Avoid refrigeration since moisture can cause the candy shell to become sticky or cloudy. Stored properly, they should remain crisp and beautiful for up to 2 days.
Freezing
Freezing candy apples is generally not recommended because the moisture during thawing can ruin the hard candy coating. It’s best to enjoy them fresh to preserve that irresistible crunch and glossy appearance.
Reheating
Reheating candy apples to restore crunch isn’t really an option here—once the candy shell softens or melts, it won’t reset properly. If the candy gets sticky, it’s best to start fresh next time to enjoy the optimal texture.
FAQs
Can I use other colors for the marbled effect?
Absolutely! The red and black combo is dramatic and stunning, but feel free to experiment with your favorite food colors to match holidays or themes. Just keep the two-color approach for that beautiful marbling.
What type of apples work best?
Firm apples like Granny Smith, Fuji, or Honeycrisp hold up best under the candy coating and give that satisfying crunch contrasted with the sweet shell.
How do I know when the candy syrup has reached the hard crack stage?
A candy thermometer is your best friend here. The hard crack stage happens at about 300°F. If you don’t have a thermometer, a cold water test can help — a small drop of syrup in cold water should harden into brittle threads.
Can I make this recipe vegan?
Yes! The recipe as it stands is vegan since it uses sugar, corn syrup, and fruit, but always double-check that your sugar is vegan-friendly (some are processed with bone char).
How should I handle candy apples on a hot day?
Heat can make the candy coating soft and sticky, so keep the apples in a cool spot and avoid direct sunlight. Serving them shortly after preparation is best in warm weather.
Final Thoughts
I can’t recommend this Marbled Effect Candy Apples Recipe enough. It’s such a fun, creative way to enjoy a classic treat with a stylish twist. Whether you’re making them for a cozy fall get-together or just to brighten your day, these candy apples will delight your taste buds and impress anyone lucky enough to try them. So grab your apples and get ready to swirl some magic into your kitchen!
Print
Marbled Effect Candy Apples Recipe
- Prep Time: 10 minutes
- Cook Time: 15 minutes
- Total Time: 30 minutes
- Yield: 8 servings
- Category: Dessert
- Method: Stovetop
- Cuisine: American
Description
This recipe creates stunning marbled effect candy apples, perfect for festive occasions or a fun treat. Firm apples are coated with a hard crack candy glaze in red and black swirled colors, creating a visually striking and deliciously sweet snack.
Ingredients
Apples
- 8 medium, firm apples
- 8–10 lollipop sticks
Candy Coating
- 2 cups granulated sugar
- 1 cup light corn syrup
- 1 cup water
- A few drops red food coloring
- A few drops black food coloring
- Parchment paper (for lining the baking sheet)
Instructions
- Prepare Apples: Wash and dry the apples thoroughly to remove any wax or residue. Insert lollipop sticks halfway into the stems to secure them for dipping. Place the prepared apples upright on a baking sheet lined with parchment paper to catch any drips.
- Make Candy Mixture: In a medium saucepan, combine granulated sugar, light corn syrup, and water. Stir over medium heat until the sugar dissolves completely. Bring the mixture to a boil and continue cooking without stirring until it reaches 300°F (hard crack stage) on a candy thermometer.
- Cool and Color: Remove the saucepan from the heat and let the mixture cool for a couple of minutes, just enough so it thickens slightly but remains pourable. Divide the hot candy syrup evenly into two heat-safe bowls. Add red food coloring to one bowl and black food coloring to the other, mixing each until the colors are well incorporated.
- Marble Apples: Using a spoon or ladle, drizzle the colored candy mixtures randomly over the apples, alternating between the red and black to create a marbled visual effect. Allow any excess candy to drip off the apples onto the parchment paper.
- Let Harden: Let the candy-covered apples sit undisturbed at room temperature for 30 to 45 minutes or until the candy coating hardens completely and forms a crisp shell.
Notes
- Ensure the apples are completely dry before dipping to allow the candy to stick properly.
- Use a candy thermometer for accurate temperature to reach the perfect hard crack stage.
- Work quickly when coloring and drizzling the candy coating since it hardens fast.
- Store candy apples in a cool, dry place and consume within 1-2 days for best freshness.


