
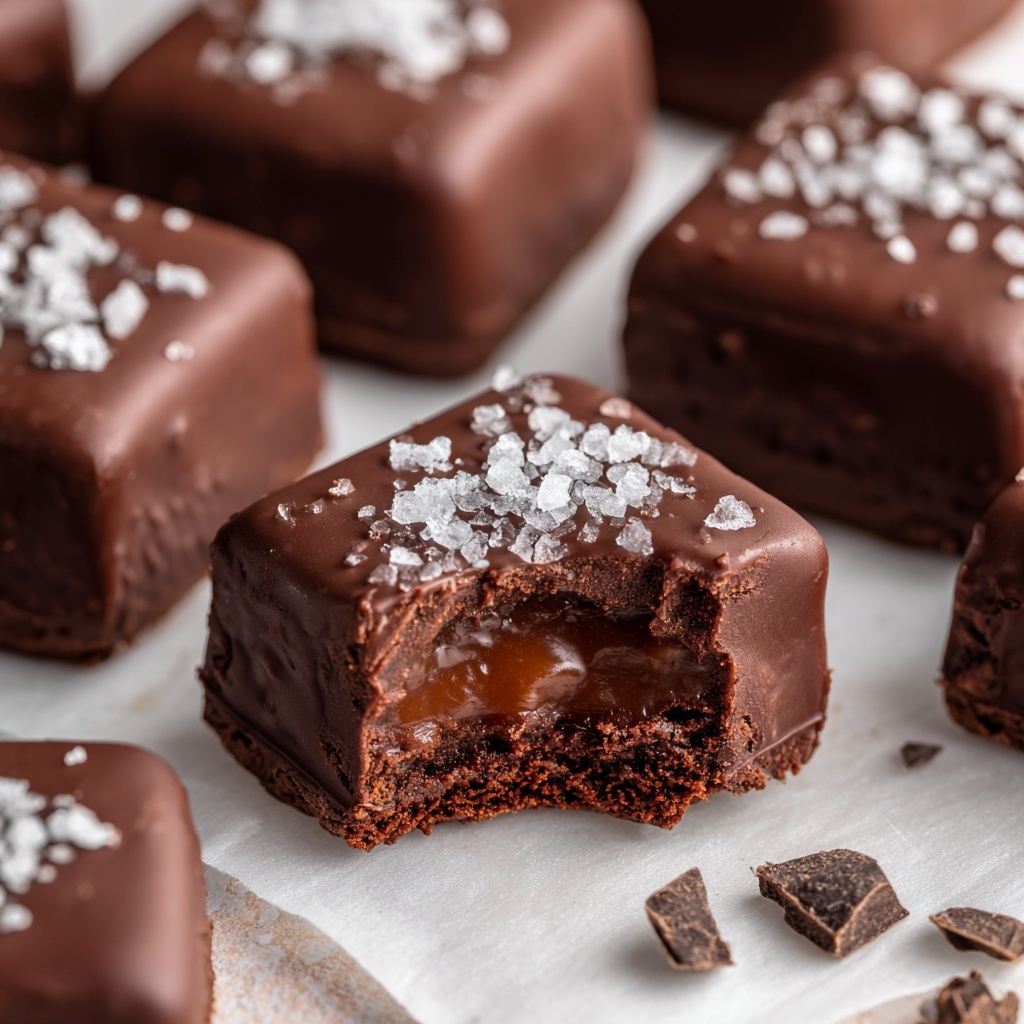
If you’ve been searching for that perfect sweet treat to satisfy your chocolate and caramel cravings, this Homemade Chocolate Caramels Recipe is just what you need. It’s an irresistible combination of creamy, buttery caramel wrapped in silky milk chocolate with a hint of sea salt that takes every bite to the next level. Whether you’re gifting them or keeping them all to yourself, these caramels are a wonderful way to turn simple pantry ingredients into something truly special and delightfully addictive.
Ingredients You’ll Need
Making these caramels is surprisingly straightforward because each ingredient plays a vital role in building that rich flavor and perfect texture. From the smooth butter to the luscious sweetened condensed milk and the luxurious milk chocolate, every element works in harmony.
- ¼ cup butter: Adds richness and a smooth, creamy base to the caramel.
- ½ cup sugar: Provides essential sweetness and helps with caramelization.
- ½ cup brown sugar: Offers deep molasses notes for a more complex flavor.
- ½ cup light corn syrup: Prevents crystallization to keep the caramel silky.
- ½ cup sweetened condensed milk: Gives the caramel its creamy texture and sweet body.
- 3 cups milk chocolate chips: Melts beautifully for coating, adding a melt-in-your-mouth finish.
- 2 teaspoons vegetable oil: Smooths the melted chocolate for easy dipping and a glossy finish.
- 1 teaspoon coarse sea salt (for topping): Balances sweetness with a subtle crunch and flavor burst.
How to Make Homemade Chocolate Caramels Recipe
Step 1: Prepare the Caramel Base
Start by combining the butter, sugar, brown sugar, corn syrup, and sweetened condensed milk in a microwave-safe bowl. Stir these ingredients until they’re completely smooth and well incorporated. This mixture is the foundation of your caramels, delivering that luscious, creamy texture that everyone loves.
Step 2: Cook the Caramel
Pop your bowl into the microwave and cook for 6 minutes, but here’s the key: stir every two minutes. This frequent stirring helps the sugars dissolve evenly and keeps the caramel from burning, ensuring a rich golden color and a perfectly gooey consistency when finished.
Step 3: Set the Caramel
Once your caramel mixture looks beautifully thickened and aromatic, pour it into a 9 x 9 inch baking pan. Smooth it out, so it sets evenly. Let it cool completely at room temperature before you try cutting it; this patience pays off with neat squares that hold their shape perfectly.
Step 4: Coat with Chocolate
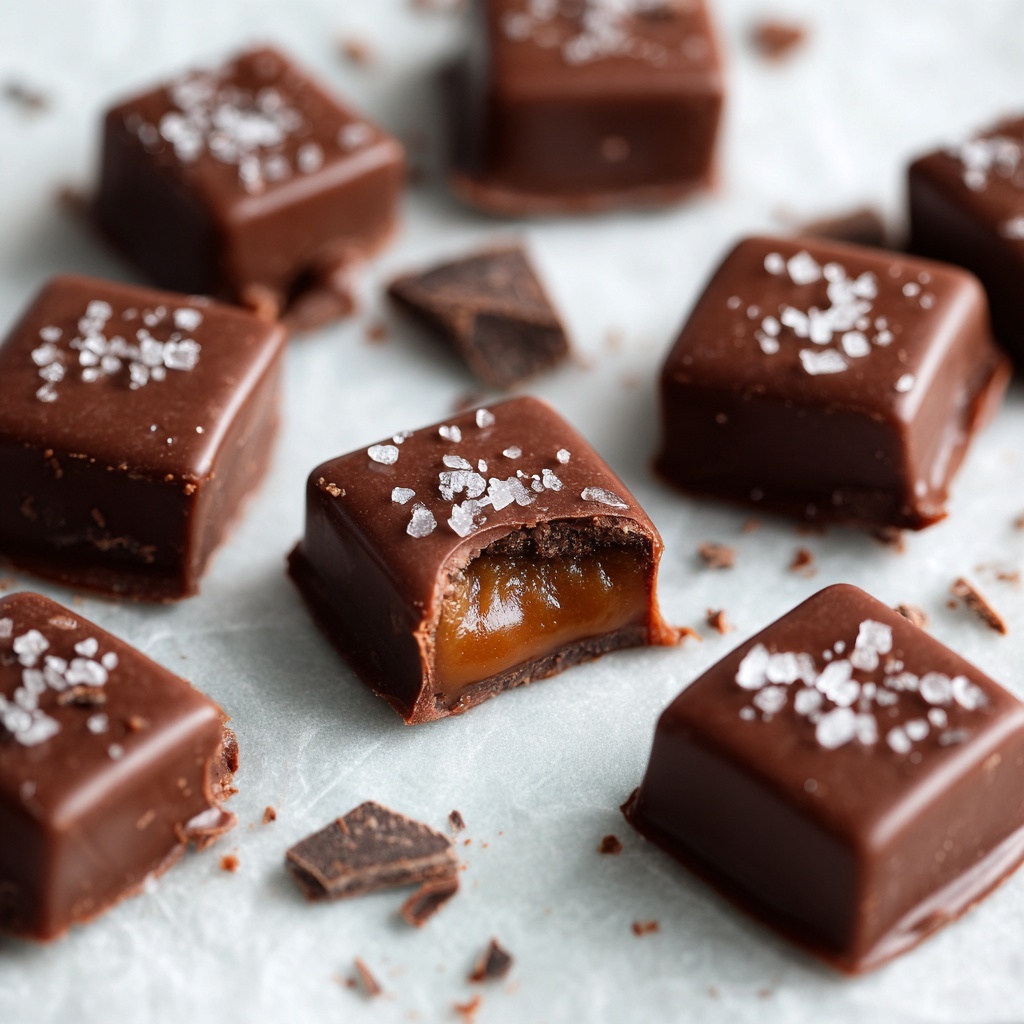
While your caramel is cooling, melt the milk chocolate chips with the vegetable oil to achieve a glossy, pourable chocolate coating. Once you cut your caramel into bite-sized squares, dip each piece into the melted chocolate, ensuring every side is covered like a delicious little jacket.
Step 5: Finish with Sea Salt
After dipping, lay the chocolates on a wax paper-lined baking sheet and sprinkle each square with the coarse sea salt. This final touch isn’t just for looks—it balances the sweetness and highlights the complexity of both the chocolate and caramel. Let the chocolate harden completely before enjoying.
How to Serve Homemade Chocolate Caramels Recipe
Garnishes
Sprinkling coarse sea salt finishes the caramels with a delightful salty crunch that enhances the sweetness. You could also experiment with a light dusting of cocoa powder or even finely chopped nuts for an extra layer of flavor and texture that’ll impress your guests.
Side Dishes
These treats pair beautifully with a creamy coffee or a rich hot chocolate. Offering a small selection of fresh berries or a light fruit salad alongside can help balance the richness of the caramels and add a refreshing note to your dessert spread.
Creative Ways to Present
Wrap individual caramels in wax paper twists for an old-fashioned candy shop vibe, or stack them in a pretty box with parchment paper for gifting. You might also arrange them on a festive platter with edible flowers or colorful sprinkles to brighten up any party table.
Make Ahead and Storage
Storing Leftovers
Keep your homemade chocolate caramels fresh by storing them in an airtight container. They’ll stay soft and chewy at room temperature for up to two weeks, making them perfect for making ahead and indulging over time.
Freezing
If you want to keep them even longer, you can freeze the caramels. Place them in a single layer on a baking sheet to freeze, then transfer to a freezer-safe container. When stored this way, they can last for up to three months, ready to thaw and delight when you’re ready.
Reheating
To enjoy your caramels after freezing, let them thaw at room temperature for a couple of hours. Avoid microwaving as it can affect their texture. Once they’ve thawed, they taste just as heavenly as fresh!
FAQs
Can I use dark chocolate instead of milk chocolate?
Absolutely! Dark chocolate offers a richer, less sweet flavor that complements the caramel beautifully. Feel free to experiment with bitterness levels based on your taste.
Why is corn syrup important in this recipe?
Corn syrup helps prevent sugar crystallization, keeping your caramel smooth and silky rather than grainy. It’s a key ingredient for that perfect chewy texture.
Can I make these caramels gluten-free?
Yes, all the ingredients in this Homemade Chocolate Caramels Recipe are naturally gluten-free, but always double-check your chocolate chips and other packaged items for any gluten-containing additives.
How do I know when the caramel is done cooking?
The microwave cooking with stirring every two minutes helps develop the right consistency. The caramel should be thick, glossy, and slightly pulling away from the sides of the bowl when it’s ready.
Can I use salted butter instead of unsalted?
It’s possible, but since you’re already adding coarse sea salt as a topping, using unsalted butter lets you better control the overall saltiness of the caramels for the best balance.
Final Thoughts
Sharing this Homemade Chocolate Caramels Recipe feels like passing along a little treasure that brings pure joy with every bite. Whether you’re making them for a special occasion or just because, these caramels are a wonderful way to indulge your sweet tooth and impress friends and family with your candy-making skills. So grab those simple ingredients and get ready to fall in love with homemade chocolate and caramel magic!
Print
Homemade Chocolate Caramels Recipe
- Prep Time: 10 minutes
- Cook Time: 6 minutes
- Total Time: 1 hour 20 minutes
- Yield: 24 servings
- Category: Candy
- Method: Microwaving
- Cuisine: American
Description
These Homemade Chocolate Caramels are a deliciously rich and creamy treat perfect for candy lovers. Combining buttery caramel with smooth milk chocolate coating and a hint of coarse sea salt, these bites offer a perfect balance of sweet and salty flavors. Made easily in the microwave and requiring no fancy equipment, this recipe yields soft, chewy caramels enrobed in decadent chocolate—ideal for gifting or enjoying as a special indulgence.
Ingredients
Caramel
- ¼ cup butter
- ½ cup sugar
- ½ cup brown sugar
- ½ cup light corn syrup
- ½ cup sweetened condensed milk
Chocolate Coating
- 3 cups milk chocolate chips
- 2 teaspoons vegetable oil
Topping
- 1 teaspoon coarse sea salt
Instructions
- Prepare the caramel mixture: Combine the butter, granulated sugar, brown sugar, light corn syrup, and sweetened condensed milk in a microwave-safe bowl. Stir the ingredients together until the mixture is smooth and well combined to ensure even cooking.
- Cook the caramel: Microwave the mixture on high for 6 minutes total, stirring every 2 minutes to prevent burning and to help the sugars dissolve properly. This will create a thick, caramelized base perfect for forming candies.
- Set the caramel: Pour the hot caramel into a 9 x 9 inch baking pan lined with parchment paper or lightly greased. Spread it evenly and allow it to cool completely at room temperature until firm enough to cut into squares.
- Dip caramels in chocolate: Cut the set caramel into bite-sized squares. Melt the milk chocolate chips with vegetable oil in a microwave-safe bowl or over a double boiler until smooth. Dip each caramel square into the melted chocolate, fully coating it, then place it on a wax paper-lined baking sheet.
- Add sea salt and cool: Immediately sprinkle the dipped caramels with coarse sea salt to add a salty contrast to the sweet chocolate. Let the chocolate harden completely at room temperature or in the refrigerator before storing or serving.
Notes
- Use a microwave-safe bowl for cooking the caramel to avoid any issues with heat transfer.
- Stirring every 2 minutes during microwaving helps prevent scorching or uneven cooking.
- If you prefer, you can substitute semi-sweet chocolate chips for a less sweet coating.
- Store finished caramels in an airtight container at room temperature for up to 2 weeks.
- For a firmer caramel, cook a minute longer but monitor closely to avoid burning.


