
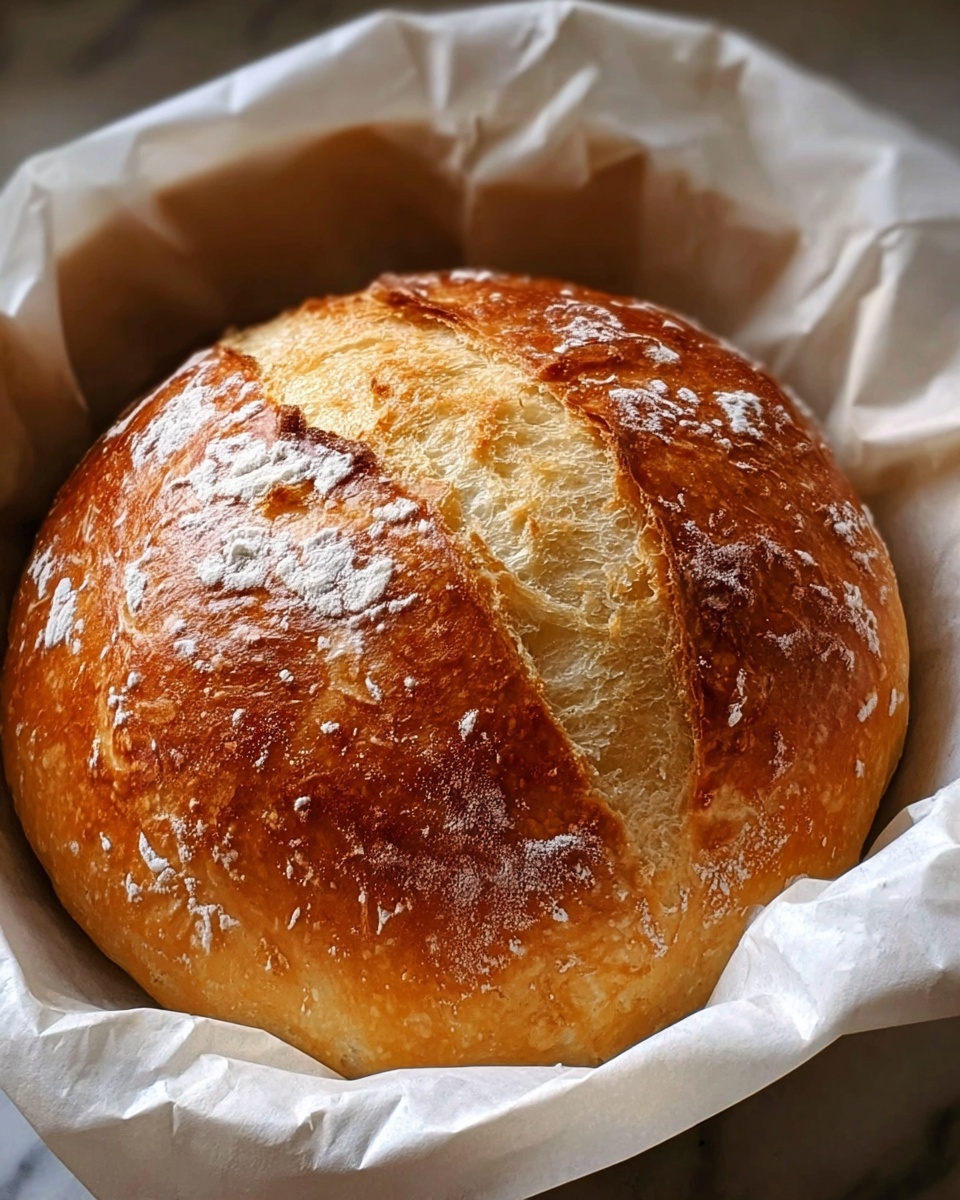
If you’ve ever wished for the comforting aroma of fresh bread wafting through your home, then you’re in for a treat. Grandma’s Perfect Homemade Bread Recipe is a true classic that brings warmth, nostalgia, and the simple joy of baking right into your kitchen. This recipe has been lovingly passed down, delivering that perfect balance of a golden crust and soft, pillowy crumb every time. It’s easy enough to make with just a handful of ingredients but rich with flavor and texture that will have you coming back for more.
Ingredients You’ll Need
Don’t let the simplicity fool you—each ingredient in this recipe plays a crucial role in creating the perfect loaf. From the sweetness of sugar that feeds the yeast to the creamy butter that enriches the dough, these basics combine beautifully to bring out exceptional taste and texture.
- Warm water: Activates the yeast and helps create that airy texture.
- Sugar: Feeds the yeast for a perfect rise and adds just a touch of sweetness.
- Active dry yeast: The magic behind the bread rising and developing flavor.
- Milk, warmed: Adds richness and tenderness to the loaf’s crumb.
- Butter, melted: Provides moisture and a subtle buttery flavor.
- All-purpose flour: The backbone of the dough that gives structure.
- Salt: Balances the sweetness and enhances the overall flavor.
- Vegetable oil: Used for greasing the bowl to prevent sticking during the rise.
How to Make Grandma’s Perfect Homemade Bread Recipe
Step 1: Activate the Yeast
Start by combining the warm water and sugar in a small bowl. Sprinkle the yeast on top and let it sit for about 5 minutes until it becomes foamy. This step is essential because it proves your yeast is alive and ready to make your bread fluffy.
Step 2: Mix the Dry Ingredients
In a large mixing bowl, combine the all-purpose flour and salt. Making a well in the center allows you to add your liquid ingredients without making a mess, setting the stage for an even dough consistency.
Step 3: Combine Wet and Dry
Pour the yeast mixture, warmed milk, and melted butter into the well in the flour. Stir gently until the dough starts to come together. This careful mixing is where your dough begins to transform from separate ingredients into something truly magical.
Step 4: Knead the Dough
Turn the dough onto a lightly floured surface and knead it by hand for about 10 minutes. Kneading develops the gluten network that gives your bread its chewy texture and elastic crumb. Don’t rush this step; your hands will feel the dough change as it becomes smooth and springy.
Step 5: First Rise
Place your dough in a lightly greased bowl, cover it with a cloth, and let it rise in a warm spot for about one hour. During this time, the dough should double in size, becoming puffy and soft. This rise is what builds the volume and airy structure that makes the loaf so inviting.
Step 6: Shape the Loaf
After the dough has risen, punch it down gently to release excess gas and then shape it into a loaf. Transfer it to a greased 9×5-inch loaf pan, smoothing the top so it bakes evenly.
Step 7: Second Rise
Allow the dough to rise again for around 30 minutes, or until it puffs up slightly above the edge of the pan. This second rise gives your bread an extra lift and a light texture.
Step 8: Bake to Perfection
Preheat your oven to 375°F (190°C) and bake the loaf for 25-30 minutes. Look for a beautiful golden-brown crust and listen for a hollow sound when you tap the bottom of the bread—this tells you it’s perfectly baked through.
Step 9: Cool Before Slicing
Remove the loaf from the pan and set it on a wire rack to cool completely. This step lets the bread finish cooking internally and ensures clean slices without a gummy texture.
How to Serve Grandma’s Perfect Homemade Bread Recipe

Garnishes
While the bread itself is delightful on its own, you can dress it up with a slather of homemade herb butter or a sprinkle of coarse sea salt. A drizzle of olive oil and a few cracked peppercorns turns it into an elegant snack in seconds.
Side Dishes
This bread is a dream companion to warm soups like tomato basil or creamy potato leek. It also shines alongside hearty stews or a vibrant salad, soaking up juices and balancing flavors perfectly.
Creative Ways to Present
Turn slices of this bread into a canvas for bruschetta loaded with fresh tomatoes and basil, or create a simple yet gourmet grilled cheese sandwich. Toast slices and cut them into sticks for homemade breadsticks that kids and adults alike will adore dipped in marinara or garlic butter.
Make Ahead and Storage
Storing Leftovers
Wrap your bread tightly in plastic wrap or keep it in an airtight container to maintain moisture. At room temperature, it will stay fresh and soft for up to two days—perfect for enjoying over a couple of meals.
Freezing
If you want to keep your freshly baked bread longer, freeze it in a sealed plastic bag. Slices or whole loaves both freeze well and can be pulled out as needed for a quick thaw and toast.
Reheating
To bring frozen or leftover bread back to life, thaw it at room temperature and warm it in the oven at 350°F (175°C) for about 10 minutes. This revives the crust’s crunch and refreshes the crumb’s softness, just like it was straight from grandma’s oven.
FAQs
Can I use whole wheat flour instead of all-purpose?
Absolutely! You can substitute whole wheat flour for all or part of the flour to add nutty flavor and extra fiber. Just keep in mind the dough might be a little denser and may require additional liquid.
Why isn’t my bread rising properly?
Make sure your water is warm but not hot, as high temperatures can kill the yeast. Also, check that your yeast is fresh and hasn’t expired. A cozy, draft-free place for rising helps the dough puff up beautifully.
Can I make this bread without milk?
Yes, you can substitute milk with water or a plant-based milk alternative. However, milk adds richness and tenderness, so your bread may be slightly less soft without it.
Is it okay to knead the dough in a stand mixer?
Certainly! Using a dough hook on a stand mixer for about 7–8 minutes is a great time-saver. Just be careful not to over-knead, or the dough can become too tough.
How do I know when the bread is fully baked?
Tap the bottom of the loaf after baking; a hollow sound means it’s cooked through. You can also use a thermometer—internal temperature should be around 190°F (88°C) for perfect doneness.
Final Thoughts
Once you try Grandma’s Perfect Homemade Bread Recipe, you’ll see why it’s so beloved. Baking this bread is more than just following steps—it’s creating something heartwarming and satisfying. There’s something truly special about pulling a warm loaf from the oven that you made with your own hands. So go ahead, gather those simple ingredients, and fill your home with the timeless magic of homemade bread.
Print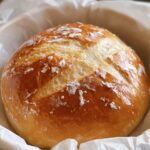
Grandma’s Perfect Homemade Bread Recipe
- Prep Time: 20 minutes
- Cook Time: 30 minutes
- Total Time: 1 hour 45 minutes
- Yield: 1 loaf (approximately 10-12 slices)
- Category: Bread
- Method: Baking
- Cuisine: American
Description
Grandma’s Perfect Homemade Bread is a timeless classic recipe delivering a soft, golden loaf with a slightly sweet, buttery flavor. This straightforward recipe uses simple ingredients and traditional techniques to create a moist, fluffy bread perfect for sandwiches or toast. With warm water activating the yeast, milk and butter enriching the dough, and two rises ensuring a tender crumb, this homemade bread is both comforting and delicious.
Ingredients
Yeast Mixture
- 1 cup warm water
- 2 tablespoons sugar
- 2 1/4 teaspoons active dry yeast
Dough
- 1/2 cup milk, warmed
- 2 tablespoons butter, melted
- 3 1/2 cups all-purpose flour (plus more for dusting)
- 1 1/2 teaspoons salt
For Greasing
- 1 tablespoon vegetable oil (for greasing the bowl)
Instructions
- Activate Yeast: In a small bowl, combine the warm water and sugar. Sprinkle the active dry yeast on top and let it sit undisturbed for 5 minutes until it becomes foamy, indicating the yeast is active.
- Mix Dry Ingredients: In a large mixing bowl, combine the all-purpose flour and salt. Create a well in the center to prepare for adding the wet ingredients.
- Combine Wet and Dry: Pour the yeast mixture, warmed milk, and melted butter into the flour well. Stir with a spoon until the mixture begins to come together into a shaggy dough.
- Knead the Dough: Transfer the dough to a lightly floured surface and knead by hand for about 10 minutes until it becomes smooth, elastic, and no longer sticky.
- First Rise: Lightly grease a large bowl with vegetable oil. Place the kneaded dough in the bowl, turning to coat it lightly with oil. Cover the bowl with a cloth and let the dough rise in a warm place for about 1 hour, or until doubled in size.
- Preheat the Oven: About 15 minutes before the first rise is complete, preheat your oven to 375°F (190°C) to prepare for baking.
- Shape the Loaf: Punch down the risen dough to release air bubbles. Shape the dough into a loaf and place it into a greased 9×5-inch loaf pan.
- Second Rise: Allow the dough to rise again in the loaf pan for 30 minutes, or until it is puffed up above the edges of the pan.
- Bake the Bread: Place the loaf pan in the preheated oven and bake for 25-30 minutes, until the bread is golden brown on top and sounds hollow when tapped on the bottom, indicating it is fully baked.
- Cool and Serve: Remove the bread from the oven, take it out of the pan, and cool on a wire rack completely before slicing to ensure the best texture.
Notes
- Make sure the water and milk are warm but not hot to avoid killing the yeast.
- Kneading is important for gluten development, which gives the bread structure and chew.
- The double rise allows the bread to develop flavor and a light texture.
- Let the bread cool completely before slicing to prevent a gummy texture.
- You can store the bread in an airtight container at room temperature for up to 3 days or freeze for longer storage.


