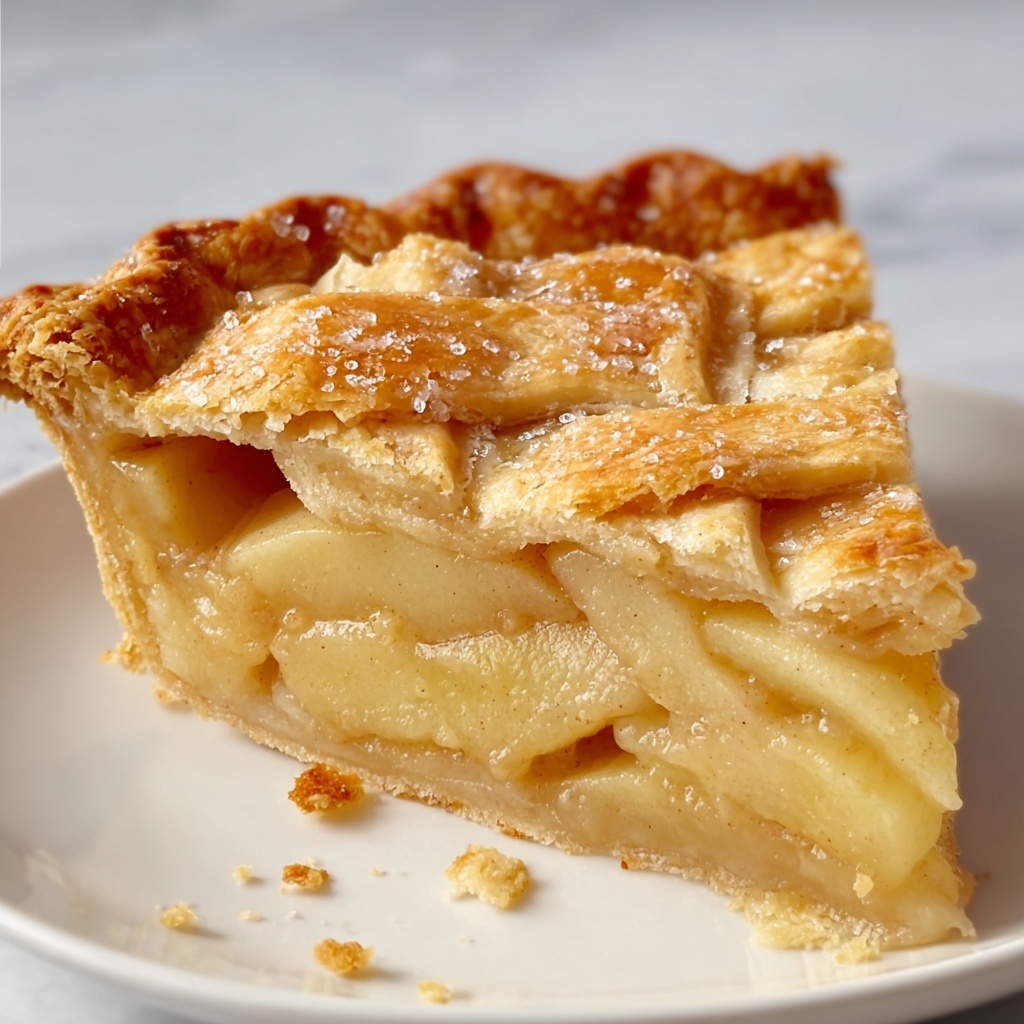
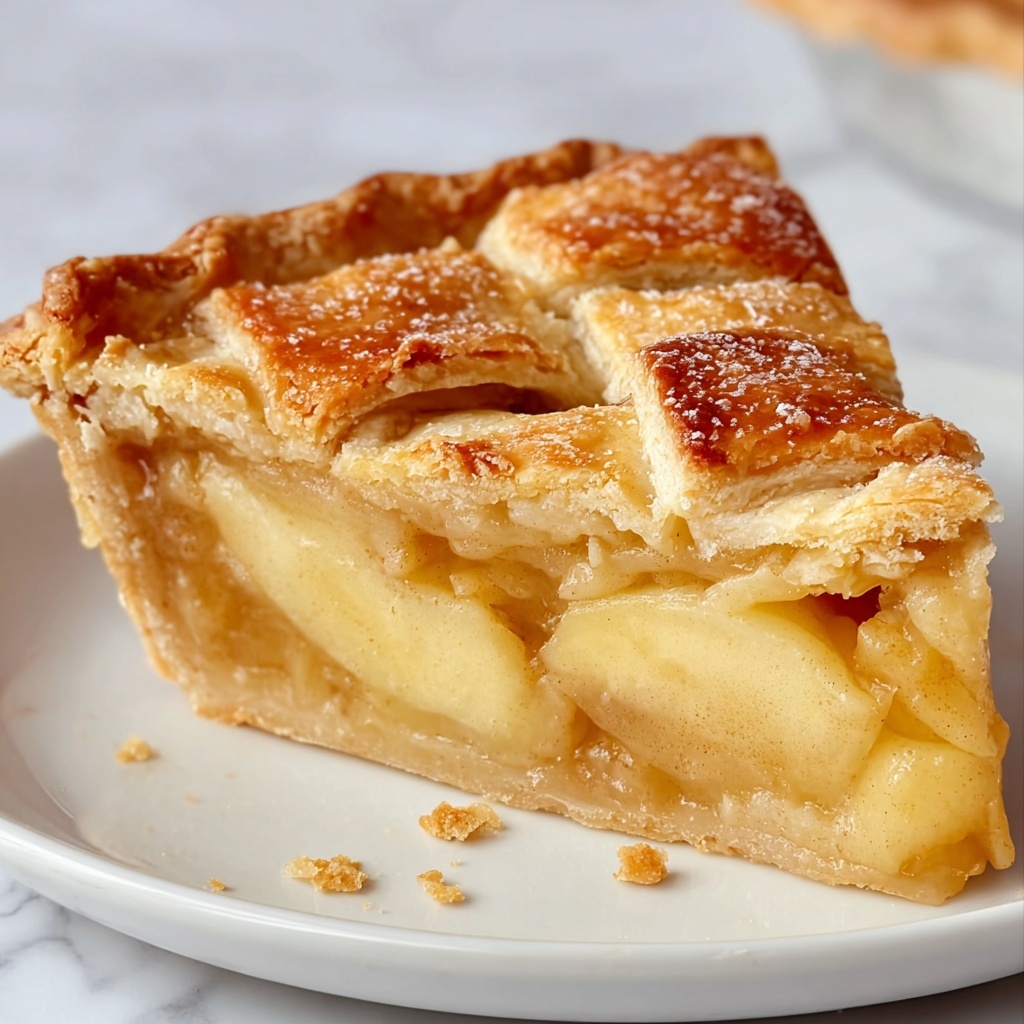
If you’ve ever dreamed of creating the perfect homemade pie, mastering a crust is where the magic starts, and this Flaky Classic Pie Crust Recipe will become your new best friend in the kitchen. It’s wonderfully tender, with those coveted flaky layers that melt in your mouth. With just a handful of simple ingredients and a bit of loving technique, you’ll build a buttery crust that is the ultimate foundation for fruit-filled, custard, or cream pies. Whether you’re a seasoned baker or just starting out, this recipe brings warmth and ease to one of the most essential elements of classic pie making.

Ingredients You’ll Need
Gathering the right ingredients is a breeze here, but each component plays a crucial role in achieving that beautifully flaky texture and subtle, buttery flavor. These staples are easy to find and work harmoniously together to create the perfect pie dough.
- 2 1/2 cups all-purpose flour: Provides the structure and tender crumb that hold your pie together.
- 1 teaspoon salt: Enhances flavor and balances the sweetness, bringing out the buttery richness.
- 1 teaspoon granulated sugar (optional): Adds a subtle sweetness, especially great for dessert pies.
- 1 cup unsalted butter, cold and cubed: The star of flakiness—cold butter creates those prized layers during baking.
- 6–8 tablespoons ice water: Just enough to bring the dough together without melting the butter, keeping it flaky.
How to Make Flaky Classic Pie Crust Recipe
Step 1: Whisk the Dry Ingredients
Start by combining the all-purpose flour, salt, and sugar (if you’re making a sweet pie) in a large mixing bowl. Whisking these together ensures they are evenly distributed, so every bite gets the right balance of flavor and seasoning. This is your dry foundation for the recipe’s success.
Step 2: Cut in the Cold Butter
Next, add your cold, cubed butter to the flour mixture. Using a pastry cutter or your fingers, gently work the butter into the flour until it resembles coarse crumbs with pea-sized chunks of butter scattered throughout. These distinct bits are what will create those signature flaky layers once baked. The key here is to keep everything cold—warm hands or melted butter will ruin the texture.
Step 3: Add Ice Water Gradually
Slowly drizzle in the ice water, starting with 6 tablespoons and adding more as needed, while tossing the mixture with a fork. Just mix until the dough begins to cling together without getting wet or sticky. Too much water can make the crust tough, so take care to stop once you see it holding.
Step 4: Chill the Dough
Divide your dough into two disks, wrap them tightly in plastic wrap, and refrigerate for at least 1 hour. This step is crucial because chilling relaxes the gluten, making the dough easier to roll and preventing shrinking during baking. Plus, the cold butter firms up again, preserving those flaky pockets.
Step 5: Roll Out the Dough
After chilling, lightly flour your work surface and roll one disk into about a 12-inch circle, perfect for a 9-inch pie pan. Don’t worry about getting it perfectly round—it just needs to cover the pan with a bit of overhang. When trimming the edges, leave a small overhang to help seal in fillings or fit a top crust if you’re making a double crust pie.
Step 6: Assemble and Bake
Use your Flaky Classic Pie Crust Recipe as a base for any pie—be it a fruit, custard, or cream variety. Whether blind baking for a no-bake filling or filling it to create a luscious double-crust masterpiece, follow your pie recipe’s baking directions to get that golden finish and wonderful crispness.
How to Serve Flaky Classic Pie Crust Recipe
Garnishes
While the crust itself is a delight, adding a sprinkle of coarse sugar on top before baking adds a pleasant sparkle and sweet crunch, perfect for fruit pies. Alternatively, a dusting of cinnamon or nutmeg can elevate the aroma and complement spicy or apple pies beautifully.
Side Dishes
Pair your pies with a scoop of vanilla ice cream or a dollop of freshly whipped cream to balance the buttery crust with smooth creaminess. For savory pies made with this crust, a fresh green salad or roasted vegetables offer a refreshing contrast.
Creative Ways to Present
Turn your flaky crust into a beautiful lattice top or try decorative cutouts for an artistic touch that will impress guests. Using pie weights or creating mini tartlets with this dough also opens up fun serving possibilities, perfect for parties or cozy family dinners.
Make Ahead and Storage
Storing Leftovers
If you have any pie crust dough left after your baking session, wrap tightly in plastic wrap and refrigerate for up to two days. This allows you to save time for your next pie craving while maintaining all the flaky goodness.
Freezing
This Flaky Classic Pie Crust Recipe freezes beautifully. After wrapping the disks in plastic, place them in an airtight container or bag and freeze for upto 2 months. Thaw overnight in the refrigerator before rolling out to ensure the texture stays perfect.
Reheating
If you want to enjoy leftover pie, gently reheat slices in a warm oven at 325°F (160°C) for about 10-15 minutes to refresh the crispness of the crust without drying out the filling.
FAQs
Can I use a food processor to make this Flaky Classic Pie Crust Recipe?
Absolutely! A food processor can speed up the process of cutting in the butter, but be careful not to over-process. Stop when the mixture resembles coarse crumbs with small butter pieces visible to keep that flaky texture.
Why is the butter cold and cubed instead of melted or softened?
Cold butter is key to creating flakes in pie crust because as it melts during baking, it creates steam pockets, which results in those tender, layered textures we love. Melted butter makes the crust dense and tough instead.
What if my dough is too dry or too wet?
If your dough feels dry and crumbly, add a tiny bit more ice water, a teaspoon at a time, mixing gently. If it’s too sticky or wet, sprinkle a little more flour and gently incorporate. The dough should hold together without being tacky.
Can I make this crust gluten-free?
While this particular recipe uses all-purpose flour, you can experiment with gluten-free flour blends designed for baking. Keep in mind that texture may vary, and adjustments in liquid or butter might be necessary.
Do I need to blind bake the crust?
Blind baking depends on your pie type. For pies with wet fillings that won’t be baked further, blind baking is important to prevent a soggy bottom. For double-crust pies or those baked with the filling, you can place the crust in the oven after assembling the pie.
Final Thoughts
There’s a special kind of joy in making a pie from scratch, and mastering this Flaky Classic Pie Crust Recipe is the perfect place to start. The buttery layers, ease of preparation, and versatility it offers will transform your baking experiences. Trust me, once you try this recipe, you’ll never want to use store-bought crust again!
Print
Flaky Classic Pie Crust Recipe
- Prep Time: 15 minutes
- Cook Time: N/A
- Total Time: 1 hour 15 minutes (including chilling time)
- Yield: 1 double-crust pie or 2 single-crust pies
- Category: Baking
- Method: No-Cook
- Cuisine: American
Description
This flaky pie crust recipe yields a tender, buttery base perfect for sweet or savory pies. Made with cold butter and minimal water, it creates delicate layers for a crisp, golden finish. Ideal for double or single-crust pies and versatile for blind baking or filling directly.
Ingredients
Pie Crust Ingredients
- 2 1/2 cups all-purpose flour
- 1 teaspoon salt
- 1 teaspoon granulated sugar (optional, for sweet pies)
- 1 cup unsalted butter, cold and cubed
- 6–8 tablespoons ice water
Instructions
- Mix Dry Ingredients: Whisk together the all-purpose flour, salt, and optional granulated sugar in a large mixing bowl to evenly distribute the ingredients.
- Cut in Butter: Add the cold, cubed unsalted butter to the flour mixture. Use a pastry cutter or your fingers to work the butter into the flour until coarse crumbs form with some pea-sized chunks of butter remaining, which helps create the flaky texture.
- Add Ice Water: Gradually drizzle in ice water, tossing the mixture gently with a fork. Add just enough water for the dough to start holding together without becoming wet or sticky.
- Form Dough Disks: Divide the dough evenly into two disks. Wrap each disk tightly in plastic wrap and refrigerate for at least 1 hour to rest the dough and solidify the butter, improving texture.
- Roll Out Dough: On a lightly floured surface, roll one chilled disk into a 12-inch circle. Fit it into a 9-inch pie pan, trimming any excess dough but leaving a slight overhang for crimping the edges.
- Prepare for Baking or Filling: Use your prepared crust as desired—either blind bake for pre-baked crust or fill with your favorite pie filling.
- Follow Pie Recipe Instructions: Proceed with baking according to your specific pie recipe’s directions to complete your pie.
Notes
- Keep butter and water as cold as possible to ensure a flaky crust.
- Do not overwork the dough to avoid a tough crust.
- Refrigerating the dough for at least an hour helps prevent shrinkage when baking.
- Optional sugar is best used for sweet pies; omit for savory pies.
- For best results, use a pastry cutter or fingers quickly to maintain butter pieces.
- You can freeze the dough disks for up to one month wrapped tightly.


