
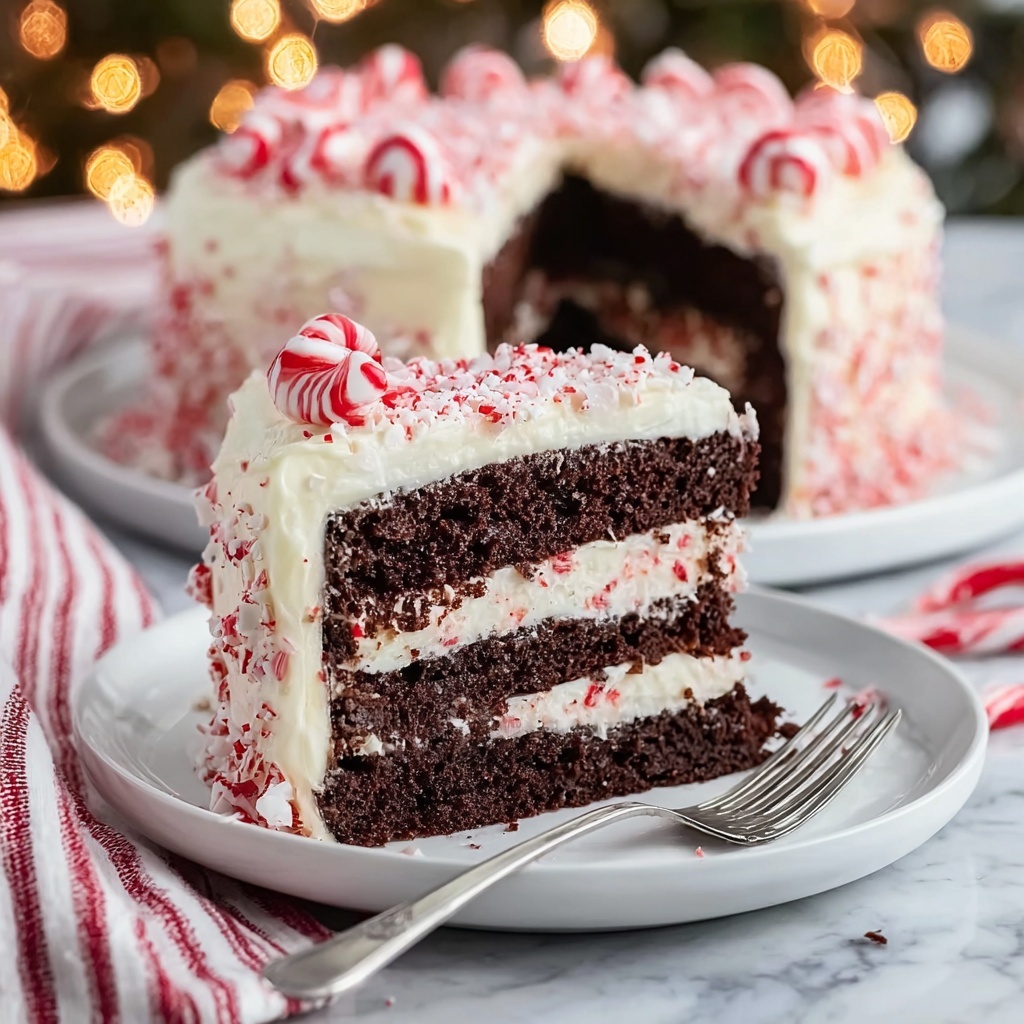
If you are on the hunt for a show-stopping dessert that perfectly captures the joy and spirit of the holidays, this Festive Peppermint Cake Recipe is about to become your new favorite. It blends the sweet coolness of peppermint with a tender, moist cake base and a luscious frosting that’s both creamy and refreshingly minty. This cake is not only visually enchanting—especially if you opt for that delightful red marbled swirl effect—but it’s also loaded with flavors that evoke cozy winter nights and joyful gatherings. Whether you’re baking for friends, family, or yourself, this recipe promises to bring warmth and cheer to any celebration.
Ingredients You’ll Need
The beauty of this Festive Peppermint Cake Recipe lies in its use of staple kitchen ingredients that are simple yet essential. Each ingredient plays a vital role, from creating the cake’s fluffy texture, enhancing its minty flavor, to adding that irresistible festive flair.
- All-purpose flour: The foundation of the cake, providing structure and softness.
- Baking powder: Works as a leavening agent to keep the cake light and airy.
- Salt: Balances sweetness and enhances overall flavor nuances.
- Unsalted butter: Adds richness and moisture for a tender crumb.
- Granulated sugar: Sweetens the cake and helps create a perfect golden crust.
- Large eggs: Bind ingredients together and add stability with their protein.
- Vanilla extract: Deepens the flavor and rounds out the mint without overpowering it.
- Peppermint extract: The star ingredient bringing cool, festive freshness to every bite.
- Whole milk: Adds moisture and keeps the cake supple and soft.
- Red gel food coloring (optional): Creates a striking marbled effect for extra holiday cheer.
- Powdered sugar: Sweetens the frosting and gives it that smooth texture.
- Crushed candy canes: Provide a crunchy, colorful topping that complements the peppermint flavor.
How to Make Festive Peppermint Cake Recipe
Step 1: Prepare the Cake Batter
Start by preheating your oven to 350°F (175°C) and prepping two 9-inch round cake pans by greasing and flouring them or lining them with parchment paper. In a medium bowl, whisk together the flour, baking powder, and salt – this dry mix will help your cake rise beautifully.
Step 2: Cream Butter and Sugar
In a large mixing bowl, beat the softened butter and granulated sugar together until the mixture turns light and fluffy, about 2 to 3 minutes. This step is crucial as it traps air that will help create a tender crumb in your finished cake.
Step 3: Add Eggs and Extracts
Next, beat in the eggs one at a time, ensuring each is fully incorporated before adding the next. Follow with the vanilla and peppermint extracts for that distinct, cozy holiday flavor that makes this cake so special.
Step 4: Combine Dry Ingredients and Milk
Gradually add the dry flour mixture and milk alternately to the wet batter, beginning and ending with the dry ingredients. Mix until you have a smooth, well-blended batter—this balance helps maintain the cake’s softness while delivering moisture.
Step 5: Create the Marbled Effect (Optional)
If you want a festive look, divide the batter into two bowls. Add red gel food coloring to one half, then swirl it into the plain batter in your pans for a beautiful red-and-white marbled appearance that will wow your guests.
Step 6: Bake the Cake
Pour the batter evenly into your prepared pans and bake for 28 to 32 minutes. Keep an eye on the cake and test with a toothpick; it should come out clean or with just a few moist crumbs when done. Let the cakes cool in the pans for 10 minutes before transferring to wire racks to cool completely.
Step 7: Prepare the Peppermint Frosting
While your cakes cool, whip up the frosting by beating softened butter until creamy. Gradually add powdered sugar, then stir in the peppermint extract and enough milk (2 to 3 tablespoons) to reach your desired consistency—smooth, spreadable, and bursting with minty goodness.
Step 8: Assemble and Decorate
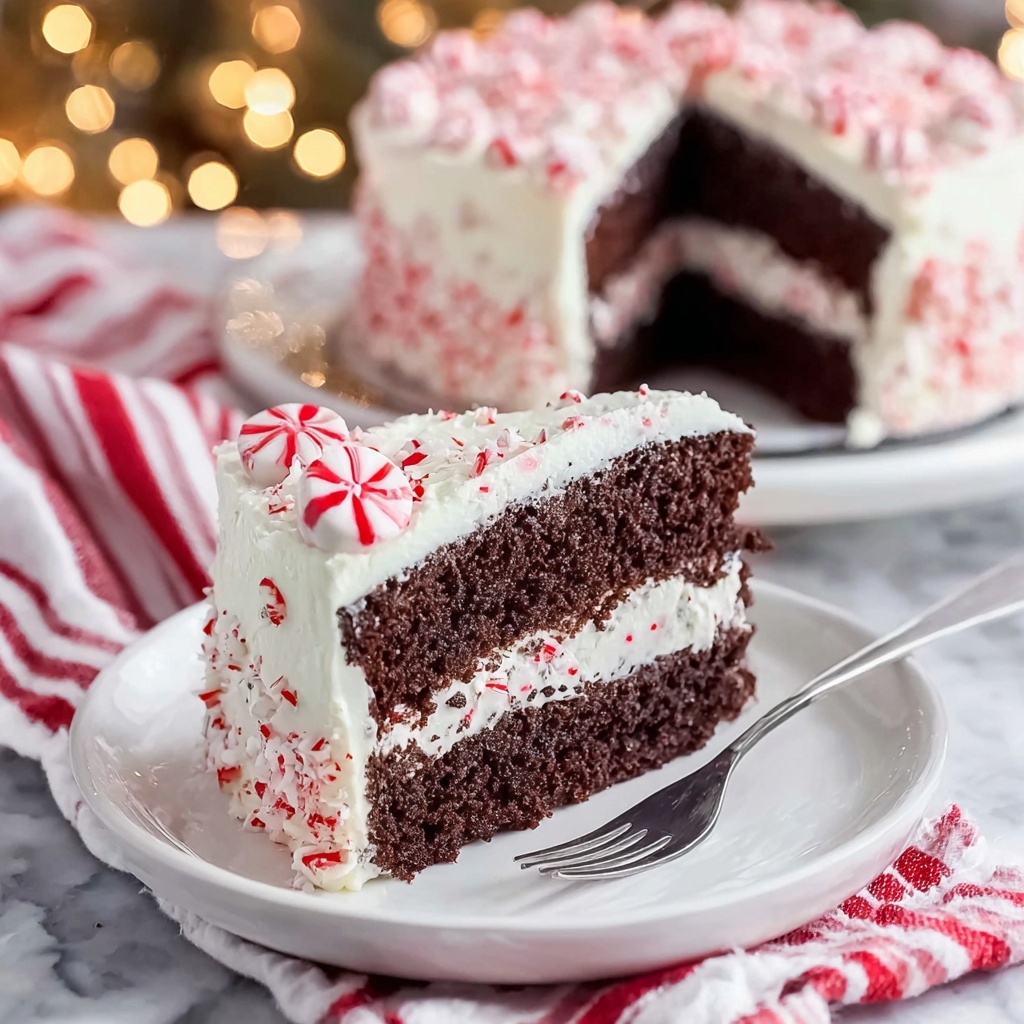
Spread a generous layer of frosting on one cake layer, then place the second layer on top. Use the remaining frosting to cover the entire cake evenly. For a dazzling finish, sprinkle crushed candy canes on top, adding texture and an extra burst of peppermint flavor.
How to Serve Festive Peppermint Cake Recipe
Garnishes
The crushed candy canes sprinkled on top not only look festive but add a delightful crunch and refreshing peppermint burst with every bite. You can also decorate with fresh mint leaves or edible silver stars for an extra touch of holiday magic.
Side Dishes
This cake pairs wonderfully with a cup of hot cocoa or a warm mug of spiced tea. For a lighter touch, serve alongside fresh berries or a simple vanilla bean ice cream, which complements the peppermint flavor without competing with it.
Creative Ways to Present
Consider layering the cake on a festive cake stand surrounded by pine branches, ornaments, or fairy lights for a stunning centerpiece. Individual mini slices served on decorative plates with a peppermint stick on the side make for charming party favors too.
Make Ahead and Storage
Storing Leftovers
Once frosted, cover the cake loosely with plastic wrap or store it in an airtight container at room temperature for up to two days, or in the refrigerator for up to five days. Let refrigerated cake come to room temperature before serving to enjoy the best texture and flavor.
Freezing
You can freeze the unfrosted cake layers wrapped tightly in plastic wrap and foil for up to three months. Thaw in the refrigerator overnight before frosting. Finished cakes with frosting can also be frozen but wrap carefully to avoid frosting damage.
Reheating
This cake is best enjoyed at room temperature and generally does not require reheating. If you prefer, serving slightly chilled is just as delightful.
FAQs
Can I use peppermint oil instead of peppermint extract?
Peppermint oil is much stronger than extract, so if you choose to use it, start with a very small amount, such as a drop, and adjust carefully to prevent overpowering the cake’s flavor.
What if I don’t have red gel food coloring? Can I omit it?
Absolutely! The red gel food coloring is purely decorative for the marbled effect. The cake tastes just as delightful without it, maintaining that classic peppermint charm.
Can I make this recipe gluten-free?
Yes, by substituting the all-purpose flour with a gluten-free flour blend designed for baking, you can make a gluten-free version. Just ensure the blend contains xanthan gum or a similar binding agent for best results.
How do I prevent my peppermint frosting from becoming too runny?
Gradually add the milk while mixing, stopping as soon as the frosting reaches a spreadable consistency. If it’s too soft, add a little more powdered sugar to thicken it without losing the minty flavor.
Can this cake be made into cupcakes?
Definitely! Simply pour the batter into lined muffin tins and bake for 18-22 minutes, checking doneness with a toothpick. Frost and garnish cupcakes with crushed candy canes for mini festive treats.
Final Thoughts
I truly can’t recommend this Festive Peppermint Cake Recipe enough for your holiday baking adventures. It’s a perfect mix of tradition and fun, delivering unmistakable peppermint cheer in every slice. Bake it, share it, and watch your loved ones’ faces light up—this cake really is a gift that keeps on giving.
Print
Festive Peppermint Cake Recipe
- Prep Time: 15 minutes
- Cook Time: 30 minutes
- Total Time: 50 minutes
- Yield: 12 servings
- Category: Dessert
- Method: Baking
- Cuisine: American
- Diet: Vegetarian
Description
This Festive Peppermint Cake is a delightful holiday treat featuring a moist and fluffy cake infused with peppermint extract. It offers the option for a beautiful red and white marbled effect and is finished with a creamy peppermint frosting topped with crushed candy canes for a festive touch. Perfect for holiday gatherings and celebrations.
Ingredients
Cake Ingredients
- 2 1/2 cups all-purpose flour
- 2 1/2 teaspoons baking powder
- 1/2 teaspoon salt
- 1 cup unsalted butter, softened
- 1 3/4 cups granulated sugar
- 4 large eggs, at room temperature
- 1 teaspoon vanilla extract
- 1 1/2 teaspoons peppermint extract
- 1 cup whole milk, at room temperature
- Red gel food coloring (optional, for marbled effect)
Frosting Ingredients
- 1 cup unsalted butter, softened
- 4 cups powdered sugar
- 2–3 tablespoons milk
- 1 teaspoon peppermint extract
- Crushed candy canes (for topping)
Instructions
- Prepare the Cake Batter: Preheat your oven to 350°F (175°C). Grease and flour two 9-inch round cake pans or line them with parchment paper to prevent sticking.
- Mix Dry Ingredients: In a medium bowl, whisk together the all-purpose flour, baking powder, and salt until evenly combined.
- Cream Butter and Sugar: In a large mixing bowl, beat the softened butter and granulated sugar together using an electric mixer until the mixture is light and fluffy, about 2-3 minutes.
- Add Eggs and Extracts: Add the eggs one at a time to the creamed mixture, beating well after each addition. Stir in the vanilla and peppermint extracts for flavor.
- Combine Wet and Dry Ingredients: Alternately add the dry ingredients and whole milk to the butter mixture, starting and ending with the dry ingredients. Mix until the batter is smooth and well incorporated.
- Create Optional Marbled Effect: If desired, divide the batter into two halves. Add red gel food coloring to one half and gently swirl it into the plain batter in the prepared pans to create a marbled pattern.
- Fill the Pans: Evenly divide the batter between the two prepared cake pans, smoothing the tops.
- Bake the Cake: Bake in the preheated oven for 28-32 minutes, or until a toothpick inserted into the center comes out clean.
- Cool the Cakes: Remove the cakes from the oven and let them cool in the pans for 10 minutes. Then, transfer them to a wire rack to cool completely before frosting.
- Prepare the Frosting: Beat the softened butter until creamy. Gradually add the powdered sugar, mixing well. Stir in the peppermint extract and 2-3 tablespoons of milk, adjusting the milk to reach your desired frosting consistency.
- Assemble the Cake: Spread a layer of frosting over one cake layer. Carefully stack the second cake layer on top.
- Frost the Cake: Use the remaining frosting to cover the top and sides of the entire cake evenly.
- Decorate: Sprinkle crushed candy canes over the frosted cake for a festive finish.
Notes
- For best results, make sure all your ingredients are at room temperature before starting.
- Red gel food coloring is used for a more vibrant color without altering the batter’s consistency.
- You can prepare the cake layers a day ahead and keep them wrapped tightly in plastic wrap at room temperature.
- The frosting consistency can be adjusted by adding more or less milk depending on your preference.
- Store the finished cake covered in the refrigerator for up to 3 days to keep it fresh.

