
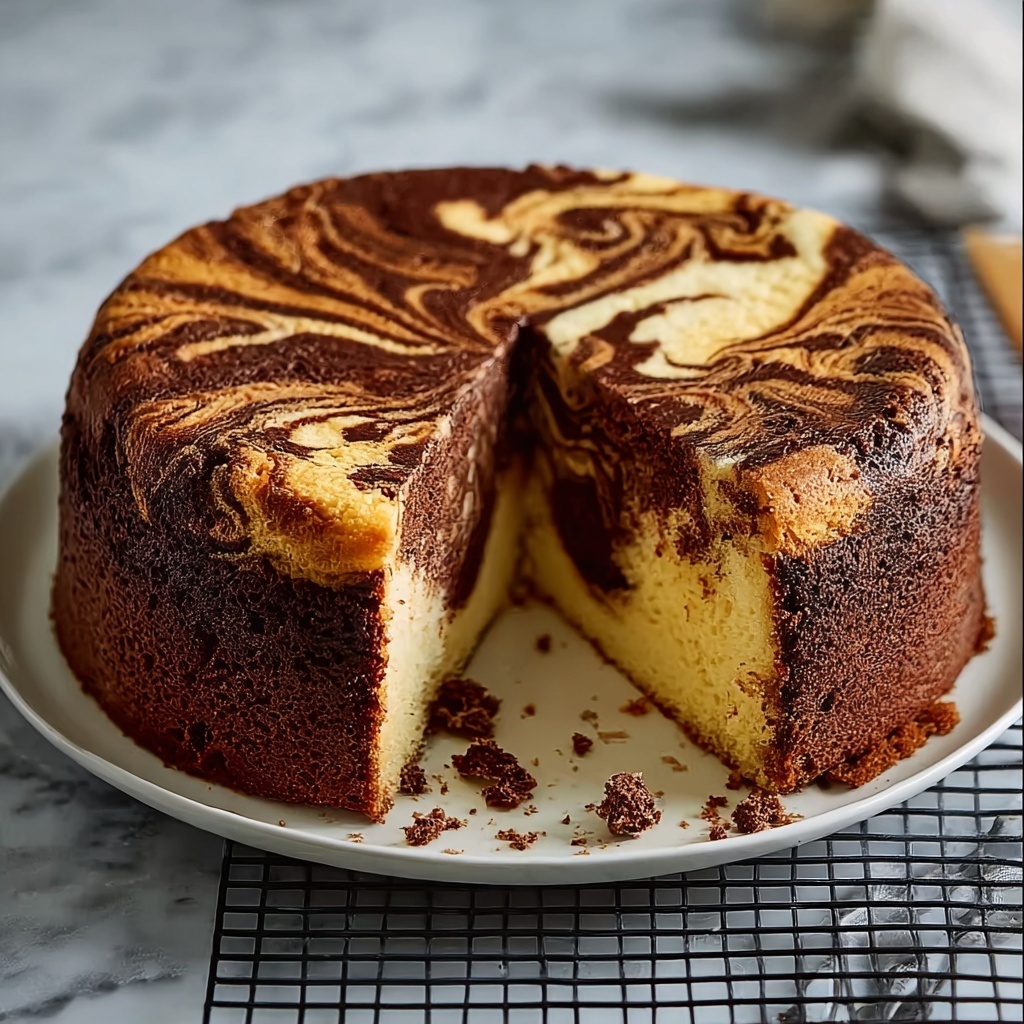
There’s something truly comforting and nostalgic about a Classic Marble Cake Recipe. It’s that perfect harmony of vanilla and chocolate batters twirling together, baked into a moist and tender cake that sings with simple, familiar flavors. Whether you’re baking for a casual family afternoon or a cozy gathering with friends, this cake never fails to impress with its beautiful marbled effect and delightful taste. Let me walk you through this timeless treat that combines ease and elegance in every bite.
Ingredients You’ll Need
Getting to know the ingredients for this Classic Marble Cake Recipe is like meeting old friends who each bring something special to the party. These staples come together effortlessly, ensuring your cake has just the right texture, flavor, and color contrast.
- 2 cups all-purpose flour: The foundation of the cake’s structure, providing softness and crumb.
- 1 cup white sugar: Adds just the right sweetness and helps create a tender crumb.
- 1 cup milk: Contributes moisture and helps dissolve the sugar and flour evenly.
- 2 large eggs: Bind the ingredients and add richness and stability.
- ½ cup butter, softened: Brings buttery flavor and keeps the cake moist.
- 2 teaspoons baking powder: The leavening agent that makes your cake light and fluffy.
- 1 teaspoon vanilla extract: Infuses the vanilla batter with warm aroma and flavor.
- ½ teaspoon salt: Balances sweetness and enhances all the other flavors.
- 2 tablespoons unsweetened cocoa powder: The star of the chocolate swirl, adding richness and that striking dark color.
How to Make Classic Marble Cake Recipe
Step 1: Prepare Your Oven and Pan
Start by preheating your oven to 350 degrees Fahrenheit (175 degrees Celsius). While it warms up, grease and flour a 9-inch round pan to make sure your cake slides out perfectly once baked. This little step sets you up for success right from the start.
Step 2: Combine the Basic Ingredients
In a large bowl, add your flour, sugar, milk, eggs, softened butter, baking powder, vanilla extract, and salt. Give everything a gentle mix to evenly incorporate the dry and wet components, so the batter starts coming together smoothly.
Step 3: Beat to Perfection
Now for some arm work or the electric mixer! Beat the mixture on medium speed for about two minutes. This step ensures the batter is silky smooth with the perfect consistency, which will give the cake its tender crumb once baked.
Step 4: Separate Your Batter
Reserve about ¾ cup of the batter for the chocolate portion and pour the rest into your prepared pan. This division is crucial for creating those beautiful marbled swirls loading your cake with flavor and visual appeal.
Step 5: Add Cocoa Powder
Stir the cocoa powder into your reserved batter until it’s evenly colored and smooth. The rich chocolate batter will contrast beautifully against the vanilla base, making every slice an eye-catching delight.
Step 6: Create the Marble Effect
Drop large spoonfuls of the chocolate batter over the vanilla batter in the pan. Grab a knife and gently swirl through both batters just enough to create that classic marbled look – don’t overmix or you’ll lose the distinct patterns.
Step 7: Bake Until Done
Pop your pan into the oven and bake for about 30 to 35 minutes. You’ll know it’s ready when a toothpick inserted in the center comes out clean, ensuring the cake is cooked perfectly through without a hint of raw batter.
Step 8: Cool and Serve
Allow the cake to cool briefly on a wire rack, then carefully invert it onto a serving plate or a cooling rack. Let the cake cool completely to firm up so slices cut cleanly, making every piece picture-perfect and ready to enjoy.
How to Serve Classic Marble Cake Recipe

Garnishes
While the marble cake looks stunning on its own, a light dusting of powdered sugar or a drizzle of chocolate glaze can add an elegant finishing touch. Fresh berries or a dollop of whipped cream also bring a lovely contrast, making each bite feel like a little celebration.
Side Dishes
Pair this cake with a scoop of vanilla ice cream, a steaming cup of coffee, or a glass of cold milk. These simple sides complement the moist, flavorful cake and make your serving feel complete without overpowering it.
Creative Ways to Present
Want to impress guests? Serve the cake in layered slices alongside fresh fruit or layer slices between whipped cream and berries for an easy trifle. You can also cut it into bite-sized cubes for elegant dessert skewers, personalized with tiny flags or edible flowers.
Make Ahead and Storage
Storing Leftovers
Wrap leftover cake tightly in plastic wrap or store it in an airtight container to keep it moist. It will stay fresh on the counter for 2 to 3 days or refrigerated for up to a week, making it easy to enjoy over several days.
Freezing
This Classic Marble Cake Recipe freezes beautifully. Slice the cooled cake and place pieces in a freezer-safe container, separating layers with parchment paper. It can be frozen for up to three months and thawed overnight in the fridge for quick treats anytime.
Reheating
To bring back that freshly baked warmth, heat slices gently in the microwave for 15 to 20 seconds or pop them in a warm oven for a few minutes. The cake’s tender crumb and rich flavors will be just as delightful as the first day.
FAQs
Can I use oil instead of butter in the Classic Marble Cake Recipe?
While butter adds that signature rich flavor and texture, you can substitute oil for a slightly different but still moist result. Keep in mind the taste and crumb will be a bit lighter and less buttery.
Is it okay to use whole wheat flour instead of all-purpose?
You could substitute whole wheat flour, but it will change the texture and make the cake denser. For the best results and that classic tender crumb, stick to all-purpose flour.
How do I make the marble effect more pronounced?
The key is to swirl just enough to create visible streaks of chocolate and vanilla without blending them completely. Use a knife or skewer to gently twirl the batters in a swirling motion.
Can I make this cake dairy-free?
Yes! Swap the milk for plant-based milk like almond or oat milk, and use dairy-free butter substitutes. The cake will still be delicious though the flavor might slightly differ from the classic version.
How long does the cake stay fresh after baking?
Stored properly, this cake stays fresh at room temperature for 2 to 3 days and up to a week in the refrigerator. Always keep it wrapped well to prevent drying out.
Final Thoughts
If you’re looking for a dessert that’s both visually striking and irresistibly delicious, you’ve got to try this Classic Marble Cake Recipe. Its simple ingredients and straightforward steps come together to create a cake that’s tender, flavorful, and perfect for any occasion. Baking this cake is a wonderful way to bring a warm, homemade touch to your kitchen—so go ahead, swirl that batter, crank up the oven, and make some memories with each slice!
Print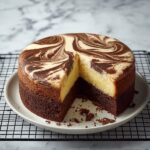
Classic Marble Cake Recipe
- Prep Time: 15 minutes
- Cook Time: 35 minutes
- Total Time: 50 minutes
- Yield: 1 9-inch cake (about 8 servings)
- Category: Dessert
- Method: Baking
- Cuisine: American
Description
This Classic Marble Cake recipe combines rich chocolate and fluffy vanilla batters swirled together to create a beautifully marbled dessert. Perfectly moist and tender, this cake is an inviting choice for tea time or special occasions.
Ingredients
Dry Ingredients
- 2 cups all-purpose flour
- 2 teaspoons baking powder
- ½ teaspoon salt
- 2 tablespoons unsweetened cocoa powder
Wet Ingredients
- 1 cup white sugar
- 1 cup milk
- 2 large eggs
- ½ cup butter, softened
- 1 teaspoon vanilla extract
Instructions
- Preheat and Prepare Pan: Preheat your oven to 350°F (175°C). Grease and flour a 9-inch round cake pan to prevent sticking.
- Combine Base Ingredients: In a large bowl, combine the all-purpose flour, sugar, milk, eggs, softened butter, baking powder, vanilla extract, and salt. Mix slowly using a spoon or spatula to just moisten the ingredients.
- Beat Batter: Using an electric mixer, beat the mixture on medium speed for about 2 minutes until the batter becomes smooth and creamy.
- Separate Batter: Reserve ¾ cup of the batter and set it aside. Pour the remaining batter into the prepared cake pan.
- Make Chocolate Batter: Stir the unsweetened cocoa powder into the reserved batter until the color is uniform and well blended.
- Create Marble Effect: Drop large spoonfuls of the chocolate batter on top of the vanilla batter in the pan. Use a knife or skewer to gently swirl the chocolate and vanilla batters together to achieve a marbled appearance.
- Bake: Bake the cake in the preheated oven for 30 to 35 minutes, or until a toothpick inserted into the center comes out clean.
- Cool and Serve: Remove the cake from the oven and cool it briefly on a wire rack. Then carefully invert the cake onto a serving plate or cooling rack and let it cool completely before slicing and serving.
Notes
- Ensure the butter is softened to room temperature to create a smooth batter without lumps.
- The swirling step is key to creating the classic marble pattern, but avoid overmixing to keep distinct streaks.
- Use a toothpick test to check doneness to avoid overbaking and drying out the cake.
- For a richer chocolate flavor, you can use Dutch-processed cocoa powder in place of regular unsweetened cocoa powder.
- Allow the cake to cool completely before cutting to ensure clean slices and prevent crumbling.


