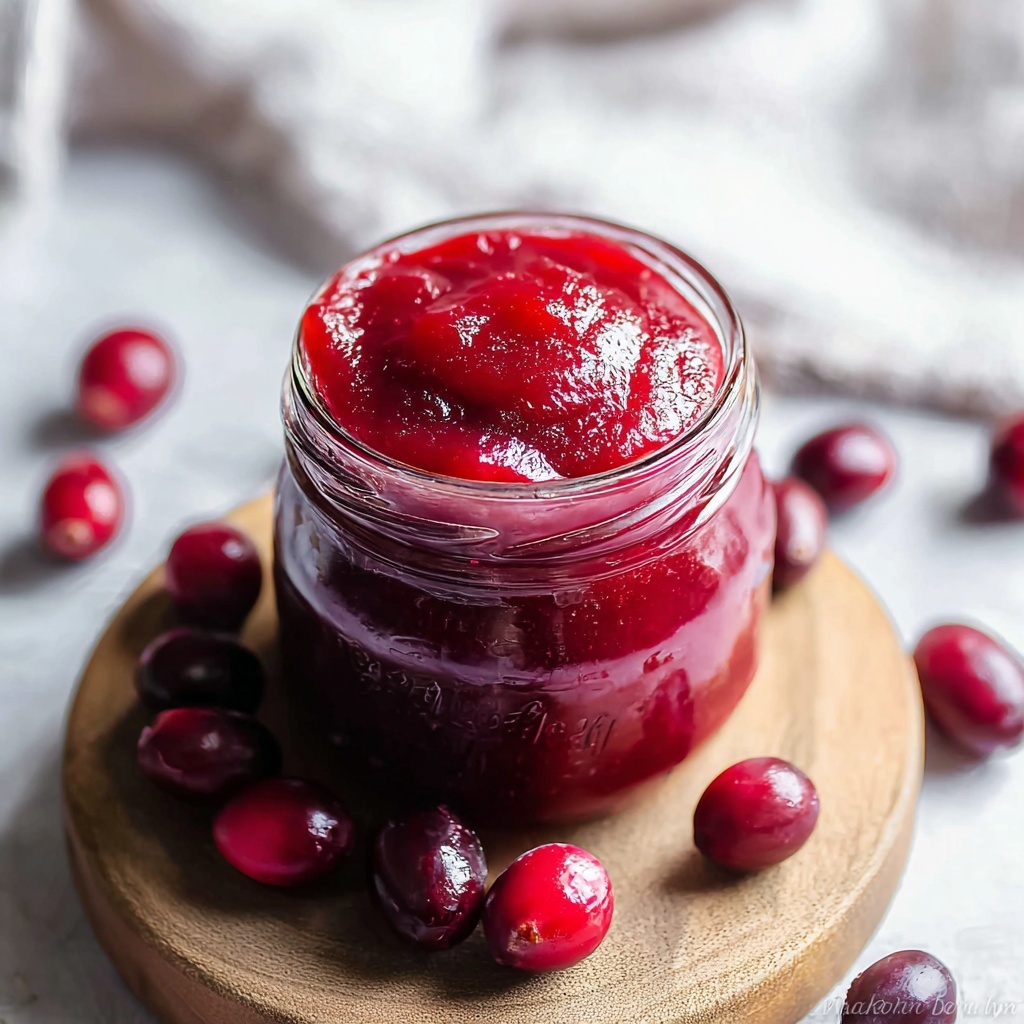
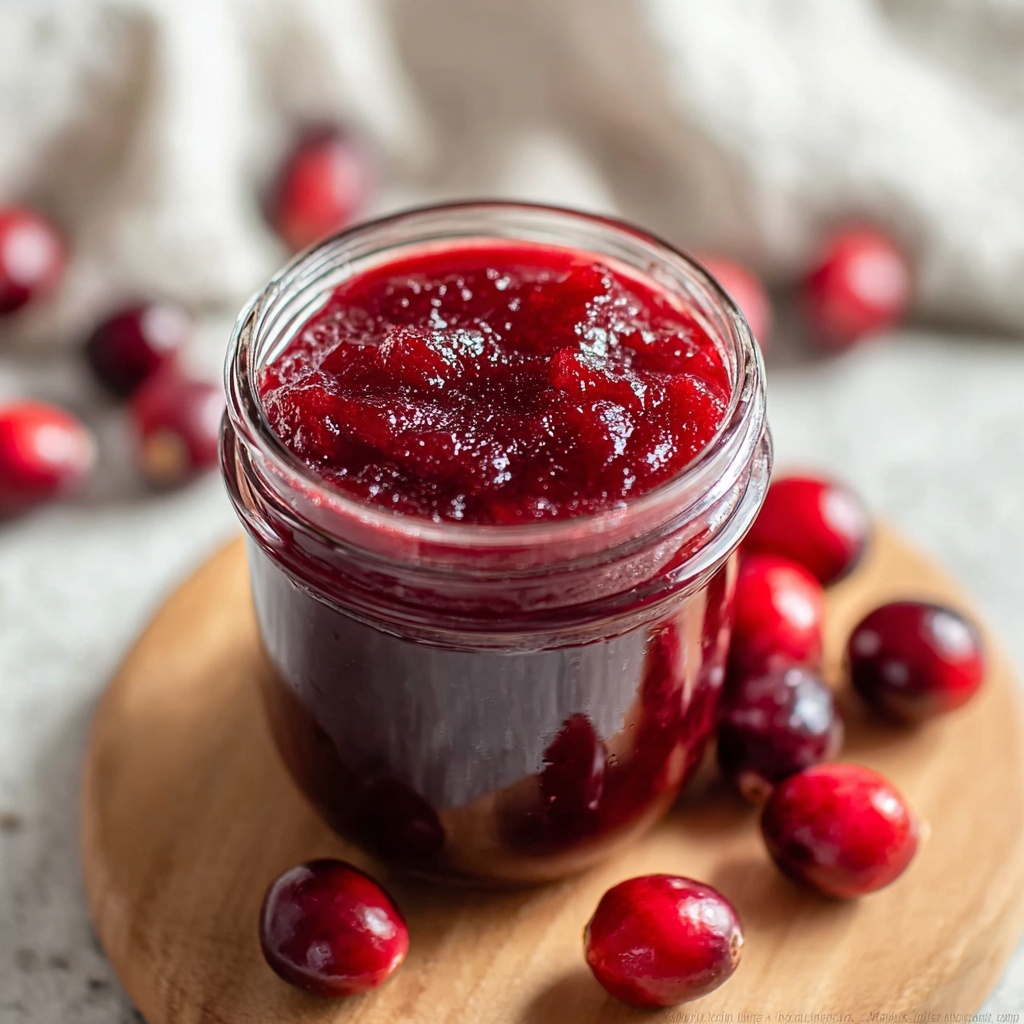
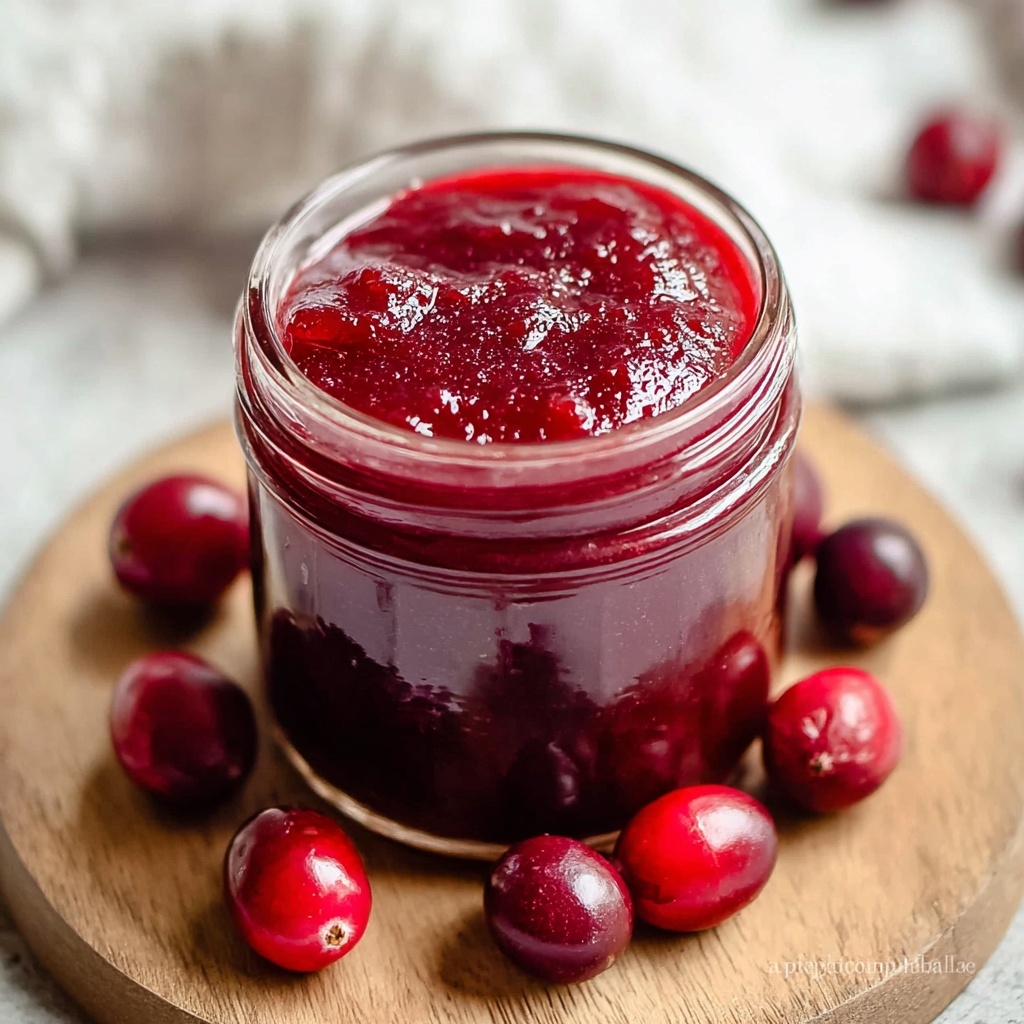
There’s something truly magical about homemade preserves, and this Cherry Jam Recipe is no exception. Bursting with vibrant color and a natural, sweet-tart punch from fresh cherries, this jam transforms simple ingredients into a delightful spread that brightens your breakfast or snacks. Whether you’re a jam connoisseur or trying your hand at preserves for the first time, this recipe brings the taste of summer right to your kitchen, making each spoonful feel like a little celebration.
Ingredients You’ll Need
To create this luscious Cherry Jam Recipe, you’ll need just a handful of straightforward ingredients, each playing a crucial role in building the perfect texture and flavor. Fresh cherries provide the juicy fruit base, sugar sweetens and acts as a natural preservative, lemon juice adds brightness and helps with set, and fruit pectin ensures the jam thickens beautifully.
- 4 cups fresh cherries (pitted): Choose ripe, firm cherries for the freshest flavor and deep red color.
- 1 ½ cups granulated sugar: Sweetens the jam and balances the tartness of the cherries.
- 2 tablespoons lemon juice (freshly squeezed): Adds a zesty brightness and helps the jam set properly.
- 1 package (1.75 oz) fruit pectin: Essential for giving your jam that perfect spreadable consistency.
How to Make Cherry Jam Recipe
Step 1: Prepare the Cherries
Start by carefully washing your cherries and removing the pits. You can use a cherry pitter for convenience or halve them with a knife. This step is important because it releases the natural juices and ensures smooth jam without pits.
Step 2: Combine and Macerate
Place the pitted cherries in a large pot and add the sugar along with the freshly squeezed lemon juice. Stir everything well, then let the mixture rest for about 30 minutes. This resting period helps the sugar dissolve and draws out even more juice from the fruit, setting the stage for a luscious jam.
Step 3: Heat the Mixture
Next, place the pot over medium heat and slowly heat the cherry mixture, stirring often. As it warms up, the sugar will dissolve completely, and the cherries will begin to soften. Keep an eye on it until it just starts to boil—that’s when the magic truly begins.
Step 4: Add the Fruit Pectin
Once the mixture reaches a boil, stir in the fruit pectin according to the package instructions. The pectin is key to achieving the jam’s signature thickness, so it’s important to mix it well and bring the mixture back to a rolling boil. Maintaining this boil for the recommended time ensures your jam will set perfectly.
Step 5: Test for Doneness
To check if your jam is ready, use the cold plate test: place a small spoonful on a chilled plate and push it gently with your finger. If the surface wrinkles and doesn’t run, congratulations! Your jam is set. If not, keep boiling for a bit longer and test again.
Step 6: Jar and Process
Carefully ladle the hot cherry jam into sterilized jars, seal them tightly, and process the jars in boiling water for 5 to 10 minutes. This ensures your jam stays fresh and safe to enjoy for months. Let the jars cool completely before storing.
How to Serve Cherry Jam Recipe
Garnishes
A sprinkle of toasted almond slivers or a few fresh mint leaves can add an exciting textural contrast and a pop of color when serving your cherry jam. These simple garnishes elevate the experience without overpowering the vibrant flavor.
Side Dishes
Cherry jam is a fantastic companion to many dishes. Spread it on warm buttered toast, swirl it into yogurt or oatmeal, or enjoy it alongside creamy cheeses and crusty bread for a delightful snack or appetizer.
Creative Ways to Present
Elevate your Cherry Jam Recipe by incorporating it into desserts like thumbprint cookies, layering it in parfaits, or even glazing roasted meats such as pork or chicken for a mouthwatering sweet-and-savory twist.
Make Ahead and Storage
Storing Leftovers
If you have any leftover jam after opening, store it in the refrigerator in a tightly sealed jar. It should stay fresh and delicious for up to three weeks, giving you plenty of time to enjoy it in various meals and treats.
Freezing
You can also freeze cherry jam for longer storage. Use freezer-safe containers, leaving some space at the top for expansion. Frozen jam maintains its flavor well and can be thawed in the refrigerator when you’re ready to use it.
Reheating
If your jam has thickened too much or crystallized slightly after refrigeration or freezing, simply warm it gently on the stove or in the microwave, stirring occasionally to return it to the perfect spreadable consistency.
FAQs
Can I use frozen cherries for this Cherry Jam Recipe?
Absolutely! Frozen cherries work well if fresh ones aren’t in season. Just be sure to thaw and drain excess liquid before starting the recipe to maintain the right consistency.
Do I need to use lemon juice in the recipe?
Yes, lemon juice plays an important role in balancing the sweetness and helping the jam set properly. Freshly squeezed is best for flavor and effectiveness.
What alternatives are there to granulated sugar?
You can experiment with natural sweeteners like honey or maple syrup, but keep in mind that they may affect the texture and setting properties, so adjustments might be necessary.
How long does homemade cherry jam last?
When properly canned and sealed, homemade cherry jam can last up to a year stored in a cool, dark place. Once opened, refrigerate and use within three weeks for the best quality.
Can I make this jam without pectin?
It’s possible to make cherry jam without pectin, but it will require longer cooking times and may have a softer set. Pectin simplifies the process and guarantees that perfect jam texture.
Final Thoughts
This Cherry Jam Recipe is one of those joyful kitchen projects that rewards you with sweet, tangy delights perfect for any occasion. It’s simple, satisfying, and packed with the fresh flavor of real cherries. I hope you give it a try and discover just how easy and fun making your own preserves can be—your taste buds will thank you!
Print
Cherry Jam Recipe
- Prep Time: 10 minutes
- Cook Time: 35 minutes
- Total Time: 45 minutes
- Yield: Approximately 2 half-pint jars (about 2 cups) of cherry jam
- Category: Jam/Preserve
- Method: Stovetop
- Cuisine: American
Description
This homemade cherry jam recipe is a sweet and tangy preserve made from fresh cherries, sugar, lemon juice, and fruit pectin. It’s perfect for spreading on toast or adding to desserts and canning for long-term storage.
Ingredients
Ingredients
- 4 cups fresh cherries, pitted
- 1 ½ cups granulated sugar
- 2 tablespoons freshly squeezed lemon juice
- 1 package (1.75 oz) fruit pectin
Instructions
- Prepare the cherries: Wash and pit the cherries using a cherry pitter or by cutting them in half carefully to remove the pits.
- Combine ingredients: In a large pot, mix the pitted cherries, granulated sugar, and freshly squeezed lemon juice. Stir well and let the mixture sit for 30 minutes to allow the cherries to release their juices.
- Heat the mixture: Place the pot over medium heat and heat the cherry mixture until it begins to boil, stirring frequently to prevent sticking or burning.
- Add pectin and boil: Once boiling, stir in the fruit pectin according to the package instructions. Continue cooking the mixture until it reaches a rolling boil again.
- Test for doneness: Use the cold plate test by placing a small amount of jam on a cold plate and pushing it with your finger. If it wrinkles, the jam is ready.
- Jar and process: Ladle the hot jam into sterilized jars and seal them tightly. Process the jars in a boiling water bath for 5-10 minutes to ensure preservation.
Notes
- Use fresh, ripe cherries for the best flavor and natural sweetness.
- Ensure jars and lids are properly sterilized to prevent spoilage.
- The lemon juice not only adds brightness but also helps with the setting of the jam.
- Adjust sugar quantity according to taste and sweetness of cherries.
- Store unopened jars in a cool, dark place. Refrigerate after opening.
