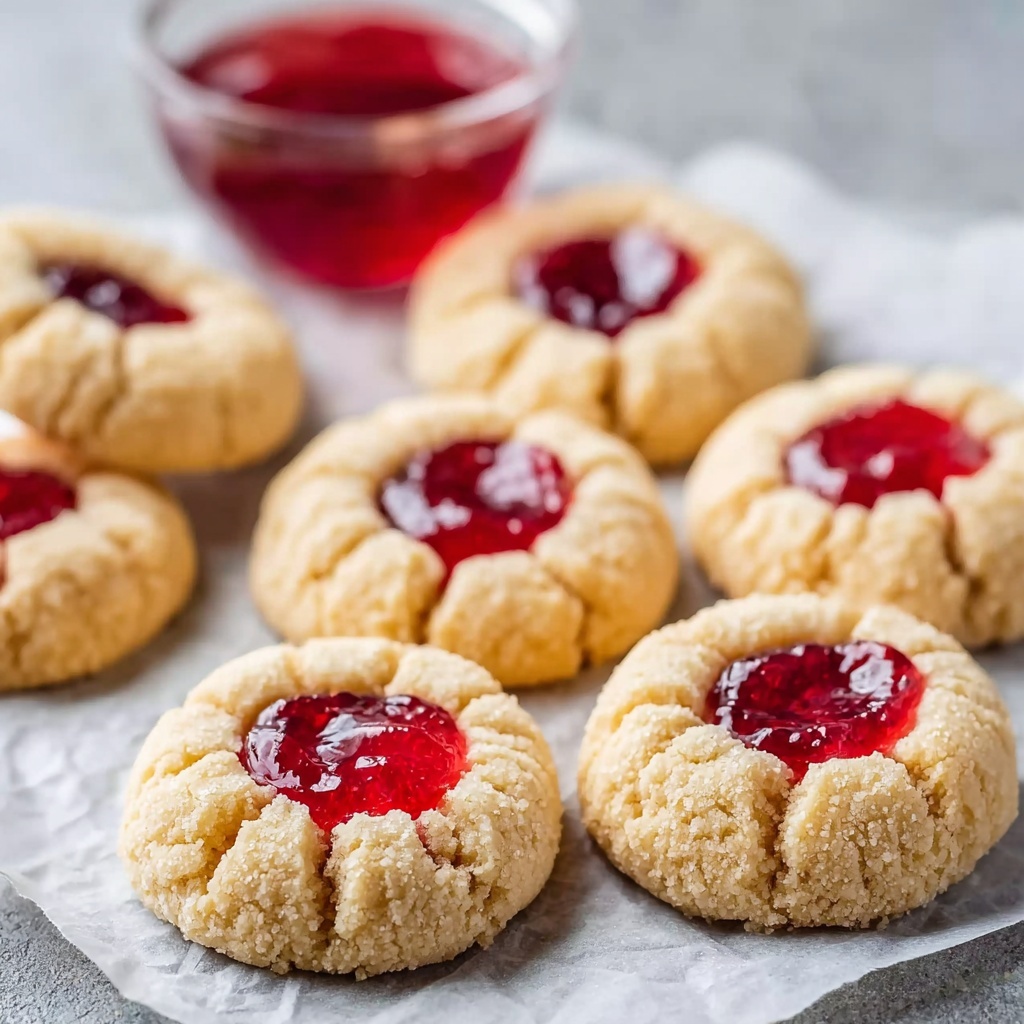
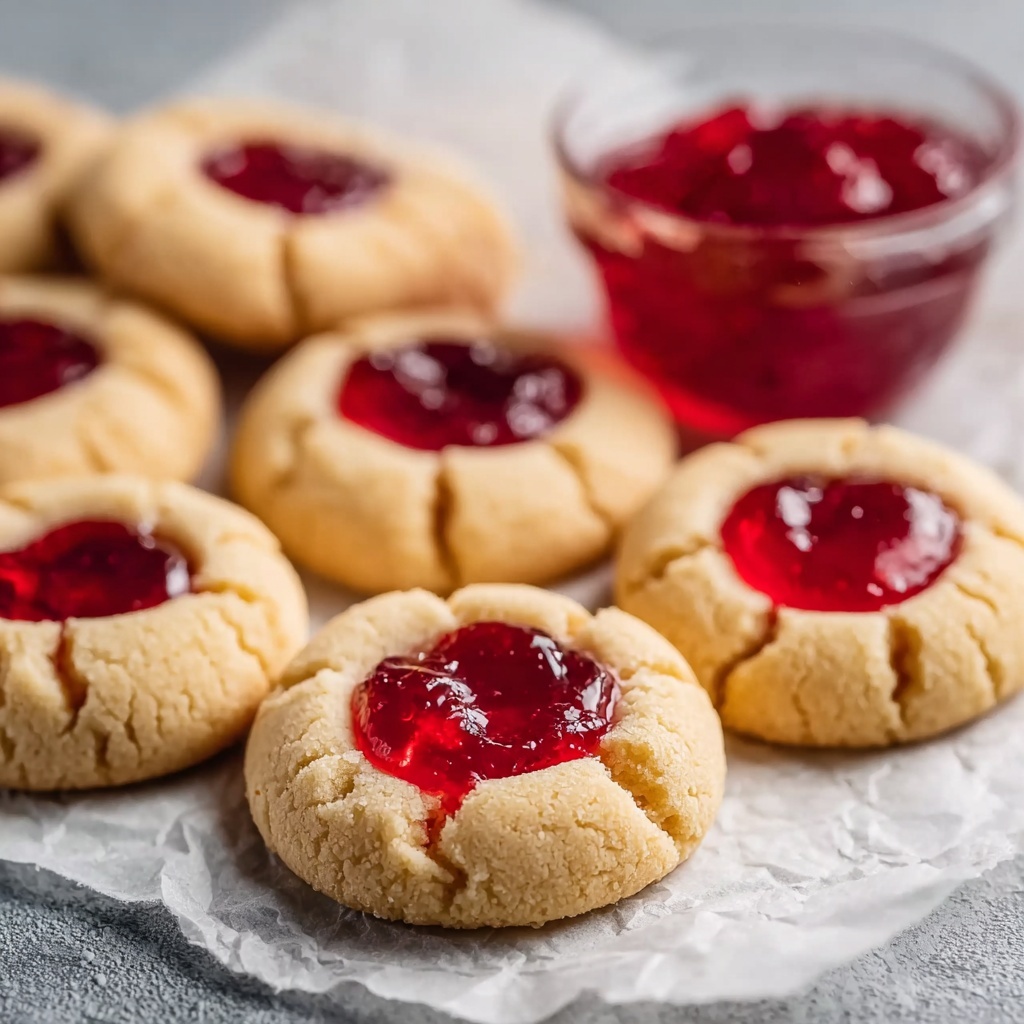
If you’re searching for a festive treat that feels like a warm hug in cookie form, look no further than this Soft Christmas Thumbprint Cookies with Jam Centers Recipe. These delightful cookies marry a tender, buttery base with vibrant jam nestled right in the center, creating a perfect balance of soft texture and fruity sweetness. Whether you’re baking for holiday gatherings or simply to brighten a chilly winter day, these thumbprint cookies stand out with their melt-in-your-mouth softness and charming jewel-like jam centers that bring joy to every bite.

Ingredients You’ll Need
Each ingredient in this Soft Christmas Thumbprint Cookies with Jam Centers Recipe plays a starring role in crafting cookies that are soft, flavorful, and irresistibly pretty. These simple pantry staples come together to create that tender crumb and luscious jam contrast that make these cookies so memorable.
- Unsalted butter (1 cup/226g): Provides a rich, creamy base that ensures softness and a melt-in-your-mouth texture.
- Cream cheese (4 oz, softened): Adds extra tenderness and a slight tang that balances the sweetness beautifully.
- Granulated sugar (2/3 cup): Sweetens just right without overpowering the delicate flavors.
- Large egg yolk (1): Locks in moisture and enriches the dough’s texture.
- Vanilla extract (1 teaspoon): Infuses warmth and enhances all the cookie’s flavors.
- Almond extract (1/4 teaspoon, optional): Adds a subtle, nutty depth that elevates the taste.
- All-purpose flour (2 cups): The foundation that gives structure while keeping the cookies tender.
- Salt (1/2 teaspoon): Balances sweetness and sharpens flavor.
- Baking powder (1/4 teaspoon): Provides gentle lift without sacrificing softness.
- Jam or preserves (1/2 cup): The jewel-toned center—choose raspberry, strawberry, or apricot for vibrant flavor and color.
- Powdered sugar (optional): A dusting to add a festive, snowy finish.
How to Make Soft Christmas Thumbprint Cookies with Jam Centers Recipe
Step 1: Prepare Your Workspace
Kick off by preheating your oven to 350°F (175°C) and lining two large baking sheets with parchment paper. This is the perfect baking temperature to keep your cookies soft and golden on the bottom. Make sure all your ingredients are measured and ready—this preparation makes the entire baking process smooth and fun.
Step 2: Create the Creamy Base
In a large bowl, use an electric mixer to beat the softened butter and cream cheese together until light and fluffy—about 3 to 4 minutes. This is where the magic starts because this creamy mix is the key to the tender crumb your cookies will have. Add the granulated sugar and keep beating until the mixture is nicely combined and slightly puffed up.
Step 3: Add the Flavor Elements
Mix in the egg yolk, vanilla extract, and almond extract (if you’re using it) until the blend becomes smooth and creamy. These flavors layer in richness and warmth, turning simple thumbprint cookies into a sublime holiday treat.
Step 4: Combine the Dry Ingredients
In a separate bowl, whisk together the flour, salt, and baking powder. Then, gradually add this to your creamy mixture, beating on low speed just until the dough comes together. Be gentle here—overmixing can toughen your cookies, and we want them soft and tender.
Step 5: Chill the Dough
Wrap your cookie dough in plastic wrap and pop it into the fridge for at least 30 minutes. This chilling step is essential—it firms up the dough for easier handling and helps the cookies hold their shape beautifully during baking.
Step 6: Shape and Create Thumbprints
Once chilled, roll the dough into 1.5-inch balls and place them about 2 inches apart on the lined baking sheets. Press your thumb or the back of a small spoon into the center of each ball to create indentations that will hold your jam. Make sure your thumbprints are deep enough to cradle the jam without piercing through the bottom.
Step 7: Fill with Jam
Spoon about half a teaspoon of your chosen jam into each indentation carefully. Don’t overfill because the jam bubbles up as the cookies bake. This colorful jam becomes the star, offering a jewel-like appearance that makes these cookies so festive.
Step 8: Bake to Perfection
Bake your cookies for 12 to 15 minutes, watching for set edges and lightly golden bottoms. The tops should remain pale, keeping that soft texture intact while the jam bubbles gently—an inviting sign that these cookies are just about ready to be enjoyed.
Step 9: Cool and Finish
Let your cookies cool on the baking sheet for five minutes before transferring them to a wire rack. This resting time helps them solidify so they don’t break when warm. When fully cooled, dust with powdered sugar if you want to add an extra touch of holiday sparkle.
How to Serve Soft Christmas Thumbprint Cookies with Jam Centers Recipe
Garnishes
Sprinkling powdered sugar over these cookies adds a snowy look that instantly ups the holiday charm. If you want, fresh mint leaves or tiny edible silver balls can be added for extra festive flair and a pop of color.
Side Dishes
Serve these delightful thumbprint cookies alongside a hot cup of cocoa or mulled cider to balance the fruity sweetness with cozy warmth. They also pair wonderfully with a cheese platter—soft cheeses like Brie create a sophisticated snack board for holiday visitors.
Creative Ways to Present
Arrange your Soft Christmas Thumbprint Cookies with Jam Centers Recipe on a tiered serving tray sprinkled with fresh cranberries and pine sprigs for a natural, festive look. Wrapping them individually in clear cellophane with a red ribbon makes them perfect for gifting or party favors.
Make Ahead and Storage
Storing Leftovers
Keep your thumbprint cookies fresh by storing them in an airtight container at room temperature for up to 4 days. Place parchment paper between layers to prevent sticking and maintain their soft texture and shine.
Freezing
You can freeze these cookies unbaked or baked. For unbaked dough, shape and press thumbprints, then freeze on a tray before transferring to a freezer bag. Bake from frozen, adding a couple of extra minutes. For baked cookies, wrap them tightly and freeze for up to 3 months; thaw at room temperature before serving.
Reheating
If you want to warm up your cookies, pop them in a preheated oven at 300°F (150°C) for about 5 minutes. This brings back the softness and freshly-baked warmth without drying them out.
FAQs
Can I use different types of jam for this recipe?
Absolutely! Raspberry, strawberry, and apricot jams are traditional favorites, but you can get creative with any flavor you love—blueberry, cherry, or even marmalade add unique twists to your thumbprint cookies.
Why do I need to chill the dough?
Chilling firms up the dough, making it easier to roll and shape. It also helps the cookies keep their shape during baking, ensuring those perfect jam-filled indentations and soft texture.
Can I make these cookies gluten-free?
Yes! Substitute the all-purpose flour with a gluten-free baking mix designed for cookies. Keep an eye on the dough’s consistency—it might need a touch of extra moisture or flour depending on the blend.
Is it okay to skip the cream cheese?
The cream cheese is what gives these thumbprint cookies their signature softness and slight tang. While you can skip it, expect a firmer cookie that’s less tender. For best results, it’s worth including!
How long do these cookies keep fresh?
Stored properly in an airtight container, these cookies stay fresh and soft for up to 4 days at room temperature. After that, they may start to dry out but can be refreshed slightly in the oven.
Final Thoughts
Making this Soft Christmas Thumbprint Cookies with Jam Centers Recipe is like inviting a little holiday happiness into your kitchen. They are wonderfully easy to make, endlessly customizable, and always impress with their delicate texture and jewel-like jam centers. I promise, once you bake these beauties, they’ll become a beloved holiday tradition you’ll look forward to year after year. Grab your mixing bowl, pick your favorite jam, and get ready to bake up some sweet memories!
Print
Soft Christmas Thumbprint Cookies with Jam Centers Recipe
- Prep Time: 20 minutes
- Cook Time: 15 minutes
- Total Time: 1 hour 5 minutes
- Yield: 15 servings
- Category: Dessert
- Method: Baking
- Cuisine: American
Description
These Soft Christmas Thumbprint Cookies feature a tender, creamy base made with butter and cream cheese, filled with vibrant jam centers. Perfect for the holiday season, these cookies boast a delicate texture and a beautiful jeweled appearance, finished with a dusting of powdered sugar for an elegant touch.
Ingredients
Cookie Dough
- 1 cup (226g) unsalted butter, room temperature
- 4 oz cream cheese, softened
- 2/3 cup granulated sugar
- 1 large egg yolk
- 1 teaspoon vanilla extract
- 1/4 teaspoon almond extract (optional)
- 2 cups all-purpose flour
- 1/2 teaspoon salt
- 1/4 teaspoon baking powder
Filling & Topping
- 1/2 cup high-quality jam or preserves (raspberry, strawberry, or apricot recommended)
- Powdered sugar for dusting (optional)
Instructions
- Prepare Your Workspace: Preheat your oven to 350°F (175°C) and line two large baking sheets with parchment paper. Organize all ingredients and tools to ensure a smooth baking process.
- Create the Creamy Base: In a large mixing bowl, cream together the softened butter and cream cheese using an electric mixer for 3-4 minutes until light and fluffy. Add the granulated sugar and beat until combined and slightly increased in volume.
- Add the Flavor Elements: Beat in the egg yolk, vanilla extract, and almond extract (if using) until fully incorporated and smooth.
- Combine the Dry Ingredients: In a separate bowl, whisk together the flour, salt, and baking powder. Gradually add this to the wet mixture, mixing on low speed just until the dough forms. Avoid overmixing to keep the cookies soft.
- Chill the Dough: Wrap the dough in plastic wrap and refrigerate for at least 30 minutes to firm up and maintain shape during baking.
- Shape and Create Thumbprints: Roll dough into 1.5-inch balls and place 2 inches apart on prepared baking sheets. Use your thumb or back of a small spoon to create indentations in each ball deep enough for jam but not breaking through the base.
- Fill with Jam: Spoon about 1/2 teaspoon of jam into each indentation, being careful not to overfill to prevent bubbling over.
- Bake to Perfection: Bake for 12-15 minutes until edges set and bottoms are lightly golden; tops should remain pale, ensuring a soft texture, with jam slightly bubbling.
- Cool and Finish: Let cookies cool on the baking sheet for 5 minutes before transferring to a wire rack. Once fully cooled, dust with powdered sugar if desired for a festive look.
Notes
- Optionally add almond extract for a subtle nutty flavor that enhances the cookie’s richness.
- Use high-quality jam or preserves for the best flavor and vibrant color.
- Do not overmix the dough to maintain the cookies’ soft texture.
- Chilling the dough is crucial for easier handling and to help the cookies keep their shape.
- Indentations should be deep enough to hold jam but not too deep to go through the cookie base.
- Allow cookies to cool properly before dusting with powdered sugar to prevent melting.

