
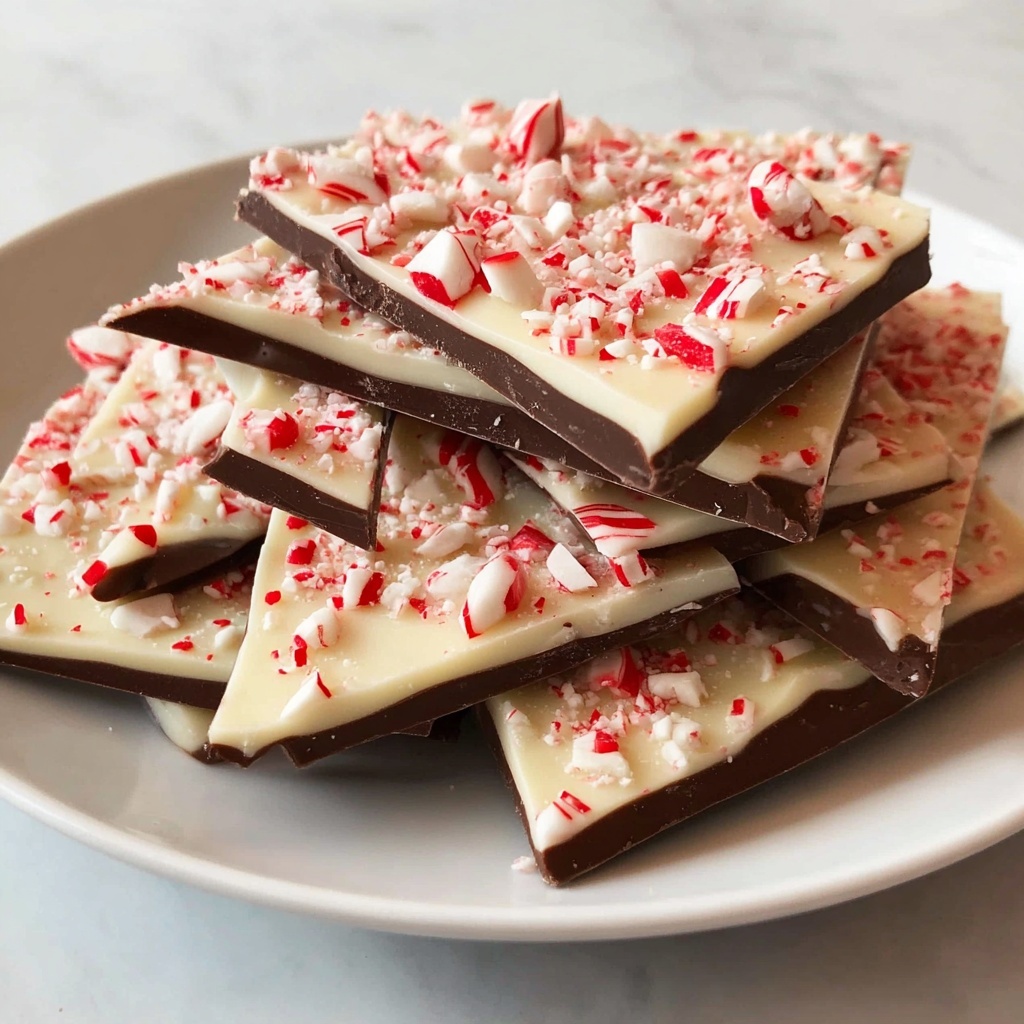
If you’re looking for a festive treat that blends rich chocolate with refreshing mint, this Peppermint Bark Recipe is an absolute must-try. Imagine layers of smooth dark chocolate topped with creamy white chocolate, all sprinkled generously with crunchy peppermint candies — it’s a holiday classic that never goes out of style. Perfect for gifting, snacking, or elevating your dessert table, this recipe combines simple ingredients in a way that feels both indulgent and wonderfully homemade.
Ingredients You’ll Need
Getting started with this Peppermint Bark Recipe couldn’t be easier because the ingredient list is straightforward yet essential. Each component plays a special role: the dark chocolate forms a rich base, the white chocolate brings smooth sweetness, and the peppermint pieces add that unmistakable holiday zing and crunch.
- 12 oz high-quality dark chocolate (60-70% cacao): A deep, slightly bitter base that balances the sweetness perfectly.
- 1 teaspoon vanilla extract: Enhances the chocolate’s flavor without overpowering it.
- 12 oz white chocolate: Smooth and creamy, providing a beautiful contrast to the dark layer.
- ½ teaspoon peppermint extract: Adds refreshing mint flavor, adjustable to your liking.
- 6-8 candy canes or peppermint candies, crushed: Gives the bark its signature festive crunch and color.
- Dairy-free option: Swap to dairy-free chocolate chips for a vegan-friendly version.
- Sugar-free version: Use sugar-free chocolate alternatives to fit dietary needs.
- Flavor variation: Try ½ teaspoon orange or almond extract for a unique twist.
- Crunchy addition: Crushed toffee or chopped nuts blend well for extra texture.
How to Make Peppermint Bark Recipe
Step 1: Prepare Your Workspace
Begin by lining a 9×13-inch baking sheet with parchment paper. Leaving a bit of parchment hanging off the edges is a clever trick to easily lift your bark out once it’s formed. Keeping your workspace completely dry and clean is very important since moisture can cause the chocolate to seize up and ruin the smooth texture.
Step 2: Melt the Dark Chocolate Base
Place the chopped dark chocolate into a microwave-safe bowl and heat it in 30-second bursts, stirring in between to ensure it melts evenly without burning. Once mostly melted, keep stirring until all lumps disappear and the chocolate is glossy. Blend in the vanilla extract for a subtle aromatic lift. If your chocolate feels too thick, don’t hesitate to add a tiny bit of coconut oil for that silky finish.
Step 3: Spread the First Layer
Pour the melted dark chocolate onto your lined baking sheet, spreading it evenly with an offset spatula or the back of a spoon to about a quarter-inch thickness. Aim for a neat rectangle rather than filling the entire pan to keep the bark at the perfect thickness. Pop it into the fridge for 20-25 minutes to firm up just enough to support the next layer.
Step 4: Prepare the Peppermint Topping
While the dark chocolate chills, gently crush your candy canes in a bag. Having different sized pieces — some finely powdered, others chunkier — gives your bark a beautiful look and varying textures in every bite. It’s a simple step that packs a big punch visually and flavor-wise.
Step 5: Melt and Flavor the White Chocolate
Just like before, melt the white chocolate slowly in the microwave, stirring often to avoid overheating. White chocolate is more delicate, so take your time. Stir in the peppermint extract, then taste to adjust the intensity so it complements but doesn’t overshadow the dark layer.
Step 6: Create the Top Layer
Remove the dark chocolate base from the fridge, and quickly spread the white chocolate evenly over it. The warmth from the white chocolate slightly softens the dark chocolate underneath, helping these two layers meld into one irresistible bark.
Step 7: Add the Finishing Touch
Sprinkle the crushed candy canes immediately on top while the white chocolate is still soft, pressing gently to make sure the larger pieces stick well. Don’t wait too long, as the peppermint won’t adhere once the white chocolate begins to set. Whether evenly scattered or rustically placed, this final touch makes the dessert pop.
Step 8: Set and Break Into Pieces
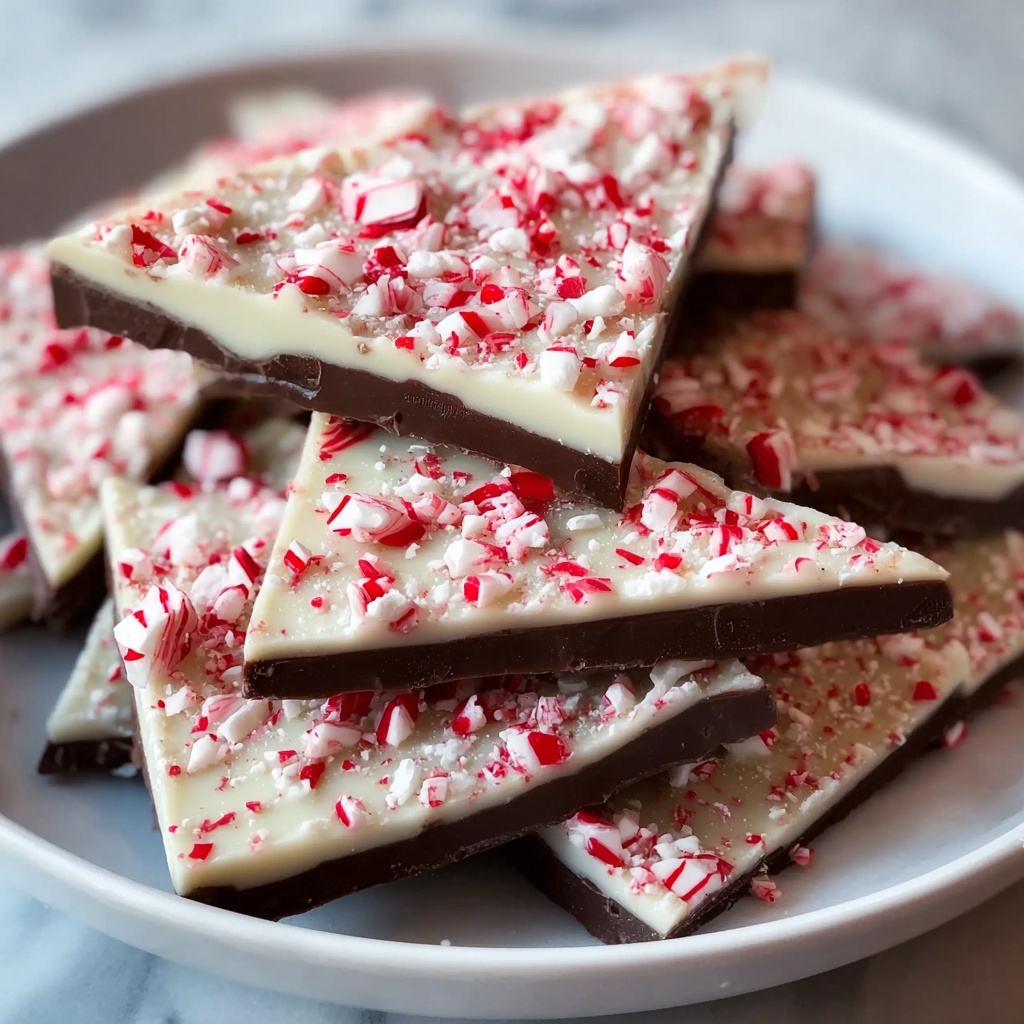
Pop your bark back into the fridge for about 30-40 minutes until completely firm. When ready, use the parchment handles to lift it out and break by hand into charming irregular pieces, or cut into neat squares if you prefer a cleaner presentation. Both options look delightful and taste heavenly.
How to Serve Peppermint Bark Recipe
Garnishes
For a festive presentation, consider dusting your peppermint bark with a light sprinkle of edible glitter or finely chopped fresh mint leaves for an elegant touch. These garnishes enhance colors and add subtle aromatics without overpowering the minty chocolate goodness.
Side Dishes
Peppermint bark pairs beautifully with warm beverages like hot cocoa, coffee, or a chai latte — their rich warmth contrasts the cool mint flavors perfectly. It also makes a lovely companion to simple vanilla ice cream, adding texture and a burst of chocolate and mint in each bite.
Creative Ways to Present
Presentation-wise, try layering broken bark pieces atop cupcakes or dipping strawberries into melted Peppermint Bark Recipe bark for unique party treats. Wrapping small portions in festive cellophane makes for charming homemade gifts or stocking stuffers that are sure to delight friends and family.
Make Ahead and Storage
Storing Leftovers
Store your peppermint bark in an airtight container at room temperature or in the fridge if your home tends to be warm. Properly stored, it stays fresh for up to two weeks, maintaining that perfect snap and flavor.
Freezing
You can freeze leftover bark by wrapping it tightly in plastic wrap and placing it inside a freezer-safe container or bag. Frozen peppermint bark can last up to three months; just thaw it at room temperature before serving to enjoy its classic texture and taste.
Reheating
Because peppermint bark is best enjoyed cold or at room temperature, reheating is generally not recommended. If it softens too much, simply let it firm up again in the refrigerator before serving for that satisfying crunch.
FAQs
Can I use milk chocolate instead of dark chocolate?
Absolutely! Milk chocolate will make your peppermint bark sweeter and creamier. Just be mindful it melts faster, so watch carefully to avoid burning during the melting process.
What if I don’t have peppermint extract?
If you don’t have peppermint extract on hand, you can increase the amount of crushed candy canes or try other extracts like almond or orange for a festive twist on this classic recipe.
How do I prevent white chocolate from seizing?
White chocolate is sensitive to moisture and overheating. Make sure your bowl and utensils are completely dry and melt slowly in short intervals while stirring constantly for smooth results.
Is Peppermint Bark Recipe gluten-free?
Yes! As long as the chocolates and candies you select are labeled gluten-free, this peppermint bark is naturally gluten-free and safe for those with gluten sensitivities.
Can I make peppermint bark vegan?
Yes, by swapping both the dark and white chocolates for high-quality dairy-free alternatives and ensuring the candy canes are vegan-friendly, you can enjoy a plant-based version of this delight.
Final Thoughts
This Peppermint Bark Recipe is one of those simple yet utterly irresistible treats that bring so much joy to any occasion. With its perfect balance of rich chocolate and crisp mint, it’s a guaranteed crowd-pleaser and incredibly fun to make. Whether you’re gifting it to friends, sharing at a holiday party, or just treating yourself, don’t hesitate to dive into this recipe — it’s a sweet hug from the kitchen that everyone deserves to savor.
Print
Peppermint Bark Recipe
- Prep Time: 15 minutes
- Cook Time: 15 minutes (melting chocolate)
- Total Time: 1 hour 20 minutes (including chilling time)
- Yield: 8 servings
- Category: Dessert
- Method: No-Cook
- Cuisine: American
Description
This Peppermint Bark recipe combines rich dark chocolate and creamy white chocolate layers infused with peppermint extract, topped with crushed candy canes for a festive, crunchy treat. Perfect for holiday gifting or seasonal snacking, this easy no-bake dessert offers customizable variations such as dairy-free or sugar-free options and delightful flavor twists.
Ingredients
Dark Chocolate Base
- 12 oz high-quality dark chocolate (60-70% cacao), chopped into small pieces
- 1 teaspoon vanilla extract
White Chocolate Topping
- 12 oz white chocolate, chopped into small pieces
- ½ teaspoon peppermint extract (adjust to taste)
Topping
- 6–8 candy canes or peppermint candies, crushed into various-sized pieces
Optional Variations
- Dairy-free option: Use dairy-free chocolate chips for both layers
- Sugar-free version: Replace with sugar-free chocolate alternatives
- Flavor variation: Add ½ teaspoon of orange or almond extract instead of peppermint
- Crunchy addition: Mix in crushed toffee pieces or chopped nuts for extra texture
Instructions
- Prepare Your Workspace: Line a 9×13-inch baking sheet with parchment paper, leaving overhang on the sides for easy removal. Ensure your workspace is clean and dry to prevent chocolate from seizing.
- Melt the Dark Chocolate Base: Place chopped dark chocolate in a microwave-safe bowl, heating in 30-second intervals and stirring thoroughly until almost melted. Stir continuously to melt remaining chunks. Add vanilla extract and stir until smooth and glossy. Add ½ teaspoon coconut oil if chocolate is too thick.
- Spread the First Layer: Pour the melted dark chocolate onto the prepared baking sheet and spread evenly to about ¼-inch thick in a 9×11-inch rectangle. Refrigerate for 20-25 minutes until firm but not completely set to support the next layer.
- Prepare the Peppermint Topping: Place candy canes in a sealed plastic bag and crush them with a rolling pin or heavy glass to create varied-sized pieces for texture.
- Melt and Flavor the White Chocolate: Melt white chocolate using the same 30-second microwave intervals, stirring frequently to prevent burning. Once smooth, stir in peppermint extract and taste to adjust flavor as desired.
- Create the Top Layer: Remove dark chocolate from refrigerator and immediately pour and spread white chocolate over it. The warmth will slightly soften the dark layer to help bonding.
- Add the Finishing Touch: Quickly sprinkle the crushed candy canes over the wet white chocolate, pressing larger pieces gently to adhere. Work fast to ensure candy sticks before white chocolate sets.
- Set and Break Into Pieces: Refrigerate the bark for 30-40 minutes until completely firm. Use the parchment paper overhang to lift the bark out, then break into irregular pieces or cut into squares as preferred for serving.
Notes
- Use high-quality chocolate for the best flavor and texture.
- Be careful not to overheat chocolate to avoid graininess.
- Add a small amount of coconut oil if chocolate is too thick or hard to spread.
- Vary the peppermint extract amount to match your flavor preference.
- Use crushed candy canes of different sizes for interesting texture and visual appeal.
- Try different flavor extracts like orange or almond for a twist.
- Dairy-free and sugar-free alternatives work well with this recipe.


