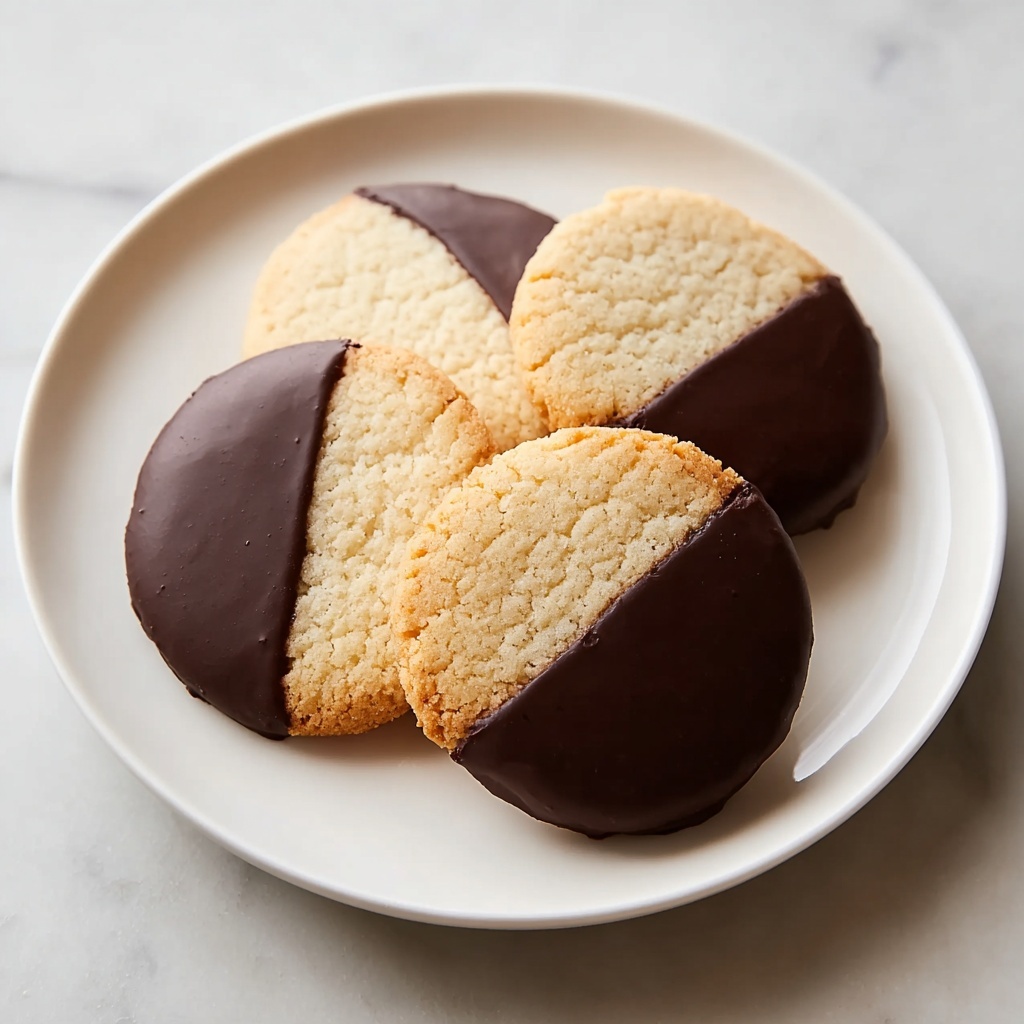
If you’re looking for a delightful treat that combines the crisp, buttery goodness of vanilla wafers with the rich, velvety allure of melted chocolate, this Vanilla Wafers Dipped in Melted Chocolate Recipe is exactly what you need. It’s an irresistible snack that’s both simple to make and wonderfully elegant, perfect for sharing at parties, gifting during the holidays, or simply indulging in a moment of sweet bliss. Imagine the satisfying crunch giving way to smooth chocolate that melts on your tongue—pure happiness in every bite!

Ingredients You’ll Need
The magic of this Vanilla Wafers Dipped in Melted Chocolate Recipe lies in its simplicity. Each ingredient plays a critical role in creating the perfect balance of flavor, texture, and appearance, making sure every bite is just right.
- 1 cup all-purpose flour: Provides the delicate structure and tender crumb of the wafers.
- 1/4 teaspoon baking powder: Helps the wafers rise slightly for a light texture.
- 1/4 teaspoon salt: Enhances and balances the sweetness.
- 1/2 cup unsalted butter, softened: Adds richness and that coveted melt-in-your-mouth quality.
- 1/2 cup granulated sugar: Sweetens the wafers perfectly without overpowering other flavors.
- 1 large egg: Binds ingredients and contributes to the soft yet crisp consistency.
- 1 tablespoon milk: Helps create a smooth batter and tender cookie.
- 1 tablespoon pure vanilla extract: The star flavor that elevates these wafers beyond the ordinary.
- 6 oz semi-sweet chocolate, chopped or chips: The luscious coating that transforms vanilla wafers into a decadent treat.
- 1 teaspoon coconut oil or vegetable shortening (optional): Ensures silky chocolate with a glossy finish.
How to Make Vanilla Wafers Dipped in Melted Chocolate Recipe
Step 1: Preheat Oven and Prepare Baking Sheet
Start by heating your oven to 350°F and lining a baking sheet with parchment paper. This sets the foundation for perfectly baked wafers that won’t stick or crumble excessively when you remove them.
Step 2: Combine Dry Ingredients
In a small bowl, whisk together the flour, baking powder, and salt. This blend ensures the wafers rise just right and maintain that characteristic tender crunch.
Step 3: Cream Butter and Sugar
Using a mixer or a sturdy whisk, beat the softened butter and granulated sugar until the mixture looks light and fluffy. This step is key for developing the wafers’ airy texture and buttery flavor.
Step 4: Incorporate Wet Ingredients
Add the egg, milk, and pure vanilla extract to the creamed butter and sugar, beating everything until it’s well combined and smooth. The vanilla here really begins to shine, promising that sweet aroma and taste.
Step 5: Mix Dry Ingredients into Wet
Gradually add the flour mixture to your wet batter, stirring until just blended. Be careful not to overmix so your wafers stay tender rather than tough.
Step 6: Form and Bake Cookies
Drop teaspoon-sized mounds of dough spaced about two inches apart onto your prepared baking sheet. Bake for 12 to 15 minutes, watching for lightly golden edges. Once done, allow them to cool on the sheet for 5 minutes before transferring to a wire rack to cool completely.
Step 7: Melt Chocolate for Dipping
Combine the semi-sweet chocolate and optional coconut oil in a microwave-safe bowl. Heat in short 20-second bursts, stirring between each, until the chocolate becomes smooth and glossy. The coconut oil helps the chocolate coat the wafers beautifully and adds a subtle silkiness.
Step 8: Dip Cookies and Set Chocolate
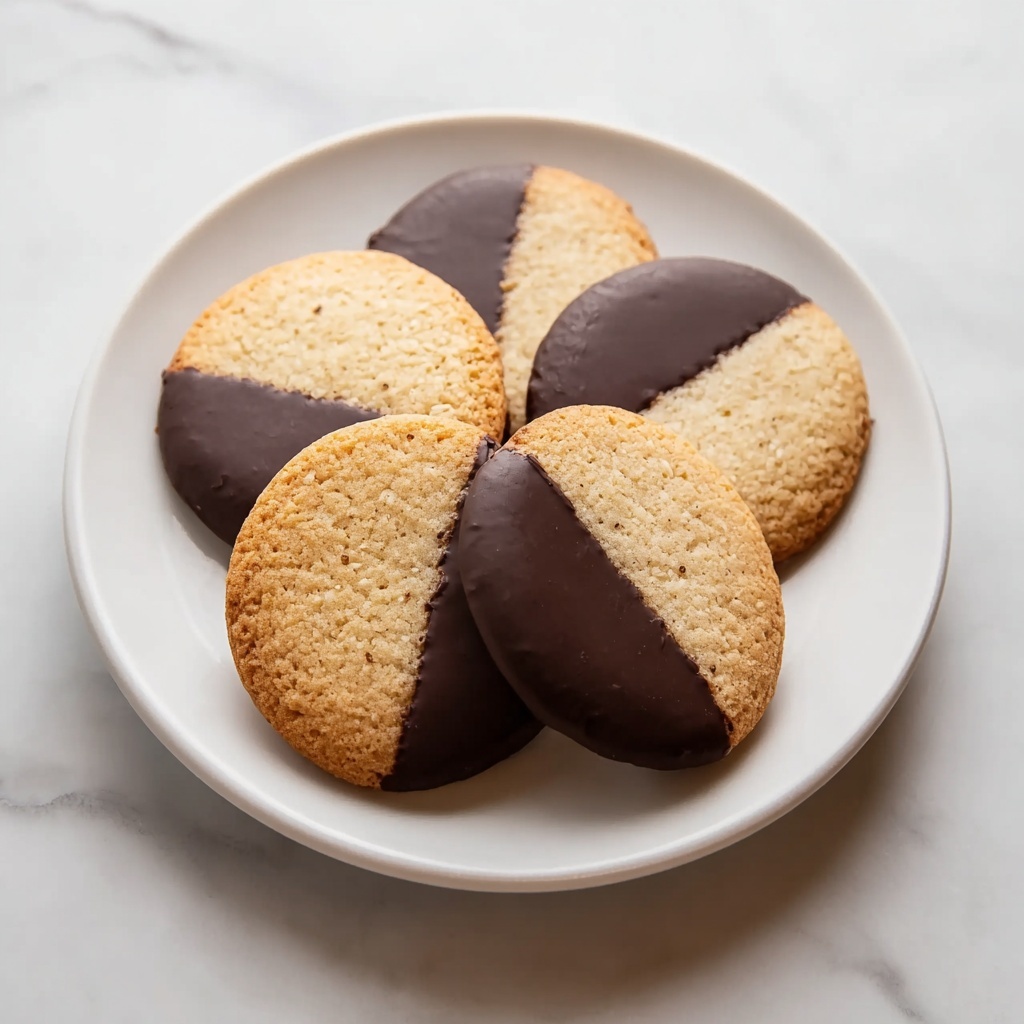
Once your vanilla wafers have cooled, dip half of each cookie into the melted chocolate. Let any excess chocolate drip off before placing them on parchment paper. Refrigerate for about 10 minutes to firm up the chocolate if you want a perfectly set finish.
How to Serve Vanilla Wafers Dipped in Melted Chocolate Recipe
Garnishes
Sprinkle a pinch of sea salt or finely chopped nuts on the melted chocolate before it sets to add a satisfying crunch and contrast. For a festive touch, colorful sprinkles or crushed peppermint can turn these treats into holiday hits.
Side Dishes
These wafers are excellent on their own but can also complement fresh fruit like strawberries or sliced bananas and a cup of rich coffee or tea. Their subtle sweetness balances beautifully with tangy or bitter flavors.
Creative Ways to Present
Arrange your dipped wafers on a tiered serving tray or place them in small, decorative boxes lined with parchment paper for gifting. They also look stunning drizzled with white chocolate or paired with edible flowers for an elegant touch that will wow guests.
Make Ahead and Storage
Storing Leftovers
Store any leftover vanilla wafers dipped in melted chocolate in an airtight container at room temperature for up to 3 days. Keeping them dry and sealed preserves their texture and prevents the chocolate from sweating.
Freezing
You can freeze these delightful treats by placing them in a single layer on a baking sheet, freezing until solid, then transferring batches to a freezer-safe bag. They will keep well for up to a month and thaw quickly at room temperature.
Reheating
For best results, avoid reheating as it may affect the crispness of the wafers and the chocolate’s texture. Instead, enjoy them at room temperature once thawed for that perfect crunch and melt-in-your-mouth goodness.
FAQs
Can I use milk chocolate instead of semi-sweet chocolate?
Absolutely! Milk chocolate will give your dip a sweeter, creamier flavor. Just keep in mind that it might be softer than semi-sweet once set.
Is it possible to make these wafers gluten-free?
Yes, substitute the all-purpose flour with a gluten-free flour blend that can be used cup-for-cup to maintain the texture and taste.
What is the purpose of the coconut oil in the chocolate?
The coconut oil helps the chocolate melt smoothly and makes it easier to coat the wafers evenly, while also giving the chocolate a nice glossy finish once set.
Can I dip the wafers in white chocolate instead?
Definitely! White chocolate is a wonderful alternative and gives a beautiful contrast to the golden wafers, making for a lovely variation on the classic recipe.
How long do these dipped wafers stay fresh?
If stored properly in an airtight container, they stay fresh and delicious for about 3 days at room temperature.
Final Thoughts
There’s something truly joyful about making and sharing the Vanilla Wafers Dipped in Melted Chocolate Recipe. It’s a simple, comforting dessert that brings together familiar flavors with a touch of elegance. Whether you’re treating yourself or impressing friends and family, these cookies are guaranteed to spread a little happiness with every bite. So go ahead, grab your ingredients, and dive into this sweet adventure—you won’t regret it!
Print
Vanilla Wafers Dipped in Melted Chocolate Recipe
- Prep Time: 15 minutes
- Cook Time: 15 minutes
- Total Time: 30 minutes
- Yield: 24 servings
- Category: Dessert
- Method: Baking
- Cuisine: American
Description
These Vanilla Wafers Dipped in Smooth Chocolate combine a buttery, soft cookie with a luscious semi-sweet chocolate coating, creating the perfect sweet treat. Crispy edges and tender centers balance wonderfully with the rich chocolate dip, perfect for dessert or snack time.
Ingredients
Cookie Ingredients
- 1 cup all-purpose flour
- 1/4 teaspoon baking powder
- 1/4 teaspoon salt
- 1/2 cup unsalted butter, softened
- 1/2 cup granulated sugar
- 1 large egg
- 1 tablespoon milk
- 1 tablespoon pure vanilla extract
Chocolate Dip
- 6 oz semi-sweet chocolate, chopped or chips
- 1 teaspoon coconut oil or vegetable shortening (optional)
Instructions
- Preheat oven and prepare sheet: Preheat your oven to 350°F (175°C). Line a baking sheet with parchment paper to prevent sticking and ensure easy cleanup.
- Combine dry ingredients: In a small bowl, whisk together the all-purpose flour, baking powder, and salt. This ensures an even distribution of leavening and seasoning.
- Cream butter and sugar: Using a mixer or a whisk, cream the softened unsalted butter and granulated sugar together until the mixture is light and fluffy. This helps create a tender cookie texture.
- Incorporate wet ingredients: Beat in the egg, milk, and pure vanilla extract until fully combined and smooth, forming the cookie batter base.
- Mix dry into wet: Gradually add the dry ingredients into the wet mixture, stirring gently until just combined to prevent overmixing which would toughen the cookies.
- Form and bake cookies: Drop teaspoon-sized mounds of dough onto the prepared baking sheet, spacing them about 2 inches apart to allow spreading. Bake in the preheated oven for 12 to 15 minutes or until the edges turn a light golden color. Let them cool on the baking sheet for 5 minutes before transferring to a wire rack to cool completely.
- Melt chocolate for dipping: Place the chopped semi-sweet chocolate and optional coconut oil or vegetable shortening in a microwave-safe bowl. Heat in 20-second intervals, stirring well between each, until the chocolate is smooth and completely melted.
- Dip cookies and set chocolate: Dip half of each cooled vanilla wafer into the melted chocolate, allowing excess chocolate to drip off. Place the dipped cookies on parchment paper. To quickly set the chocolate, refrigerate the cookies for about 10 minutes. Once set, the cookies are ready to serve or store.
Notes
- Ensure butter is softened to room temperature for easier creaming and better cookie texture.
- Do not overmix the dough to maintain tender cookies.
- You can substitute coconut oil with vegetable shortening or butter in the chocolate dip.
- Store cookies in an airtight container at room temperature for up to 3 days or refrigerate for up to a week.
- For a glossy finish on the chocolate, add the optional coconut oil to the melting process.


