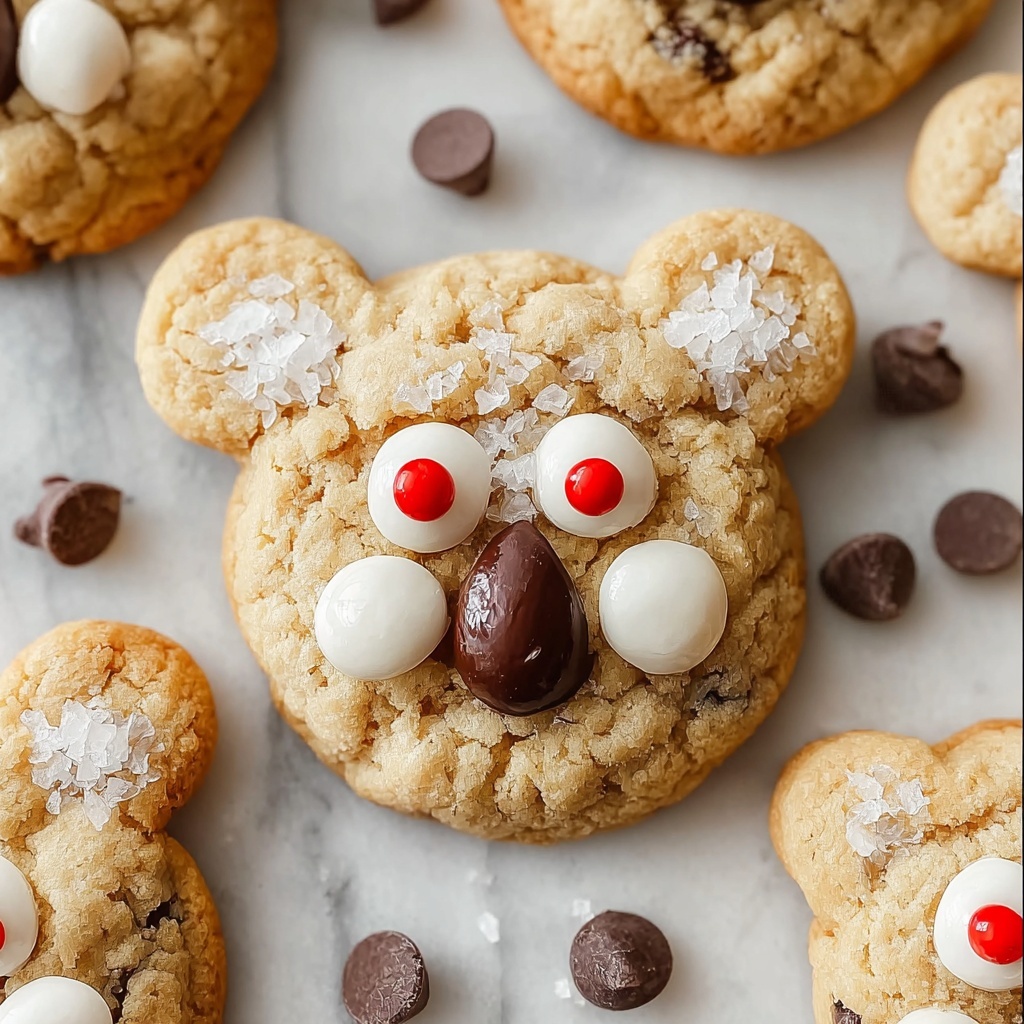
If you are searching for a cookie that combines playful charm with irresistible flavor, the Chocolate Chip Teddy Bear Cookies Recipe is exactly what you need. These adorable treats not only bring a smile with their cute bear shapes but also delight your taste buds with soft, buttery dough studded generously with mini chocolate chips. Perfect for family gatherings, bake sales, or a fun baking day with kids, this recipe makes cookie time feel extra special and joyful.
Ingredients You’ll Need
Gathering the ingredients for this recipe is a breeze because each one plays a crucial role in creating the perfect balance of taste, texture, and appearance. The combination ensures tender, chewy cookies bursting with chocolate goodness and a delightful bear shape that’s sure to charm everyone.
- All-purpose flour (2 1/4 cups): The backbone of your cookies, providing structure and the perfect chew.
- Baking soda (1/2 teaspoon): Helps the cookies rise just right, making them light and tender.
- Salt (1/2 teaspoon): Enhances all the flavors, balancing sweetness.
- Unsalted butter, softened (3/4 cup): Adds richness and creates a melt-in-your-mouth texture.
- Granulated sugar (1/2 cup): Gives sweetness and contributes to the slight crispiness on the edges.
- Brown sugar, packed (3/4 cup): Adds moisture and that cherished caramel-like depth.
- Vanilla extract (1 teaspoon): Infuses a warm, inviting aroma that makes these cookies irresistible.
- Egg (1 large): Binds all the ingredients together for perfect consistency.
- Mini chocolate chips (1 cup): The star of the show, offering bursts of chocolate in every bite.
- Additional chocolate chips and candy eyes: Essential for decorating your teddy bears with charming faces.
How to Make Chocolate Chip Teddy Bear Cookies Recipe
Step 1: Preheat Your Oven
Start by heating your oven to 350°F (175°C) and prepare a baking sheet lined with parchment paper. This step ensures your cookies bake evenly without sticking, setting the stage for success.
Step 2: Mix the Dry Ingredients
In a medium bowl, whisk together the all-purpose flour, baking soda, and salt. This mix gives your cookies the right rise and flavor balance, keeping them tender yet structured as they bake.
Step 3: Cream the Butter and Sugars
Using a large bowl, beat the softened butter along with the granulated and brown sugars until the mixture turns light and fluffy. This process incorporates air, resulting in cookies with a beautifully soft crumb. Then add vanilla extract and egg, beating until everything is fully combined.
Step 4: Combine Wet and Dry Ingredients
Gradually add the dry ingredients to the wet mixture, blending gently until just combined. Overmixing can lead to tough cookies, so take your time. Finally, fold in the mini chocolate chips, ensuring each bite will be packed with chocolaty goodness.
Step 5: Shape the Teddy Bears
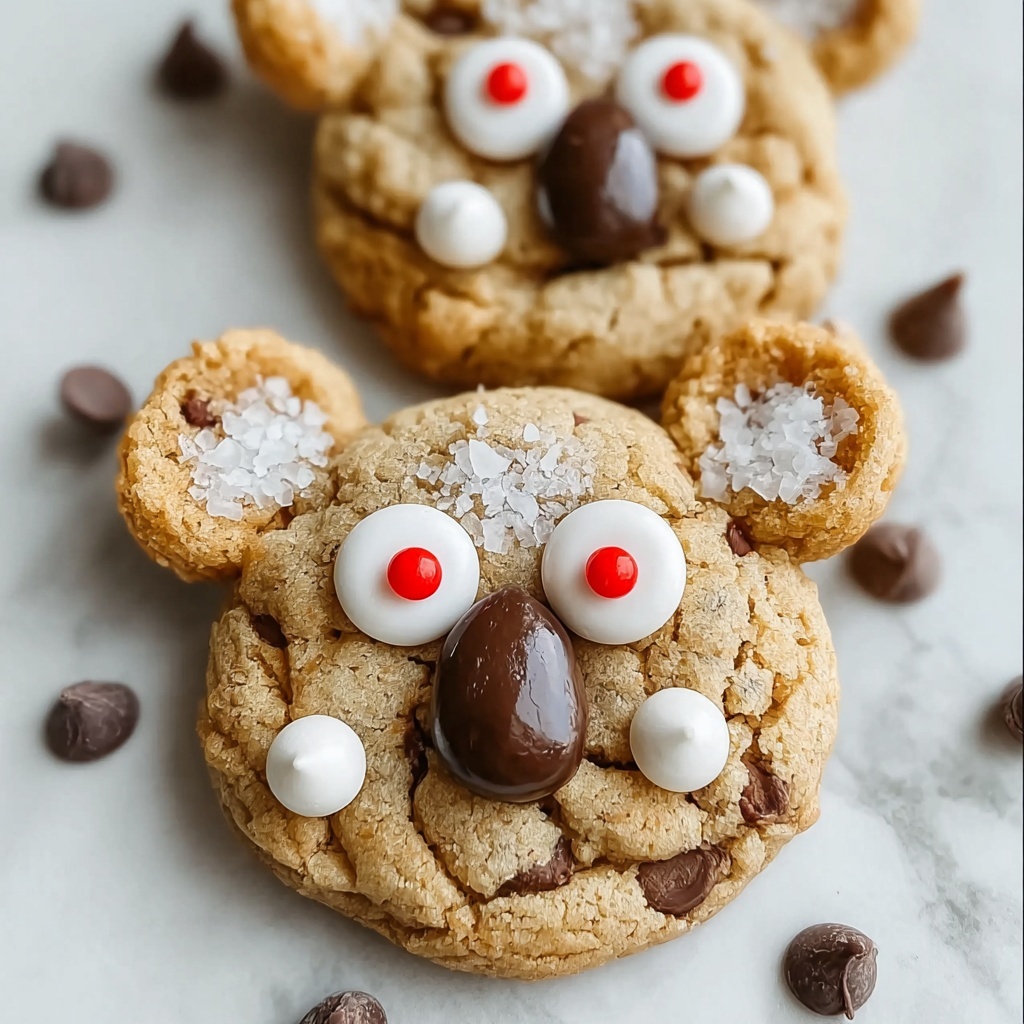
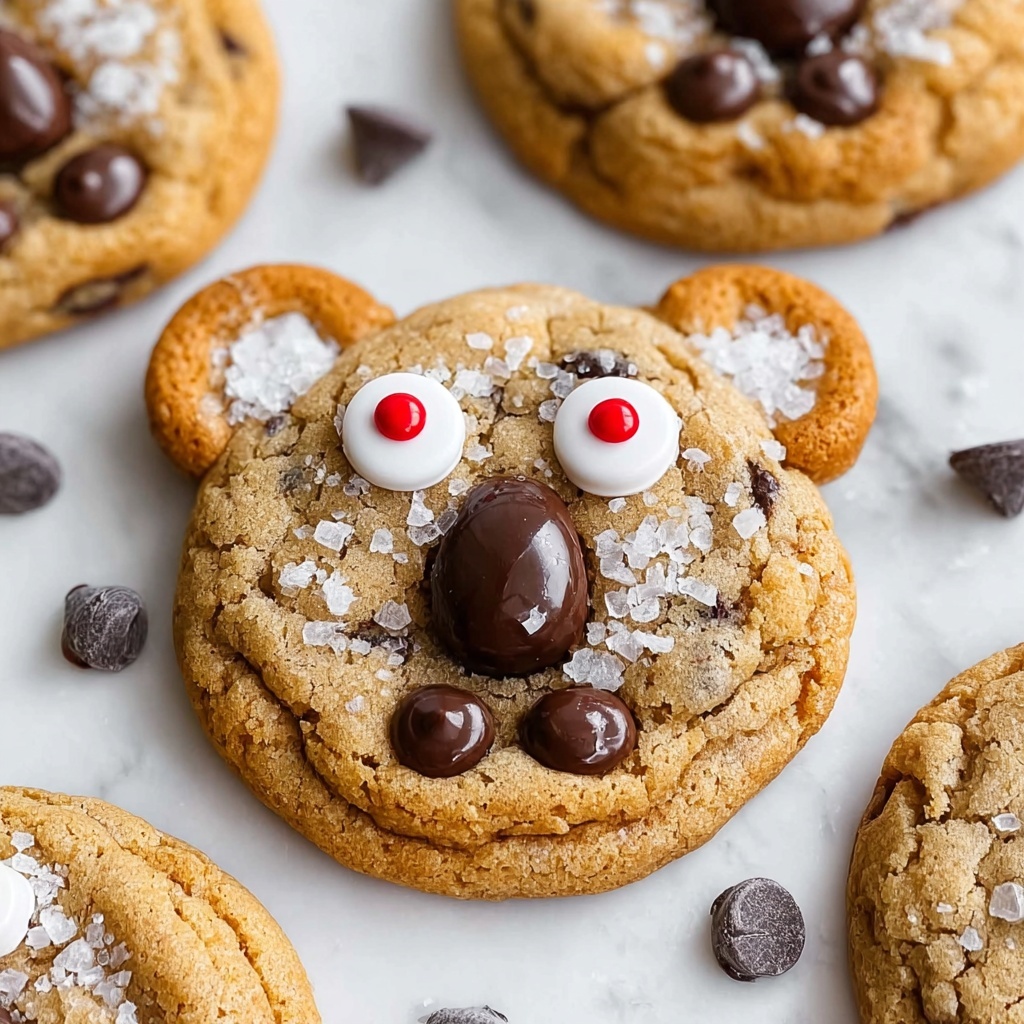
Now for the fun part: shaping these delightful bears! Scoop tablespoon-sized portions for the teddy bear’s body. Use smaller dough portions for the head and limbs and assemble them on the baking sheet. Press chocolate chips into the dough to create noses, and add candy eyes for that adorable, lifelike flair.
Step 6: Bake to Perfection
Bake your teddy bear cookies for about 10 to 12 minutes, or until the edges turn a gentle golden brown. Once baked, let them cool on the baking sheet for 5 minutes so they firm up before transferring to a wire rack. This step helps keep their delightful shape intact while cooling evenly.
How to Serve Chocolate Chip Teddy Bear Cookies Recipe
Garnishes
For an extra touch of whimsy, add tiny dots of frosting or melted chocolate to create smiles or rosy cheeks. These little accents make the bears even more inviting and perfect for gifting or party platters.
Side Dishes
Pair these cookies with a cold glass of milk, a hot cup of tea, or rich, creamy coffee for an indulgent treat. They also go wonderfully alongside fresh fruit or a scoop of vanilla ice cream for a dessert that’s both playful and satisfying.
Creative Ways to Present
Why not arrange the teddy bear cookies on a festive platter surrounded by colorful sprinkles or edible flowers? You could also package them in clear cellophane bags tied with ribbons for charming homemade gifts that everyone will love.
Make Ahead and Storage
Storing Leftovers
Keep your leftover teddy bear cookies fresh by storing them in an airtight container at room temperature. They will maintain their softness and sweetness for up to a week, ready to brighten your afternoons whenever cravings strike.
Freezing
If you want to save some dough for later, you can freeze cookie dough balls individually on a tray before transferring them to a freezer-safe bag. When ready to bake, just thaw and assemble the teddy bears as usual. Baked cookies also freeze well for up to three months.
Reheating
To enjoy the cookies warm, pop them in a preheated oven at 300°F (150°C) for 5 minutes or so. This will revive their soft texture and melt the chocolate chips slightly, making each bite just as delightful as freshly baked.
FAQs
Can I use regular-sized chocolate chips instead of mini chocolate chips?
Absolutely! Regular chocolate chips work fine, though mini chips distribute more evenly and lend a tidier look to the teddy bear shape. Either way, the chocolate flavor shines through beautifully.
What if I don’t have candy eyes for decoration?
No worries! You can substitute with small dots of chocolate, icing, or even tiny edible pearls. The goal is to have fun, so get creative with whatever you have on hand.
Can I make this dough dairy-free?
Yes, swapping unsalted butter for a plant-based alternative should work well. Just ensure the substitute is firm and spreadable to keep the right cookie texture.
How long do the cookies keep their shape during baking?
The assembled teddy bears hold their shape nicely due to the firm dough and proper chilling, but avoid overbaking so the edges don’t spread too much and distort the cute shape.
Is this recipe kid-friendly for baking together?
Absolutely! Shaping the teddy bears is a fantastic hands-on activity that kids love. It’s an engaging way to teach them about baking while having a blast with cookie crafting.
Final Thoughts
What’s not to love about the Chocolate Chip Teddy Bear Cookies Recipe? It effortlessly combines creativity and classic cookie flavors into a treat that’s as fun to make as it is to eat. Whether you’re baking with family or need a cheerful snack for guests, these cookies are sure to bring joy and smiles to any occasion. So grab your ingredients and get ready for a baking adventure filled with warmth and chocolatey delight!
Print
Chocolate Chip Teddy Bear Cookies Recipe
- Prep Time: 15 minutes
- Cook Time: 12 minutes
- Total Time: 27 minutes
- Yield: 24 servings
- Category: Dessert
- Method: Baking
- Cuisine: American
Description
These adorable Chocolate Chip Teddy Bear Cookies are a fun and delicious treat perfect for kids and cookie lovers alike. Soft, buttery dough packed with mini chocolate chips is shaped into cute teddy bears and decorated with candy eyes and chocolate chip noses. Baked to a light golden perfection, these cookies are sure to bring smiles and delight any dessert table.
Ingredients
Dry Ingredients
- 2 1/4 cups all-purpose flour
- 1/2 teaspoon baking soda
- 1/2 teaspoon salt
Wet Ingredients
- 3/4 cup unsalted butter, softened
- 1/2 cup granulated sugar
- 3/4 cup brown sugar, packed
- 1 teaspoon vanilla extract
- 1 large egg
Add-ins & Decoration
- 1 cup mini chocolate chips
- Additional chocolate chips and candy eyes for decorating
Instructions
- Preheat the Oven: Preheat your oven to 350°F (175°C) and line a baking sheet with parchment paper to prevent sticking and ensure even baking.
- Mix the Dry Ingredients: In a medium bowl, whisk together the all-purpose flour, baking soda, and salt to evenly distribute the leavening agents and seasoning.
- Cream the Butter and Sugars: In a large bowl, beat the softened unsalted butter with granulated sugar and brown sugar until the mixture becomes light and fluffy. Add the vanilla extract and the egg, then beat until well combined to form a creamy dough base.
- Combine the Ingredients: Gradually incorporate the dry flour mixture into the wet ingredients, mixing just until combined to avoid overworking the dough. Carefully fold in the mini chocolate chips for bursts of chocolate in every bite.
- Shape the Teddy Bears: Using tablespoon-sized portions of dough, shape the teddy bear bodies on the prepared baking sheet. Add smaller dough portions for the head and limbs, assembling each bear neatly. Decorate each bear by pressing chocolate chips for noses and candy eyes for adorable faces.
- Bake the Cookies: Bake the assembled teddy bear cookies for 10-12 minutes, or until the edges turn a light golden color. Allow the cookies to cool on the baking sheet for 5 minutes before transferring to a wire rack to cool completely, ensuring they set and hold their shape.
Notes
- Use softened butter to ensure easier creaming with the sugars for a better texture.
- Be gentle when mixing to avoid tough cookies.
- Mini chocolate chips work best to fit the size of the teddy bear shapes.
- For best results, chill the dough slightly if it becomes too soft to handle when shaping.
- Allow cookies to cool to prevent breaking when moving from baking sheet to wire rack.


