
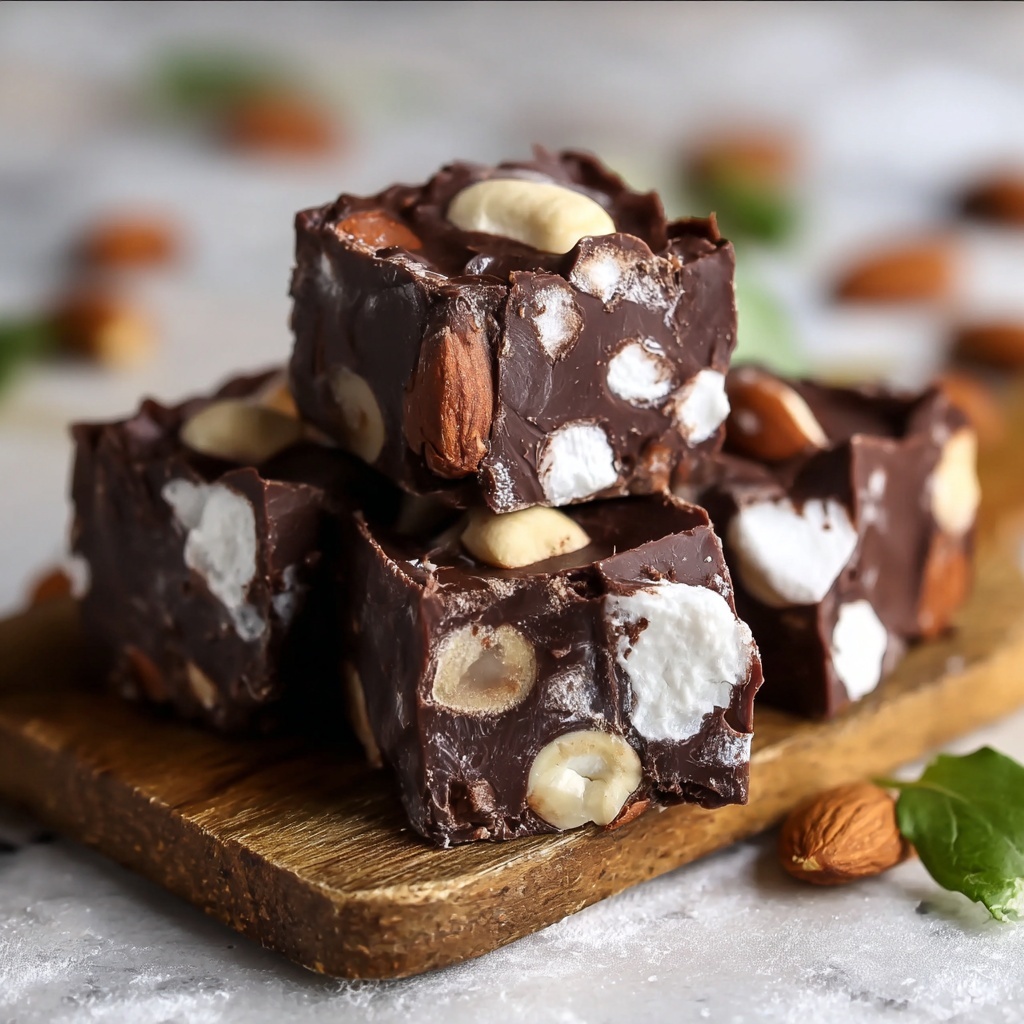
If you’re craving a treat that’s sweet, nutty, and delightfully chewy all at once, this Rocky Road Candy Recipe is the perfect answer. Combining creamy milk chocolate, crunchy salted peanuts, and fluffy mini marshmallows creates a luscious bite that has become a classic favorite for good reason. Whether you’re making it for a festive gathering, a cozy night in, or just because you want a little homemade indulgence, this candy hits all the right notes. The best part? It’s incredibly simple to whip up, yet impressively delicious, making Rocky Road candy an irresistible treat you’ll keep coming back to.
Ingredients You’ll Need
Gathering the right ingredients is what makes this Rocky Road Candy Recipe shine. Each element plays a key role: the chocolate brings that rich, melt-in-your-mouth texture, the peanuts add a satisfying crunch and saltiness, and the marshmallows contribute a soft, chewy contrast. Together, they create a balance of flavors and textures that’s simply unbeatable.
- Milk chocolate chips (2 ½ cups): Choose quality chocolate for smoothness and rich flavor; semi-sweet or dark chips work great too if you prefer a less sweet bite.
- Creamy peanut butter (¾ cup, optional): Adds depth and creaminess—if you love peanut butter, don’t skip this little addition!
- Lightly salted peanuts (2 ½ cups): Salted nuts provide the perfect crunch and a touch of savory contrast; feel free to swap for walnuts, almonds, pecans, or macadamia nuts.
- Mini marshmallows (2 ½ cups): These sweet, pillowy pieces are essential for that signature Rocky Road softness.
- Coarse salt (1 teaspoon): A sprinkle intensifies the flavors and highlights the sweetness.
How to Make Rocky Road Candy Recipe
Step 1: Melt the Chocolate and Peanut Butter
Start by gently melting your chocolate chips and peanut butter together. Use either a double boiler or microwave in short bursts, stirring often to maintain a smooth, glossy texture without burning. This silky mixture will be the luscious base that holds everything else together.
Step 2: Mix in the Nuts and Marshmallows
Once your chocolate and peanut butter blend is smooth, fold in the salted peanuts (or nuts of your choice) and mini marshmallows carefully. Gently mixing ensures that the nuts and marshmallows are evenly distributed without breaking them up too much, so every bite has a great mix of textures.
Step 3: Add a Pinch of Coarse Salt
Sprinkle in the teaspoon of coarse salt and fold it in lightly. This splash of salt elevates the flavors and balances the sweetness perfectly, making your Rocky Road Candy Recipe irresistibly well-rounded.
Step 4: Spread and Chill
Pour the mixture into a parchment-lined baking pan, spreading it evenly. Use a spatula to pat it down slightly so the surface is smooth but still shows the texture of the nuts and marshmallows. Pop it into the fridge for at least two hours to set firmly.
Step 5: Cut into Pieces
Once chilled and set, remove the pan and slice your Rocky Road into bite-sized pieces or classic squares. Now, you’re ready to enjoy or share this delightful treat!
How to Serve Rocky Road Candy Recipe

Garnishes
While Rocky Road candy is beautiful on its own, a light dusting of cocoa powder or a sprinkle of crushed nuts on top right before serving adds an elegant touch that’s sure to impress your guests. You can also drizzle some melted white chocolate for a pretty contrast.
Side Dishes
Serve your Rocky Road candy alongside a hot cup of coffee, rich hot chocolate, or even chilled milk for a nostalgic treat that hits all the cozy notes. For a more grown-up pairing, try it with a glass of port or a sweet dessert wine to enhance the chocolate and nutty flavors.
Creative Ways to Present
Get playful and present your Rocky Road pieces in a decorative box or wrapped individually in parchment paper tied with twine for homemade gift-giving. You can also layer it in clear jars to showcase the mix of ingredients or use it as a topping for ice cream sundaes for an indulgent, crunchy highlight.
Make Ahead and Storage
Storing Leftovers
Rocky Road candy stores beautifully at room temperature in an airtight container for up to two weeks. Keep it somewhere cool and dry to prevent the marshmallows from getting sticky and the chocolate from melting.
Freezing
If you want to save Rocky Road for longer, freezing is a great option. Wrap the pieces tightly in plastic wrap and place them in a sealed freezer bag. When you’re ready to enjoy, thaw at room temperature for 30 minutes to preserve the chewy marshmallow texture.
Reheating
Rocky Road candy is best enjoyed cold or at room temperature rather than reheated. However, if you want to bring back that freshly made melt-in-your-mouth feel, warm it gently in your hands or leave it in a warm room for a short time, avoiding direct heat sources that could cause the chocolate to seize.
FAQs
Can I use different types of nuts in this Rocky Road Candy Recipe?
Absolutely! While the classic Rocky Road calls for lightly salted peanuts, you can swap in walnuts, almonds, pecans, or even macadamia nuts depending on your taste and what you have on hand. Each brings a unique crunch and flavor twist to your candy.
Is peanut butter necessary in this recipe?
Peanut butter is optional but highly recommended as it adds creaminess and richness, helping bind the chocolate and nuts. If you’re allergic or not a fan, you can omit it, and your candy will still be delicious.
How long does Rocky Road candy last once made?
Stored properly in an airtight container at room temperature, Rocky Road candy will stay fresh and tasty for about two weeks. Beyond that, freshness might decline, though freezing can help extend its life.
Can I make this recipe vegan or dairy-free?
Yes! Use dairy-free chocolate chips and substitute peanut butter with almond or sunflower butter. Also, choose vegan marshmallows, which are often gelatin-free, to keep the recipe plant-based and allergen-friendly.
What’s the best way to cut Rocky Road candy without it crumbling?
Use a sharp knife warmed in hot water, wiped dry before slicing. This warms the blade slightly and helps cut through the candy cleanly without too much crumbling or breaking apart.
Final Thoughts
This Rocky Road Candy Recipe is truly a joyful treat to make and share. Its perfect harmony of chocolate, nuts, and marshmallows brings a delightful mix of textures and flavors that everyone will love. I wholeheartedly encourage you to try it out, whether you’re a seasoned cook or just looking for a fun, satisfying homemade candy. Once you taste it, your Rocky Road addiction might just begin!
Print
Rocky Road Candy Recipe
- Prep Time: 10 minutes
- Cook Time: 0 minutes
- Total Time: 1 hour 10 minutes
- Yield: 30 servings
- Category: Dessert
- Method: No-Cook
- Cuisine: American
Description
This Rocky Road Candy recipe is a delightful and easy-to-make treat combining rich milk chocolate, creamy peanut butter, crunchy nuts, and soft mini marshmallows. Perfect for candy lovers who want a sweet, salty, and nutty flavor all in one bite. This no-bake recipe takes just 10 minutes to prepare and yields 30 servings, making it an ideal snack for parties, holidays, or anytime you crave something sweet and indulgent.
Ingredients
Chocolate Mixture
- 2 ½ cups milk chocolate chips (or semi-sweet/dark chocolate chips)
- ¾ cup creamy peanut butter (optional)
Add-ins
- 2 ½ cups lightly salted peanuts (or nuts of choice: walnuts, almonds, pecans, macadamia nuts)
- 2 ½ cups mini marshmallows
- 1 teaspoon coarse salt
Instructions
- Prepare the Chocolate Mixture: In a microwave-safe bowl, combine the milk chocolate chips and creamy peanut butter (if using). Microwave in 30-second increments, stirring well after each, until the mixture is smooth and fully melted.
- Combine Ingredients: In a large mixing bowl, add the lightly salted peanuts (or chosen nuts) and mini marshmallows. Pour the melted chocolate and peanut butter mixture over the nuts and marshmallows, and gently fold until everything is evenly coated.
- Season and Mix: Sprinkle the 1 teaspoon of coarse salt over the mixture and stir gently to distribute the salt throughout.
- Set the Candy: Line a square baking pan with parchment paper. Pour the Rocky Road mixture into the pan and spread it out evenly. Press down lightly to compact the mixture.
- Chill: Place the pan in the refrigerator for at least 1 hour, or until the candy is firm and set.
- Cut and Serve: Remove the set candy from the pan by lifting the parchment paper. Cut into squares or desired shapes and serve.
Notes
- You can substitute the nuts with your favorite kind or omit entirely for a nut-free version.
- If you prefer a dairy-free version, use dairy-free chocolate chips and peanut butter alternatives.
- Store the Rocky Road candy in an airtight container in the refrigerator for up to 2 weeks.
- For a different flavor, try adding dried fruit like cranberries or cherries to the mixture.


