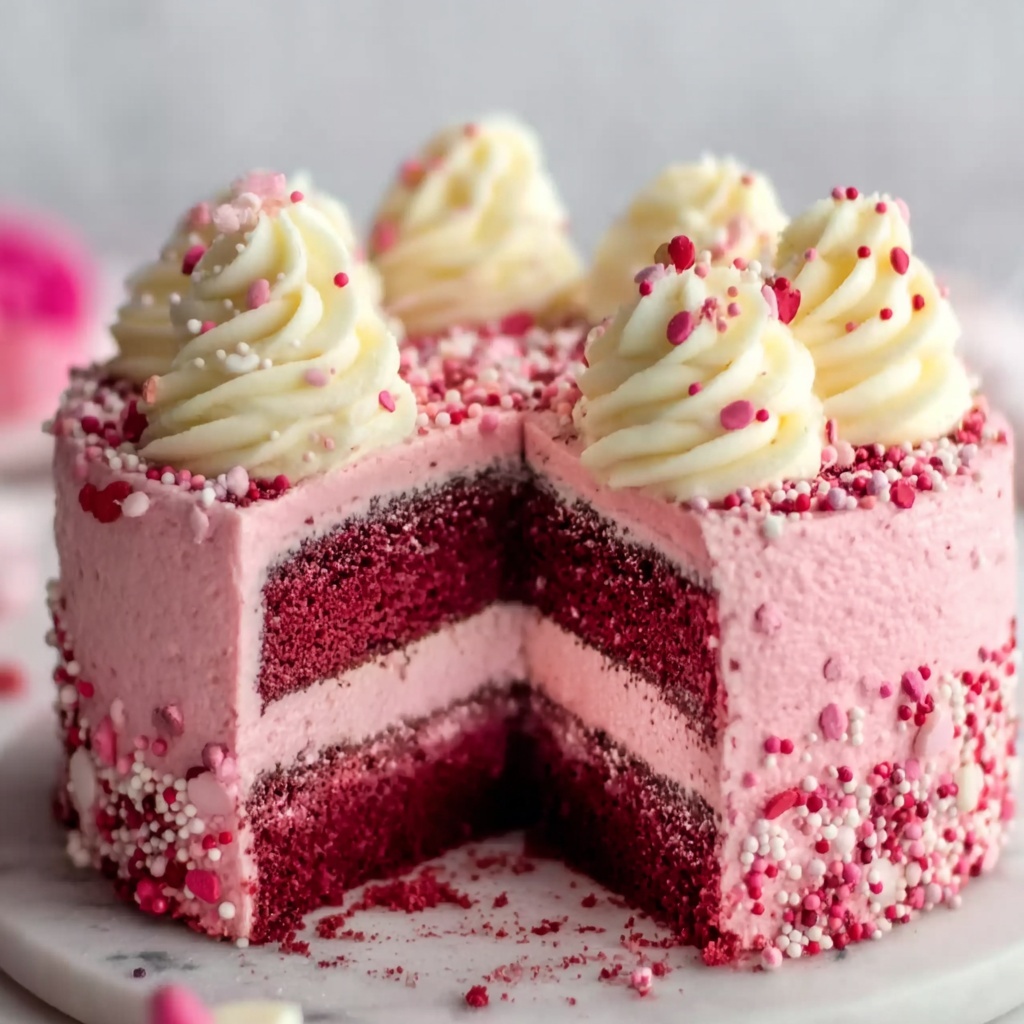
If you have a sweet tooth and love vibrant, show-stopping desserts, the Pink Velvet Dream Cake Recipe is destined to become your new obsession. This cake is the perfect harmony of moist, tender crumb and a subtle cocoa hint all dressed up in a stunning pink hue that looks as delightful as it tastes. With its silky cream cheese frosting and that beautiful blush color, it’s an absolute dream for birthdays, celebrations, or simply when you want to treat yourself to something truly special.
Ingredients You’ll Need
Every ingredient in this Pink Velvet Dream Cake Recipe plays an important role in creating its unforgettable texture, flavor, and appearance. From the warm richness of cocoa powder to the tanginess of buttermilk, each item is simple yet essential to the magic of this cake.
- All-purpose flour: Provides the cake’s structure and soft crumb.
- Granulated sugar: Adds sweetness while helping to tenderize the cake.
- Baking soda: Acts as the leavening agent for a light, fluffy texture.
- Salt: Balances the sweetness and enhances flavors.
- Cocoa powder: Gives that subtle chocolate undertone, a signature in velvet cakes.
- Vegetable oil: Keeps the cake moist and tender through baking.
- Buttermilk, room temperature: Adds acidity for flavor depth and reacts with baking soda for rise.
- Large eggs, room temperature: Provide structure and richness to the batter.
- Red food coloring: Creates that iconic pink color that makes this cake a true eye-catcher.
- White vinegar: Enhances the leavening process and balances flavors.
- Vanilla extract: Adds aromatic sweetness to complement the cocoa.
- Cream cheese frosting: The luscious topping that perfectly complements the cake’s flavor.
How to Make Pink Velvet Dream Cake Recipe
Step 1: Prepare Your Pans and Oven
First things first, preheat your oven to 350°F (175°C). Grease and flour two 9-inch round cake pans, ensuring that the cakes come out clean and perfect. Preparing the pans properly is vital so your beautiful cake layers stay intact after baking.
Step 2: Combine the Dry Ingredients
In a medium bowl, sift together the all-purpose flour, granulated sugar, baking soda, salt, and cocoa powder. This method guarantees that your dry ingredients are well mixed and lump-free, which means an even crumb and flawless texture for your pink velvet cake.
Step 3: Mix the Wet Ingredients
In a separate large mixing bowl, whisk together the vegetable oil, room temperature buttermilk, eggs, red food coloring, white vinegar, and vanilla extract. Blend these until the mixture is smooth and fully incorporated; this colorful mix is what brings your cake to life with flavor and that signature pink glow.
Step 4: Combine Wet and Dry Ingredients
Slowly add the dry mixture into the wet mixture, stirring gently but thoroughly until the batter is smooth and free of lumps. This ensures that your Pink Velvet Dream Cake Recipe has a uniform texture, which is crucial for a melt-in-your-mouth experience.
Step 5: Bake the Cake
Divide the batter evenly between the two prepared pans. Pop them in the oven and bake for 25 to 30 minutes. You’ll know they’re done when a toothpick inserted into the center comes out clean. Keep an eye on them—they’re almost ready to become the star of your dessert table!
Step 6: Let the Cakes Cool
Allow the cakes to cool in the pans for about 10 minutes. Then, gently transfer the cakes to a wire rack and let them cool completely. Cooling properly is essential before frosting to avoid a melty mess and to ensure your frosting stays beautifully smooth.
Step 7: Frost and Assemble
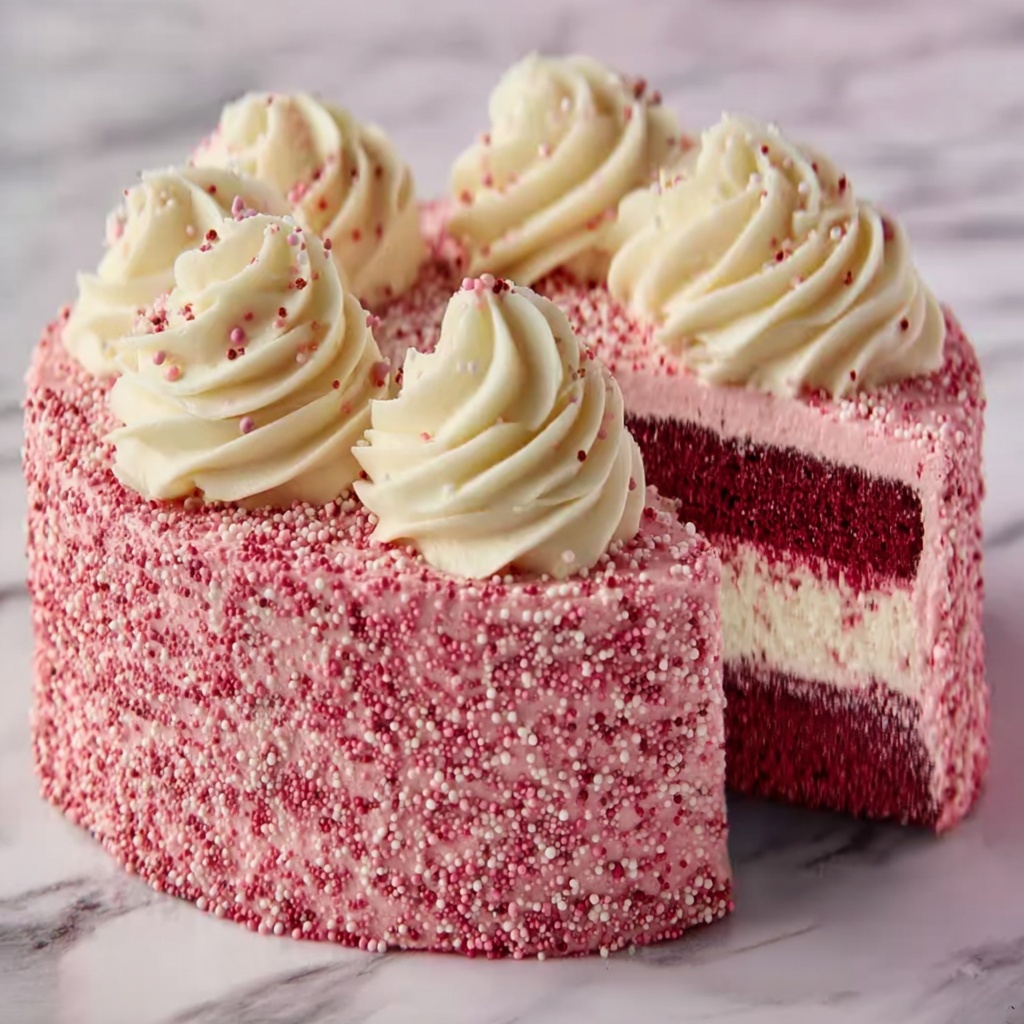
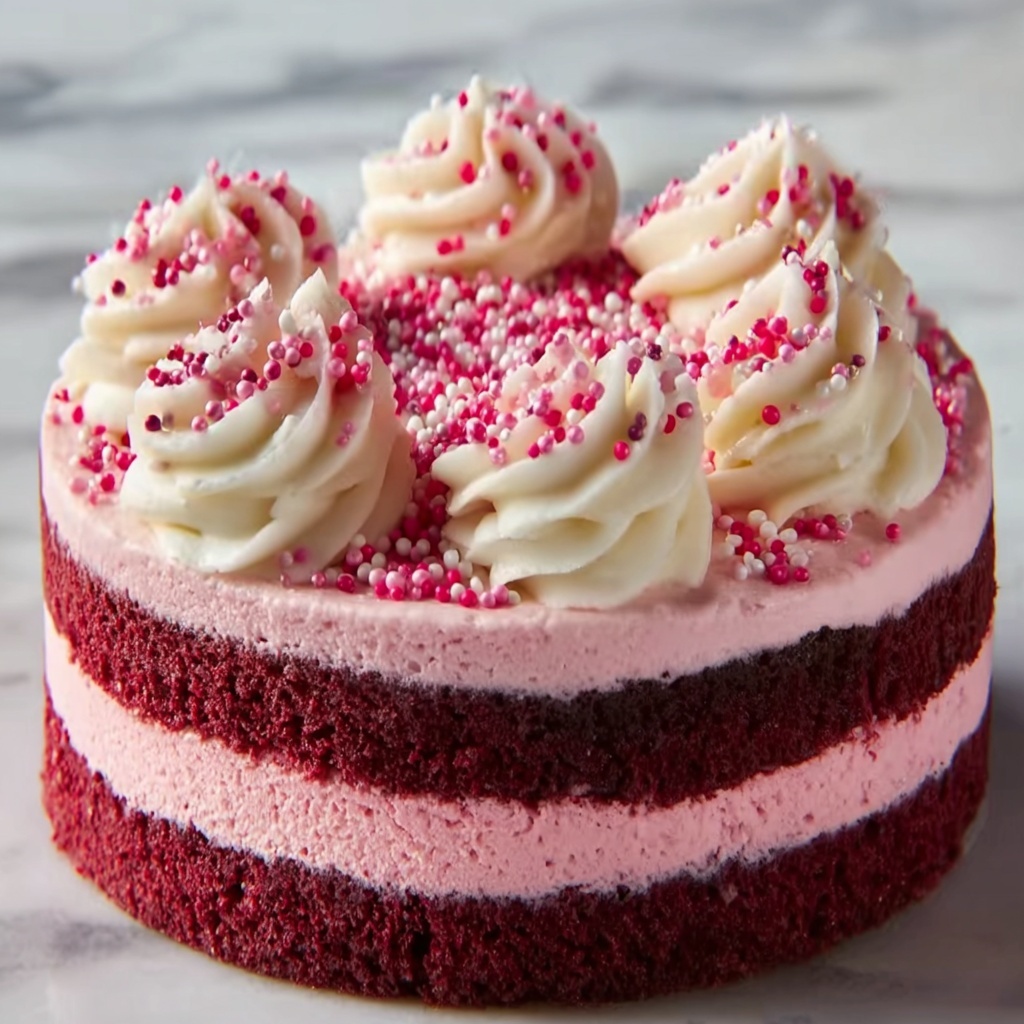
Once cooled, spread a generous layer of cream cheese frosting on top of one cake layer. Carefully place the other layer on top, then cover the entire cake, including the sides, with frosting for a stunning finish. This final touch makes your Pink Velvet Dream Cake Recipe truly unforgettable.
How to Serve Pink Velvet Dream Cake Recipe
Garnishes
To elevate the cake’s appearance and flavor, consider topping it with fresh berries like raspberries or strawberries, edible flowers, or a dusting of pink sanding sugar. These garnishes add a delightful crunch and a fresh contrast to the creamy frosting.
Side Dishes
Serve your Pink Velvet Dream Cake Recipe alongside a scoop of vanilla bean ice cream or a dollop of lightly whipped cream. Fresh fruit salad or a simple berry coulis also work beautifully, balancing sweetness with light fruitiness.
Creative Ways to Present
For a stunning presentation, try slicing the cake into petite individual servings and placing each piece in a clear glass dome or on delicate dessert stands. You can also make layered mini cakes or cupcakes using the same batter and frosting for a fun twist.
Make Ahead and Storage
Storing Leftovers
Wrap any leftover Pink Velvet Dream Cake tightly with plastic wrap or keep it in an airtight container. Stored in the refrigerator, it will stay fresh and moist for up to 3 days, letting you enjoy every last bite without worry.
Freezing
This cake freezes wonderfully! Wrap the cooled, un-frosted layers well in plastic wrap and aluminum foil, then freeze for up to 2 months. When ready to enjoy, thaw the layers overnight in the refrigerator before frosting and serving.
Reheating
If you prefer your cake slightly warmer, let a slice come to room temperature naturally or warm it gently in the microwave for about 10 seconds. Be cautious not to overheat, especially with the cream cheese frosting, to maintain the perfect texture.
FAQs
Can I use a different type of food coloring?
Absolutely! While red food coloring is traditional for Pink Velvet Dream Cake Recipe, you can experiment with natural dyes like beet juice or opt for pink gel colors for more vibrancy. Just be mindful of the color intensity when adding.
Is buttermilk necessary, or can I substitute it?
Buttermilk is key for the cake’s tender crumb and tangy flavor, but if you don’t have it, you can mix 1 cup of milk with 1 tablespoon of white vinegar or lemon juice and let it sit for 5 minutes. This homemade buttermilk substitute does the trick perfectly.
What makes this cake different from red velvet cake?
The Pink Velvet Dream Cake Recipe uses a slightly smaller amount of cocoa powder and a heavier dose of red food coloring to achieve a lighter, pinker hue with a more delicate chocolate flavor compared to classic red velvet’s richer tone.
Can I make this cake gluten-free?
You can substitute the all-purpose flour with a gluten-free blend designed for baking. Just make sure it includes xanthan gum or another binding agent for structure, and expect slight texture differences but still plenty of deliciousness.
How should I handle cream cheese frosting?
Keep your cream cheese and butter softened but not melted for the best frosting texture. Beat them until creamy and smooth before adding powdered sugar and vanilla. Chill the cake if the frosting becomes too soft after assembly.
Final Thoughts
The Pink Velvet Dream Cake Recipe is truly a showstopper that’s surprisingly easy to make, thanks to its straightforward ingredients and steps. Its delicate pink hue and rich, moist crumb covered in luscious cream cheese frosting make it the perfect centerpiece for any occasion. I can’t wait for you to try it and fall in love with every bite as I have!
Print
Pink Velvet Dream Cake Recipe
- Prep Time: 20 minutes
- Cook Time: 30 minutes
- Total Time: 50 minutes
- Yield: 12 servings
- Category: Dessert
- Method: Baking
- Cuisine: American
Description
This Pink Velvet Dream Cake is a delightful twist on the classic red velvet, featuring a vivid pink hue and a tender, moist crumb. Perfectly balanced with subtle cocoa notes and a luscious cream cheese frosting, this cake is ideal for celebrations or any special occasion where you want to impress with both flavor and appearance.
Ingredients
Dry Ingredients
- 2 1/2 cups all-purpose flour
- 1 1/2 cups granulated sugar
- 1 tsp baking soda
- 1 tsp salt
- 1 tsp cocoa powder
Wet Ingredients
- 1 1/2 cups vegetable oil
- 1 cup buttermilk, room temperature
- 2 large eggs, room temperature
- 2 tbsp red food coloring
- 1 tsp white vinegar
- 1 tsp vanilla extract
Frosting
- Cream cheese frosting
Instructions
- Preheat and prepare pans: Preheat your oven to 350°F (175°C). Grease and flour two 9-inch round cake pans to ensure easy removal of the cakes.
- Sift dry ingredients: In a medium bowl, sift together the all-purpose flour, granulated sugar, baking soda, salt, and cocoa powder until well combined and smooth.
- Mix wet ingredients: In a large mixing bowl, combine the vegetable oil, room temperature buttermilk, eggs, red food coloring, white vinegar, and vanilla extract. Mix until smooth and fully incorporated.
- Combine mixtures: Gradually add the dry mixture to the wet mixture while stirring until the batter becomes smooth and lump-free to ensure even texture.
- Divide and bake: Divide the batter evenly between the two prepared pans. Bake in the preheated oven for 25-30 minutes, or until a toothpick inserted in the center comes out clean.
- Cool cakes: Allow the cakes to cool in the pans for about 10 minutes before transferring them to a wire rack to cool completely, preventing the frosting from melting.
- Frost the cake: Once the cakes are completely cooled, frost the top of one layer with cream cheese frosting. Place the second layer on top and frost the entire cake, including the sides, for a smooth, professional finish.
Notes
- Make sure all wet ingredients are at room temperature to help create a smooth batter and even baking.
- Do not overmix the batter as it can lead to a dense cake texture.
- If you don’t have buttermilk, you can make a substitute by adding 1 tablespoon of white vinegar to 1 cup of milk and letting it sit for 5 minutes.
- Use gel or paste food coloring for a more vibrant pink color without altering the batter’s consistency.
- For extra moistness, you can wrap the cake layers tightly in plastic wrap and refrigerate overnight before frosting.

