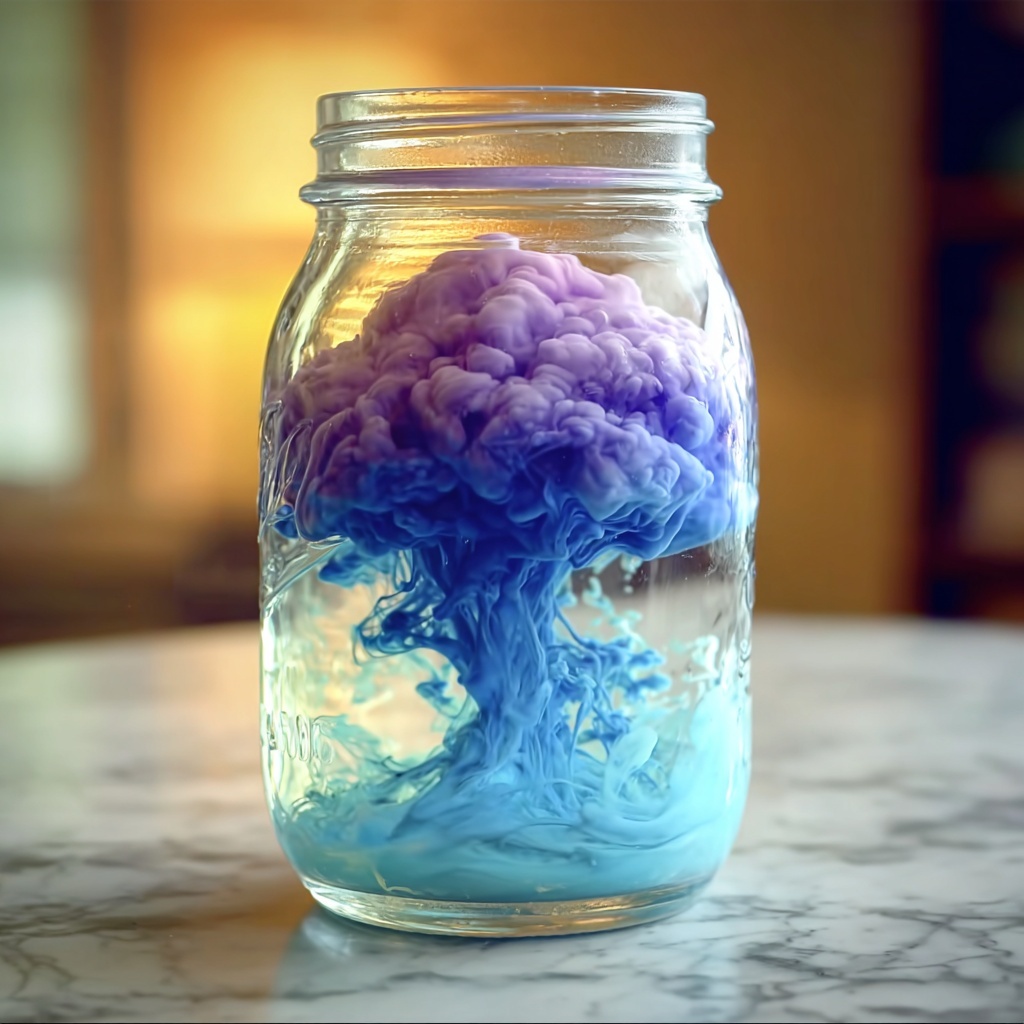
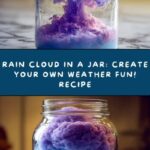
The Rain Cloud in a Jar: Create Your Own Weather Fun! Recipe is such a delightful and simple activity that brings a tiny slice of nature inside your home. Picture a clear glass jar transformed into a mini weather experiment where fluffy shaving cream becomes a cloud and vibrant drops of colored water mimic rain falling slowly below. It’s an enchanting way to observe the magic of precipitation in a hands-on, colorful, and completely mess-free form. Whether you’re sharing it with kids or just looking for a creative twist on learning and play, this recipe turns a kitchen item into an educational masterpiece full of wonder and whimsy.
Ingredients You’ll Need
Gathering the essentials for this fun project is easier than you think, and each ingredient plays a special role to bring the rain cloud concept to life. From the glass jar that holds your “weather system” to the shaving cream that creates fluffy texture, these basics come together to form an interactive experience that’s as visually appealing as it is engaging.
- 1 large clear glass jar: Choose a jar wide enough to see the rain fall clearly from above, making the experiment extra vivid.
- Water: This acts as the air in your jar and provides the “sky” for your rain to fall into.
- Shaving cream (for the cloud!): The fluffy foam that mimics the cloud; opt for a dense, creamy shaving cream for the best effect.
- Food coloring (blue or any color): Adds colorful raindrops, making the rainfall visually exciting and easy to see.
- A dropper or spoon: Essential for gently adding the colored water onto the shaving cream cloud without disturbing the layers.
How to Make Rain Cloud in a Jar: Create Your Own Weather Fun! Recipe
Step 1: Prepare the Water Base
Start by pouring water into your clear glass jar until it’s about three-quarters full. This creates your ‘sky’ where the rain will eventually fall, and filling it to this level ensures there’s plenty of space for your cloud layer and rain to be seen easily.
Step 2: Form the Cloud Layer
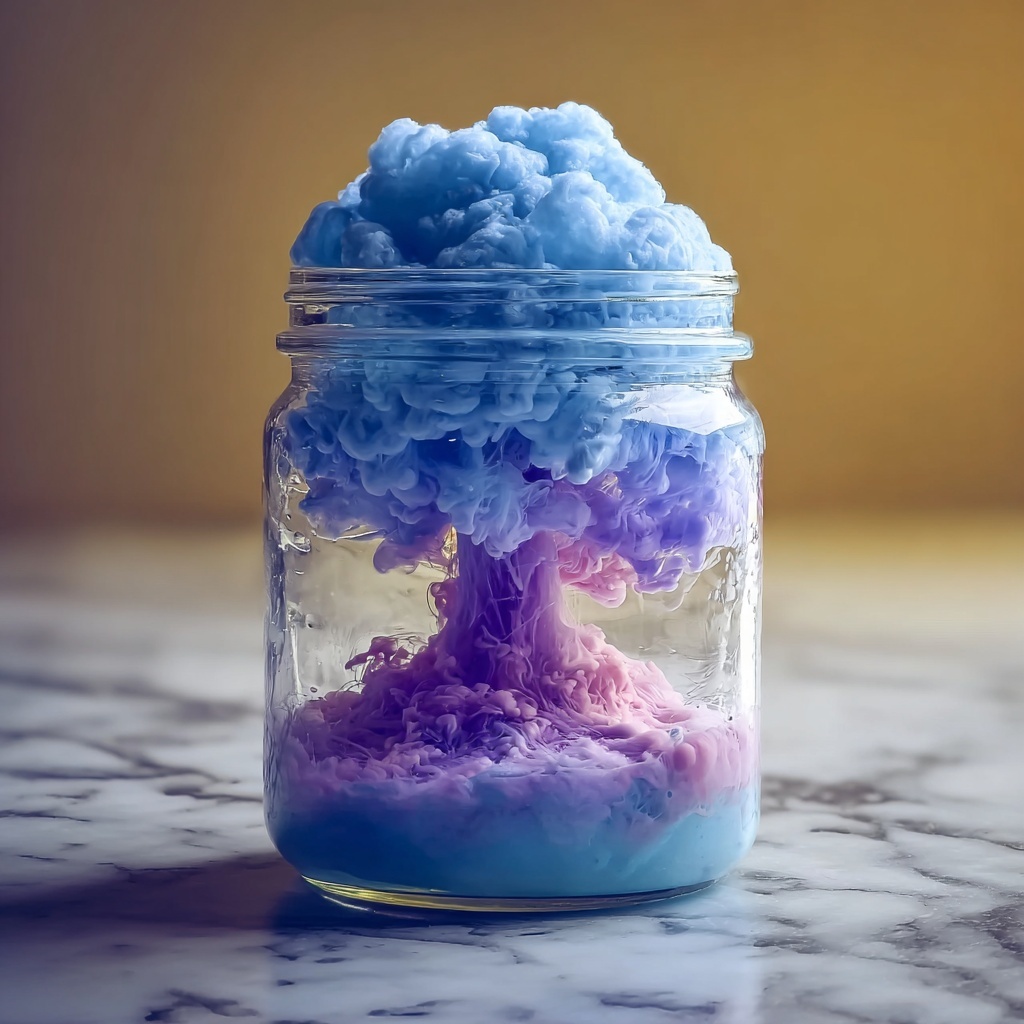
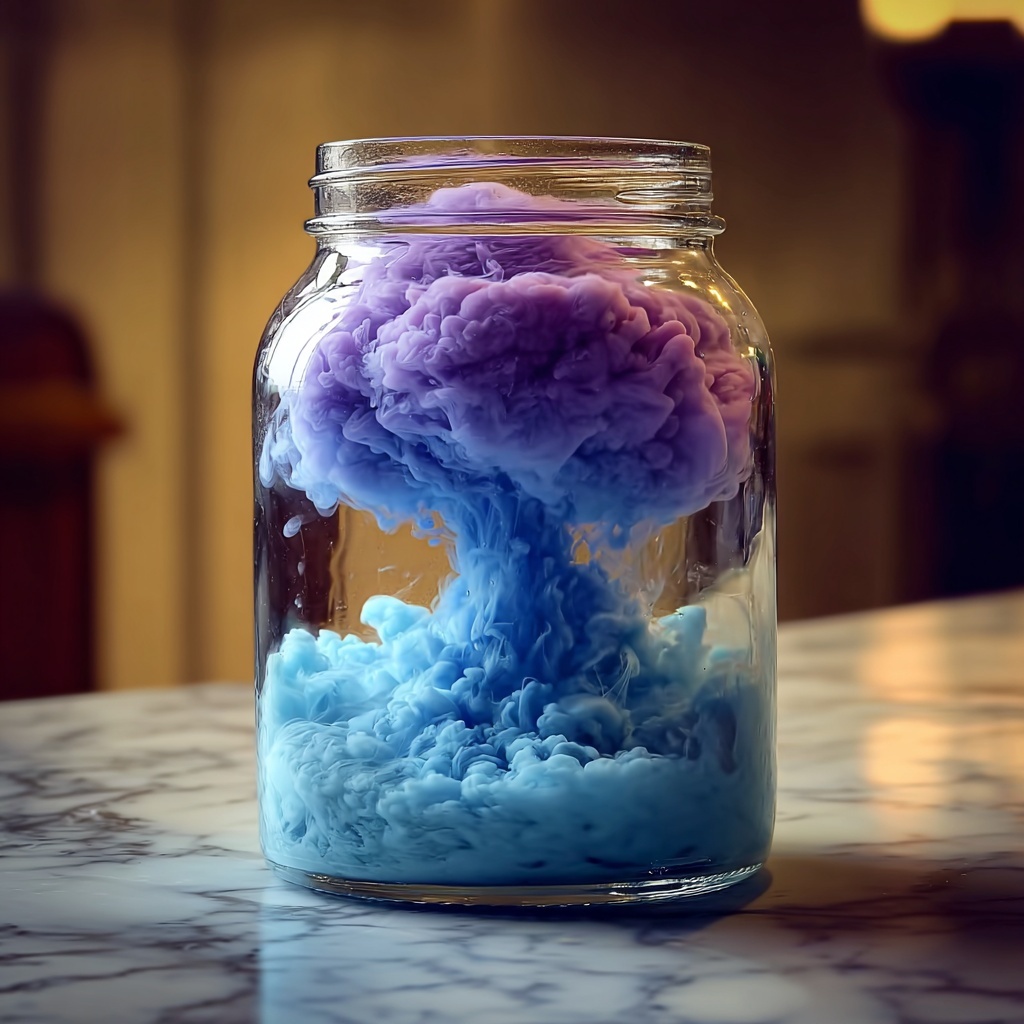
Next, spray a generous layer of shaving cream on top of the water. This fluffy foam acts as your cloud, floating serenely and waiting to hold the colored raindrops. The thickness of the shaving cream is what allows it to hold and then slowly release the drops, so go for a nice, thick layer.
Step 3: Mix Your Colored Rain
In a separate small cup, mix a few drops of your chosen food coloring with a bit of water. This step is where your rain gets its vibrant tint, turning the experiment into a visual delight. Feel free to get creative with colors—blue for classic rain, or any hue that inspires joy!
Step 4: Make It Rain
Now for the exciting part: using your dropper or spoon, gently add the colored water onto the shaving cream cloud. Watch carefully as the ‘cloud’ becomes saturated; eventually, the colored droplets will begin to seep through the foam and drift down into the water below, just like real rain falling from real clouds.
Step 5: Enjoy the Weather Show
Take a moment to marvel at the slow-motion rainfall cascading through your jar. Every drop that escapes the cloud adds a little spectacle to your homemade weather, making science and art come alive in one simple glass.
How to Serve Rain Cloud in a Jar: Create Your Own Weather Fun! Recipe
Garnishes
While this is not an edible recipe, adding little thematic touches around your jar can amplify the fun. Maybe place some tiny toy umbrellas, raindrop stickers, or even small paper clouds around your jar display to enhance the atmosphere and make your weather experiment a full sensory experience.
Side Dishes
Since this activity is all about experiencing the “rain,” consider pairing it with rainy day snacks like warm cookies or hot cocoa. These comforting treats set the mood perfectly, making the whole moment feel cozy and inspiring curiosity about the natural world at the same time.
Creative Ways to Present
Try placing your jar on a windowsill where natural light shines through to highlight the colorful rain drops. Alternatively, use a dark tray beneath to make the colors pop, or even try different jars or containers to create a “weather gallery” showcasing multiple rain clouds in different colors—it’s an eye-catching way to share the fun of the Rain Cloud in a Jar: Create Your Own Weather Fun! Recipe with guests or family.
Make Ahead and Storage
Storing Leftovers
Since this is an educational water activity and not food, leftovers aren’t quite relevant—though you can save your colored water mixture in a sealed container for another round of rain later. Just keep your cloud fresh by adding new shaving cream each time you reset the jar.
Freezing
Freezing isn’t recommended for this activity, as the shaving cream texture changes and the water needs to remain liquid for the rain effect to work. Keeping the jar at room temperature lets you enjoy the experiment to its fullest.
Reheating
There’s no reheating involved here, but if you want to refresh the experiment, simply remove the old shaving cream layer carefully with a spoon, add fresh cream, and start your colorful rain again for an endlessly repeatable delight.
FAQs
Can I use any type of shaving cream?
For the best cloud effect, use a dense, creamy shaving cream rather than foamy or gel types. The thicker texture holds the colored water better and mimics clouds more realistically.
What colors work best for the food coloring?
Blue is the classic choice to represent rain, but don’t hesitate to try other colors like green, purple, or even rainbow drops for a fun twist on the traditional rain cloud.
Is this activity safe for kids?
Absolutely! It’s a safe, messy-free way for children to explore weather concepts. Just ensure that younger children don’t ingest the shaving cream or food coloring and supervise their use of small tools like droppers.
Can I make more than one Rain Cloud in a Jar at once?
Yes! Creating multiple jars with different colors or layers can be a fantastic way to compare how rain forms and to add a colorful display showcasing your own mini weather system collection.
How long does the rain effect last?
The colored drops will continue to fall until the shaving cream cloud is fully saturated. This usually takes a few minutes, making it perfect for a quick yet captivating science activity or a calming sensory break.
Final Thoughts
If you’re looking to blend fun, education, and a bit of magic all in one simple experiment, the Rain Cloud in a Jar: Create Your Own Weather Fun! Recipe is a must-try. It’s a charming way to watch science unfold before your eyes while adding a splash of color and excitement to any day. Why not bring this tiny weather wonder into your home and create your own rainy-day joy with just a few simple ingredients?
Print
Rain Cloud in a Jar: Create Your Own Weather Fun! Recipe
- Prep Time: 5 minutes
- Cook Time: 0 minutes
- Total Time: 5 minutes
- Yield: 1 rain cloud in a jar
- Category: Educational Experiment
- Method: No-Cook
- Cuisine: None
Description
Create a fun and educational weather experiment by making your own rain cloud in a jar using water, shaving cream, and food coloring to simulate precipitation.
Ingredients
Materials Needed
- 1 large clear glass jar
- Water
- Shaving cream (for the cloud)
- Food coloring (blue or any color)
- A dropper or spoon
Instructions
- Fill the Jar: Pour water into the glass jar until it’s about ¾ full, creating the base for your rain cloud experiment.
- Create the Cloud: Spray a layer of shaving cream on top of the water. This fluffy foam represents your cloud and will hold the ‘rain’ temporarily.
- Prepare the Colored Water: In a small cup, mix a few drops of food coloring with a little water to create your rain color.
- Add the Rain: Use a dropper or spoon to gently drop the colored water onto the shaving cream layer. As the ‘cloud’ becomes saturated, the colored drops will start to fall through the shaving cream and into the water below.
- Observe the Rainfall: Watch closely as the colorful rain drifts down through the cloud, mimicking precipitation from real clouds, completing your weather experiment.
Notes
- This experiment is perfect for children and adults alike to visually understand how rain forms.
- You can try different food coloring colors to simulate various weather effects.
- The shaving cream cloud may need to be replenished if you want to repeat the experiment multiple times.
- Use a dropper for more precise ‘rain’ drops and better visualization.


